Moebius's Viper they can't call an "egg".
- Thread starter Eagle-1
- Start date
Eagle-1
Well-Known Member
- Joined
- Jan 16, 2014
- Messages
- 1,020
I am always impressed by the amount of details you are able to get
Details? You mean from the same kit boxes most of that Galactica destruction detail is comin' from?
...for y'all to check out and give me some feedback/critique/criticisms/comments and suggestions of any kind. It's getting close, but I could still change/modify whatever y'all come up with I oughta, so hollar!
Now, see, this is the kinda thing I WANT y'all to tell me about when I ask y'all!!!
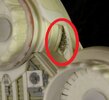
I didn't even notice that it's bra strap was showin' until today!
I beg and I plead.
Not a peep. Nuthin.
Rob.
Eagle-1
Well-Known Member
- Joined
- Jan 16, 2014
- Messages
- 1,020
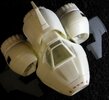
Today's update involves a couple items. By a couple, I really mean three-ish. Four-ish? Anyhow, they are making some clear windows since I opened up the canopy:
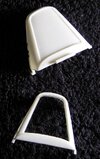
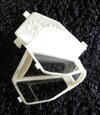
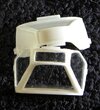
Which ended up alright? Alright as I could get it anyway.
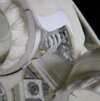
Next, covering up that "flaw" I saw a couple posts back just behind the top engine cowl, the little recess where the screen was showing:
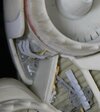
Then, the making of some doodles and noodles for that exposed upper engine section seen on the show Viper:
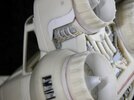
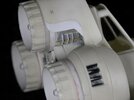
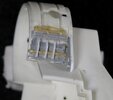
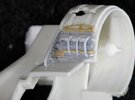
So looks like final tally is three-ish. This is detail on that engine is included in most Mark II Viper models so I don't know why it was left blank on this one just because it's a "toon" type model.
Rob.


Which ended up alright? Alright as I could get it anyway.

Next, covering up that "flaw" I saw a couple posts back just behind the top engine cowl, the little recess where the screen was showing:


Then, the making of some doodles and noodles for that exposed upper engine section seen on the show Viper:


So looks like final tally is three-ish. This is detail on that engine is included in most Mark II Viper models so I don't know why it was left blank on this one just because it's a "toon" type model.
Rob.
Eagle-1
Well-Known Member
- Joined
- Jan 16, 2014
- Messages
- 1,020
I guess now that you put in clear windows, you need an interior as well
Well, I didn't think of that until I got it on there and that's the truth. I forgot all about seeing something under there now, so I dread it, but there will have to be some kinda tub built, I reckon. Soon as I looked in on the bottom of the model, I remembered. CRAP! I said. The Wife came running in because she's never heard me cuss before and thought I may have cut my arm off or sumthin'.
Your "flaws" are better than anything I could have done
Thank you, but, I've seen your work. I don't know who you're saying all that for, but I know tain't true.
Rob.
blakeh1
Well-Known Member
- Joined
- Oct 26, 2011
- Messages
- 1,099
eh, painting wise sure. Scratch building/greeblifying wise, I am kind of sloppy. Even cleaning up seam lines is not great for meThank you, but, I've seen your work. I don't know who you're saying all that for, but I know tain't true.
Rob.
A lot can be hidden with the paint job
Eagle-1
Well-Known Member
- Joined
- Jan 16, 2014
- Messages
- 1,020
The fella's over at the RPF told me that it really needed something done to the recesses on the sides of the fuselage. By "fella's" , I mean one fella. Once he pointed out that they now looked plain with some of the other things I've done to destroy this model, I said, "Yeah, it does look like it needs something different.
Different started:
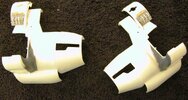
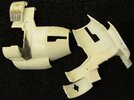
More holes chopped in the model. My advice to everyone who decides to do this kinda thing to their own Moebius Super-Deformed Viper, do this first. I had to tear the model back apart because I honestly didn't plan to do anything to these sides, but the breaking apart of this caused several breaks to occur that I really didn't want!
Can't really leave holes, so I'll be adding something different.
Rob.
Different started:


More holes chopped in the model. My advice to everyone who decides to do this kinda thing to their own Moebius Super-Deformed Viper, do this first. I had to tear the model back apart because I honestly didn't plan to do anything to these sides, but the breaking apart of this caused several breaks to occur that I really didn't want!
Can't really leave holes, so I'll be adding something different.
Rob.
Eagle-1
Well-Known Member
- Joined
- Jan 16, 2014
- Messages
- 1,020
Alright. Different.
Here's what we had:
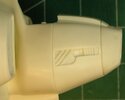
Here's now what we got:
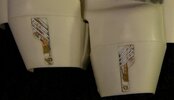
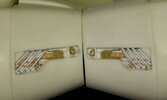
Y'all, this was tough. This is one of those things that, even though it looks rough and I'm not 100% satisfied with it, I better leave it alone because trying to make it any better ain't working, but making it worse works VERY well. Those areas where the slats are is actually cut outs with the fins sticking through a shaped piece of plastic that looks like a skeleton's rib cage before I shove the slats through. Of course, those ribs tried to break loose every time I touched them and the spacing was very hard to try and get the same. One side is ever so slightly different than the other side, but like I said...
I better stop and leave it just like it is.
Good, bad, better or not.
Y'all think it looks any better? Y'all know me by now, so blast me.
Rob.
Here's what we had:

Here's now what we got:


Y'all, this was tough. This is one of those things that, even though it looks rough and I'm not 100% satisfied with it, I better leave it alone because trying to make it any better ain't working, but making it worse works VERY well. Those areas where the slats are is actually cut outs with the fins sticking through a shaped piece of plastic that looks like a skeleton's rib cage before I shove the slats through. Of course, those ribs tried to break loose every time I touched them and the spacing was very hard to try and get the same. One side is ever so slightly different than the other side, but like I said...
I better stop and leave it just like it is.
Good, bad, better or not.
Y'all think it looks any better? Y'all know me by now, so blast me.
Rob.
Eagle-1
Well-Known Member
- Joined
- Jan 16, 2014
- Messages
- 1,020
Hey all Y'all! It's me again. Alright, alright, stop grumblin' "Him again" 'cause ya' knowed I was comin' sooner or later, and take a look at the latest. Should be one of the last things before slingin' some paint on this rig.
As seen previous, with opening up them windows, a cockpit would now need to be doodled. Now, even if I wasn't able to do that, I did make some place that looks like it would be one.
For this, years ago, I made some replicas of the seating area of a 1/24th scale AIRFIX Harrier I needed for some studio scale Laser Tanks from Space:1999. Still having a few of those scattered around, I dug a couple out. I had to dig out a couple because I didn't take this picture of it before I cut it all to pieces, so this one goes back in with all the other cast parts, but here it is before destruction.
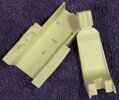
I really didn't have to make a whole lotta modifications to use most of it and it seems to have fit pretty well all up in that Viper hole. Now, I know this ain't what's in the Viper from the show, but I couldn't actually find much reference for that and I don't think it's major if it don't match. This was just to plug that great big open section of the fighter that would be seen with open windows and this does that.
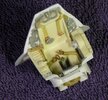
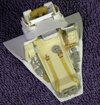
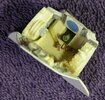
Installing it inside the model, the fit is very good and will seal up real nice in there and won't let the air get out in the vacuum of space and make the pilots eyeballs get sucked outta his sockets. We know that could happen from Buzz Lightyear years ago, so it's probably true. I know y'all see the tape already stuck on the radar/TV/scope type thingy, but I put some clear in the front of that, so I had to go ahead and paint in there. Of course, I forgot to do that first and had to rip the whole thing back apart which went back together a little wonky, but the wonk is on the back and as can be seen in the pictures... you ain't gonna see that even if you look through the nose grills.
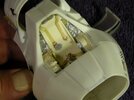
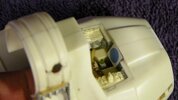
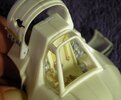
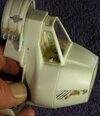
And folks, I do believe that about does the actual sticking of bits together, unless y'all see something else I oughta do?
Give me some critique/comments/suggestions. All are welcome!
Rob.
As seen previous, with opening up them windows, a cockpit would now need to be doodled. Now, even if I wasn't able to do that, I did make some place that looks like it would be one.
For this, years ago, I made some replicas of the seating area of a 1/24th scale AIRFIX Harrier I needed for some studio scale Laser Tanks from Space:1999. Still having a few of those scattered around, I dug a couple out. I had to dig out a couple because I didn't take this picture of it before I cut it all to pieces, so this one goes back in with all the other cast parts, but here it is before destruction.

I really didn't have to make a whole lotta modifications to use most of it and it seems to have fit pretty well all up in that Viper hole. Now, I know this ain't what's in the Viper from the show, but I couldn't actually find much reference for that and I don't think it's major if it don't match. This was just to plug that great big open section of the fighter that would be seen with open windows and this does that.


Installing it inside the model, the fit is very good and will seal up real nice in there and won't let the air get out in the vacuum of space and make the pilots eyeballs get sucked outta his sockets. We know that could happen from Buzz Lightyear years ago, so it's probably true. I know y'all see the tape already stuck on the radar/TV/scope type thingy, but I put some clear in the front of that, so I had to go ahead and paint in there. Of course, I forgot to do that first and had to rip the whole thing back apart which went back together a little wonky, but the wonk is on the back and as can be seen in the pictures... you ain't gonna see that even if you look through the nose grills.


And folks, I do believe that about does the actual sticking of bits together, unless y'all see something else I oughta do?
Give me some critique/comments/suggestions. All are welcome!
Rob.
Eagle-1
Well-Known Member
- Joined
- Jan 16, 2014
- Messages
- 1,020
...a little-off...
Thank you sir! I can only do any of this because it and I understand each other.
Rob.
Pantherman
Well-Known Member
- Joined
- Feb 10, 2022
- Messages
- 3,847
Looking good and no eyeball sucking on your watch...... PanthermanHey all Y'all! It's me again. Alright, alright, stop grumblin' "Him again" 'cause ya' knowed I was comin' sooner or later, and take a look at the latest. Should be one of the last things before slingin' some paint on this rig.
As seen previous, with opening up them windows, a cockpit would now need to be doodled. Now, even if I wasn't able to do that, I did make some place that looks like it would be one.
For this, years ago, I made some replicas of the seating area of a 1/24th scale AIRFIX Harrier I needed for some studio scale Laser Tanks from Space:1999. Still having a few of those scattered around, I dug a couple out. I had to dig out a couple because I didn't take this picture of it before I cut it all to pieces, so this one goes back in with all the other cast parts, but here it is before destruction.
View attachment 116211
I really didn't have to make a whole lotta modifications to use most of it and it seems to have fit pretty well all up in that Viper hole. Now, I know this ain't what's in the Viper from the show, but I couldn't actually find much reference for that and I don't think it's major if it don't match. This was just to plug that great big open section of the fighter that would be seen with open windows and this does that.
View attachment 116212
View attachment 116213
View attachment 116214
Installing it inside the model, the fit is very good and will seal up real nice in there and won't let the air get out in the vacuum of space and make the pilots eyeballs get sucked outta his sockets. We know that could happen from Buzz Lightyear years ago, so it's probably true. I know y'all see the tape already stuck on the radar/TV/scope type thingy, but I put some clear in the front of that, so I had to go ahead and paint in there. Of course, I forgot to do that first and had to rip the whole thing back apart which went back together a little wonky, but the wonk is on the back and as can be seen in the pictures... you ain't gonna see that even if you look through the nose grills.
View attachment 116215
View attachment 116216
View attachment 116217
View attachment 116218
And folks, I do believe that about does the actual sticking of bits together, unless y'all see something else I oughta do?
Give me some critique/comments/suggestions. All are welcome!
Rob.
Eagle-1
Well-Known Member
- Joined
- Jan 16, 2014
- Messages
- 1,020
Looking good and no eyeball sucking on your watch...... Pantherman
I'm from Louisiana. I know you've heard stories.
They are ABSOLUTELY true.
(Thank you Pman!)
Rob.
jmilesmusicman
Member
- Joined
- Oct 9, 2013
- Messages
- 45
Propellers... in OUTER SPACE?!? Just kidding, those look great and jibe with the source you are using, they actually DO look like propellers!! Looking great, and loving this thread!This update, I needed to concentrate on the back/rear end on that section all up in between the engines. Doing a little searching, I found a couple different arrangements back there, but I chose this one:
View attachment 114564
Why I chose that one to go by, I don't know, but it's too late now. Even going with that one, I didn't stick 100% to what we can almost see there. Using that though, I cobbled this together. Again, the stock rear as it comes outta the box:
View attachment 114565
Here's my interpretation of that:
View attachment 114566
View attachment 114567
View attachment 114568
View attachment 114569
If anything looks janky or loose or looks like it may be falling off, it very well may. I've very loosely glued it together (to be able to pop it all back apart) so that I could take pictures and posted these for y'all to check out and give me some feedback/critique/criticisms/comments and suggestions of any kind. It's getting close, but I could still change/modify whatever y'all come up with I oughta, so hollar!
Rob.
