Bismarck 1/400 Papermodel

Thank you John and Patrick.

It is a little bit off centre, but to me the side fit was more important.
I may try to straighten it out later. When the ship is mounted down it is not that noticeable.

Jim
 
Good day all.
Time for an update.
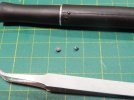
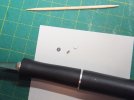
Started working on the components of the main deck. Installed the anchor chains for the main and Aft anchors, then assembled the Capstans, two for the aft section and 2 for the main anchors. The forward capstans consist of 6 pieces each, where the two aft units 4 pieces. Cutting and shaping pieces at the size of the aft capstans can be interesting. Have to work with pins, as even toothpicks are too big. ;D

Here is the work for the 2 Aft Capstans.
Deck%207_zpsb5jovkny.jpg

Deck%208_zpsnurceznk.jpg

The 2 Aft Capstans in place.

Deck%2010_zpsy6hzwlov.jpg

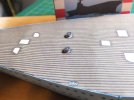
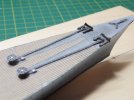
The Forward Capstans for the main Anchors were assembled and installed, as were the main Anchors. The placement of the anchors given with the kit were wrong, according to images and drawing of the ship that I have and were corrected. Also missing from the kit were the two "Bow Anchor Hawse", which are 2 chain guides for the anchor and chain. These were easy enough to synthesize from the ships drawings.
Deck%209_zpsgvx1qjc4.jpg

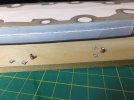
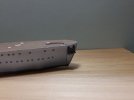
And the last to install was the Stern Anchor. I have images of this anchor hanging Port, Starboard and straight. I elected straight because this anchor lays tighter to the hull at this orientation.
Deck%2011_zpsyg2li9j3.jpg

Some of these small parts take time to assemble. So some updates may be slow.

Thank you for following.
Questions and comments are welcome.

Jim
 
Playing a little catch up on the entries here....Excellent choice and a great job so far Jim!! Looking really good my friend!! ;)
 
Hi John, yes some of the pieces can get a little tiny.
I was checking Eduards to see what they had for this scale. Their AA guns are not any better than what I already have, but may get get the railing kit.
Did some work on adding more deck features today.
These are the parts for a couple of hose reels.

Deck%2012_zpspovbjhwf.jpg

Two of the completed hose reels installed, along with other small deck features.

Deck%2013_zps9uswh3gu.jpg

Thank you for following.
Questions and comments welcome.

Jim
 
Good evening.
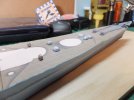
Though it may not look like much. I am finished with the small main deck features for the moment.

Deck%2014_zpsycswu41s.jpg

Added the fwd Breakwater.

Deck%2015_zpsaobaw79k.jpg

And finished off the features on the aft section.

Deck%2016_zpsyske603j.jpg

This is where I'm at tonight.

Deck%2017_zpsrynwtznc.jpg

Time to move up above the main deck. This is where the puzzle begins, with no assembly instructions, will have to rely on images of the model from the designer and educated parts placement.
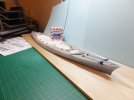
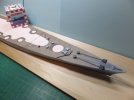
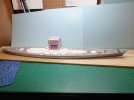
Right now she looks like some of the images I have of her being built. No Castles and no Barbettes.

Thank you for following.
Questions and comments welcome.

Jim
 
No instructions?! I don't think I'd even try do start a project like this without them.
 
Hi Scrach.
It's not that bad to deal with. It is like scratch building, this is where all your research material comes into play. So you are not exactly blind going in. Plus, at least for me, that is part of the fun.

Jim
 
Looks great! I'm always amazed out how good these paper models look when they're finished. I tried building a Titanic one about 30 years ago...didn't have the patience..lol Of course I was 10 at the time!
 
Looking great Jim!! Things are coming together nicely!! So no full instructions ey? More or less like building some of the plastic kits out there today...LOL!!! ;D ;D Sure you have things well in hand!! Keep up the good work over there!! ;)
 
That's common in war gaming as well. A lot of the metal or resin cast figures/vehicles don't include assembly instructions. That said, a metal cast Viking is usually two or the parts not two or the hundred. :/
 
I have a short update tonight.
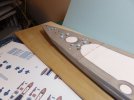
We have Barbettes.

Barbettes%201_zpskwscpz7u.jpg

Barbettes%202_zps8yvv5etw.jpg

I have already marked these for the mounting pins for gun turrets. Easier to do it before assembly then after.

Thank you for following.

Jim
 

Latest posts

Back
Top