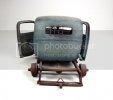
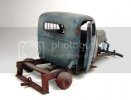
Basic to Rusting and weathering

Thank you G!! I wish I had 55 gallon drums of this stuff!! LOL!!! Glad you are enjoying this!! ;)

Than you CT!! Appreciate it!!! ;D

Hope to make some headway on this a little later...off to anther softball game soon!!! ::)
 
T....

Thanks brotha, for display products K4, great work and great skill to show a variety of different techniques. :eek: :eek:

Very good idea to use several types of products that are in the market, that speaks of you can alternate them, also gives the reference of the good quality of these.

Congratulations my friend for this great review

Cheers

Richard
 
This is so informative mate, and your photography skills are top notch aswell. Great stuff.
 
Hello Richard!! Thanks you for those kind words my friend. Alternating products is easy and I am fortunate to be able to. Certainly for the "basics" I was trying to convey the message that there are a lot of items to use and that the possibilities are endless, especially when you combine them!! I did not forget about you....there is a GAZ out there with your name on it!! :eek:

Thank you John!!! You are too kind!!! for a "basic" tutorial it is more of the never ending story ey? LOL!!! It all good I hope! Thanks for stopping by!! ;)
 
Smashing job mate........... ;D ;D

Just getting caught up here and on MSC. fantastic work so far Teddy. I'm itching to do some weathering and rusting with the K4 products.

Side note , we need to make out a day dude.
 
that just sounds all wrong there rob ;D where i come from it means welll.... ;D
 
:eek: :eek: :eek: TRM, i have been studying weathering for years and to timid and intimidated to try it, your tutorial here has been really easy to follow and has prompted me to give it a try finally, in fact went out and picked up the supplies today, thanks again for sharing this and your techniques with us.
 
Thanks Roman...always a pleasure when you stop by!!

LOL....Rob...I am flattered but what would I tell my wife!! :eek:


Spud....quick on the uptake!!

modelsinc1967 (Darren) - Thank you very much Sir. I'm big fan of you work as seen here and on your site. I think that it really great that this SBS is encouraging!! That is exactly what I hoped it would do. These are easy techniques and with you building skill, know you will excel .....couple things to remember....Keep with it and always keep trying different things and second, this is addictive!!! ;) Tough not to rust once your start!! Not that you have any questions, but, just ask if you do or post em here. Looking forward to seeing you dig into the new toys!! Thanks!!!
 
Todd I'm skimming through your chipping/salt technique and have a question. You sprayed down a thin layer of "Effects" and/or HS then sprinkled some salt to taste. Before your second application are you letting the Effects/HS with salt dry first? If so how long is the drying time, and if not wouldn't the paint layer seep underneath the grains of salt? I'm curious to how this works because it is so very useful looking forward.
Thanks, Anthony
 
:D Hello Anthony!! Happy to help with the question. The answer would be Yes! ;D After a quick clear coat, I spray the Hair Spray/chipping fluid on. If the surface is still wet I will sprinkle some salt where I like. If dry, and the AB right there, spray a little more add some more salt. Before going onto the paint, I spray a light coat of HS/CF on the salt to keep it in place...and yes, I wait till this is dry. Then Paint.

At this point you can do a couple of things if you like. Wait till the paint is dry and chip the salt. Clear coat again and use either more salt or just chipping fluid and repeat the process using different shades of the same paint of completely different colors, or, leave the salt on add more HS/CF and then paint again.

In both instances, you are creating depth the the paint work. Each layer will enhance the dimension a little more. Once you get to the weathering stages everything will just come alive!!

I hope this helped a little.

I also realized I would probably get a beating if I did not update this. I have been pretty busy with life's little chores this month and have slowed down this past week. But the end of that tunnel, I think, is near. So with that, I moved onto getting some things together on this. I needed to keep things separated as long as possible to allow me to paint many sections a lot easier. But I am at the stage where it needed to come together so the weathering will be blended fairly evenly over the entire model.

Blah Blah Blah.....pics......... ::)

008-2.jpg

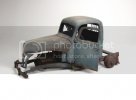
I mounted the engine and of course the hood. You cans see I was impatient and began adding some leaves to the block.
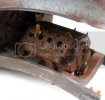
010-2.jpg

After installing the hood, I went back to the AB and dusted lightly another thin coat Deck Tan/Light Sea Grey as I did earlier. This blends the fading from the hood to the cowl and onto the rest of the piece.
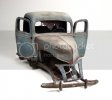
001-2.jpg

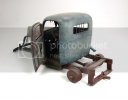
You can see the grill is precariously hanging there. This will undoubtedly fall off at some point before final placement of the piece...just par for the course. I needed to see how this looked.
005-2.jpg

006-2.jpg

008-3.jpg

010-3.jpg

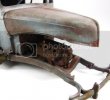
Just about ready for some washes and streaking...grime that is. I also need to come up with a "quick-n-dirty base too.

As always, thanks for stopping!!!!


TBC.....
 
Thanks Norm!! Sure to be more soon!!! All sorts of little things are up next I think!! ;D
 
Thanks Anthony!! Glad it did! If I get through this weekend, I should be able to move on this! ;D
 

Latest posts

Back
Top