Quaralane
Well-Known Member
- Joined
- May 22, 2009
- Messages
- 11,263
Newest project from the bench:
The excellent 1/72 Y-Wing from Bandai

Quick look at the contents of the kit. There are a LOT of parts here


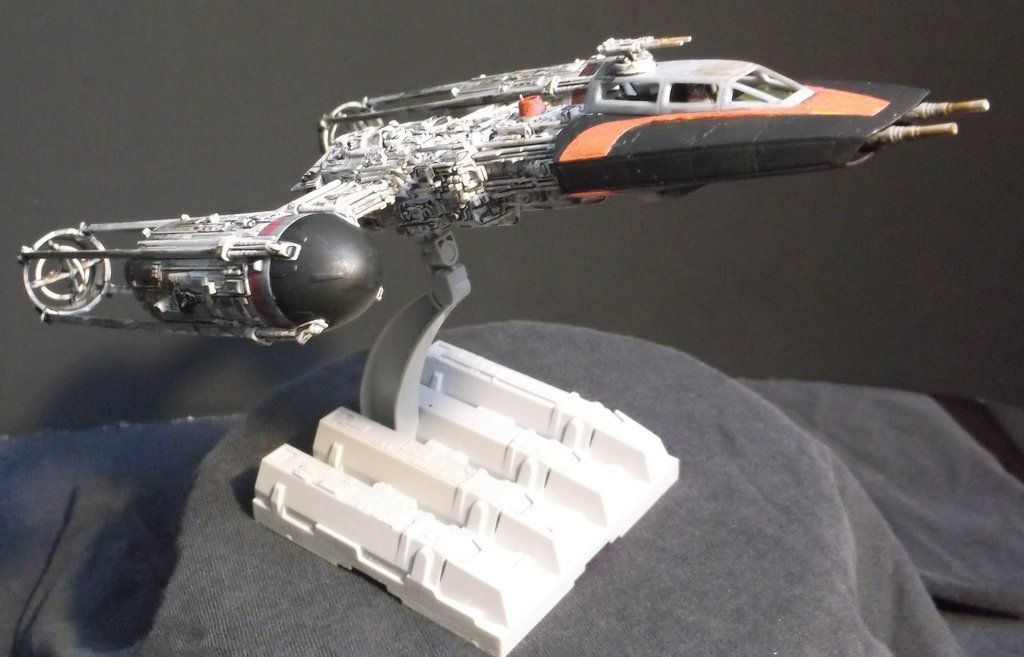
Decided not to go with a traditional 'Gold Squadron' color scheme here.
Instead, I chose to create a hypothetical "Heartbreaker Squadron"
To that end, the gold markings for the nose were painted in with pink, and the end caps for the nacelles were painted in with black

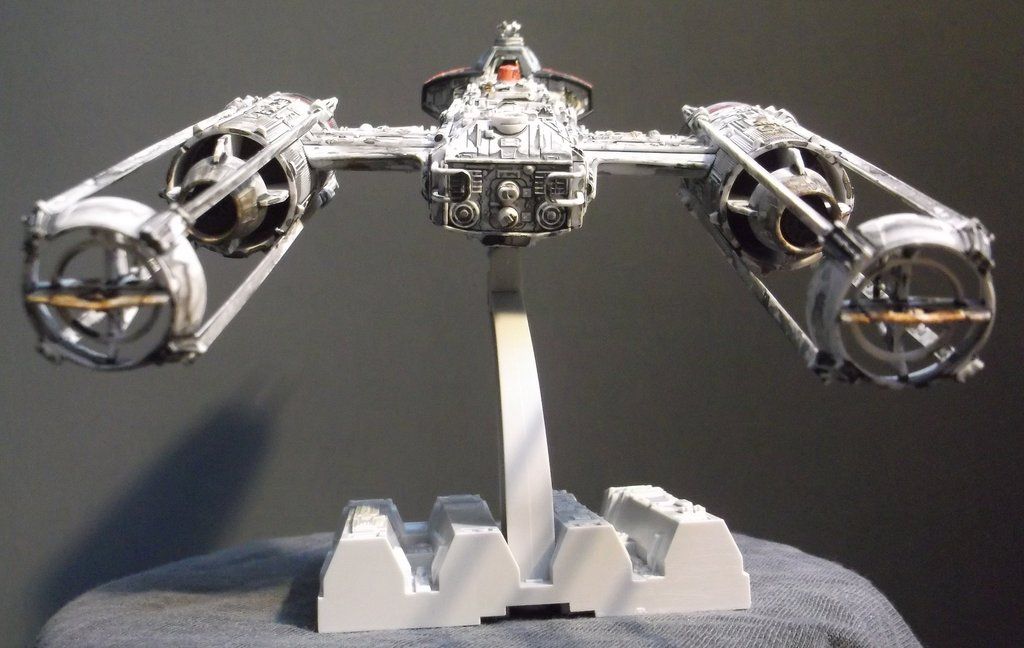
Added a pink ring to the rear sections of the nacelle caps

The nose cowling parts were painted in with black

For our pilot, I painted in her flightsuit with pink. Her vest and helmet were done in white, and her boots and gloves were painted with black.
Overall, she was given a black wash to bring out detail

Nose module was assembled fairly stock.
The cockpit was painted in with Testors Interior Green followed by a black wash and a drybrush to bring out detail.
Pilot was put into place


Guns in place and cockpit cover installed


Work begins on the most complex part of this build: the main body.
There are almost thirty pieces included in this assembly


Installation of the various tubing on the main body begins.
Also added the astromech, using a pink R5-style head


Nose is attached to the main body


Engine nacelles are assembled and installed on the body


Final tubing was installed on the 'wings,' as well as the installation of the 'ion cannon' on the top of the cockpit.
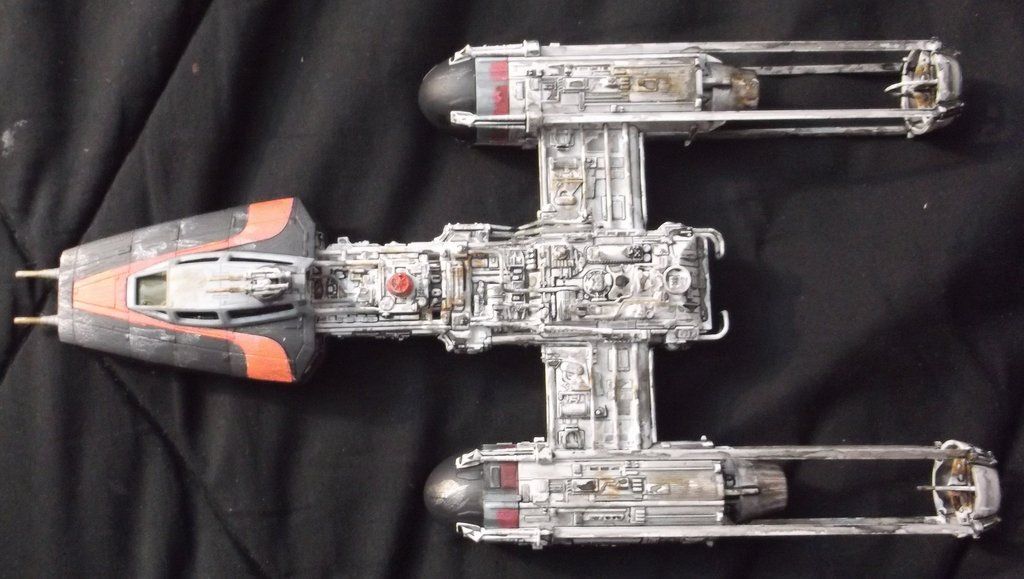
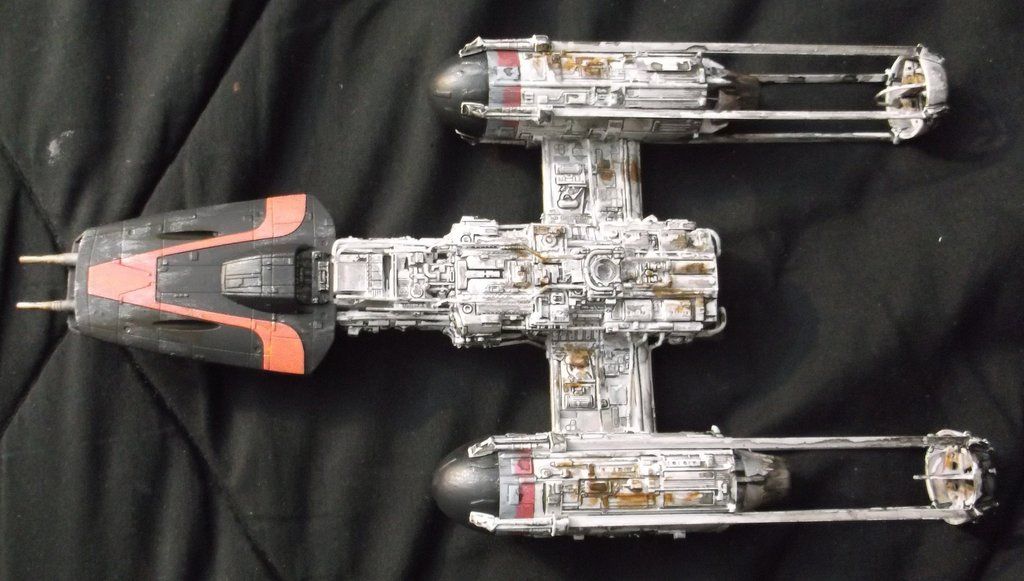
The whole craft was given a black wash, especially the main body and nacelles.
The thrusted and vanes were drybrushed with smoke.
On the black sections, I drybrushed some detailing with silver.
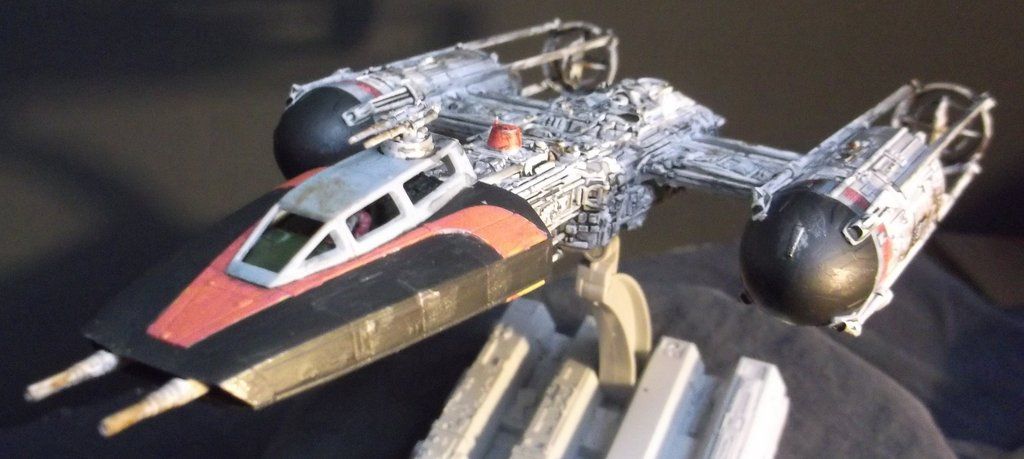
Finished build pics


Youtube link:
[youtube]http://www.youtube.com/watch?v=hMsyQnKx6iU[/youtube]
The excellent 1/72 Y-Wing from Bandai
Quick look at the contents of the kit. There are a LOT of parts here
Decided not to go with a traditional 'Gold Squadron' color scheme here.
Instead, I chose to create a hypothetical "Heartbreaker Squadron"
To that end, the gold markings for the nose were painted in with pink, and the end caps for the nacelles were painted in with black
Added a pink ring to the rear sections of the nacelle caps
The nose cowling parts were painted in with black
For our pilot, I painted in her flightsuit with pink. Her vest and helmet were done in white, and her boots and gloves were painted with black.
Overall, she was given a black wash to bring out detail
Nose module was assembled fairly stock.
The cockpit was painted in with Testors Interior Green followed by a black wash and a drybrush to bring out detail.
Pilot was put into place
Guns in place and cockpit cover installed
Work begins on the most complex part of this build: the main body.
There are almost thirty pieces included in this assembly
Installation of the various tubing on the main body begins.
Also added the astromech, using a pink R5-style head
Nose is attached to the main body
Engine nacelles are assembled and installed on the body
Final tubing was installed on the 'wings,' as well as the installation of the 'ion cannon' on the top of the cockpit.
The whole craft was given a black wash, especially the main body and nacelles.
The thrusted and vanes were drybrushed with smoke.
On the black sections, I drybrushed some detailing with silver.
Finished build pics
Youtube link:
[youtube]http://www.youtube.com/watch?v=hMsyQnKx6iU[/youtube]
") ,
,