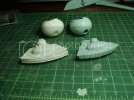
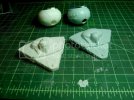
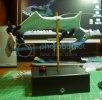
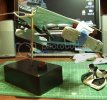
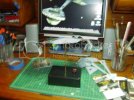
AMT Trek K'Tinga ST: The Motion Picture

Glorfindel said:
YEEEEEEEEEEEEHAAAAAAAAAAAA!!
My man Jeff at JT Graphics comes through big time! Get home from work tonight to see a lovely parcels box jammed into my mailbox. "Heeeeeelo" up grade parts and new neck! Wow they look great. I need to take pics tomorrow and show off the parts for comparison.

Yes, you do!
 
Glorfindel said:
YEEEEEEEEEEEEHAAAAAAAAAAAA!!
My man Jeff at JT Graphics comes through big time! Get home from work tonight to see a lovely parcels box jammed into my mailbox. "Heeeeeelo" up grade parts and new neck! Wow they look great. I need to take pics tomorrow and show off the parts for comparison.

Pics! Pics! Pics! Pics! We want Pics! Pics! Pics!
 
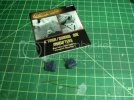
Alrighty, since I do not have much experience with resin I'll describe the texture first. It feels like plastic! I do know I'll use CA to glue them up with and will give them a thorough wash to remove any mold release. No air bubbles as far as I could tell so the castings appear to be of great quality. A touch of clean up is all I'll need to do here.
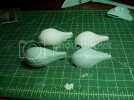
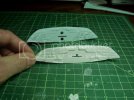
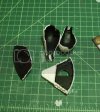
The detail in the command deck and bridge is incredible when compared to the kit parts. Totally night and day. Surprisingly not a huge difference in the neck though they do embed a thin strip of brass tube inside that travels the length of the neck and serves dual purposes as a support mechanism and as a channel for either Kylar or Magnetic wire. Along with the neck comes a new shoulder plate which was a big surprise to me. But since I've already got optics installed in the kit part that's what I'll be going with. A bit more detail but the kit part will suffice. When purchasing the new bridge from JT Graphics they give you a set of disrupters not molded into the AMT kit. Nice touch and should be a very easy installation. Well that's it. I hope to blow out a lot of this tomorrow.

Klingontopneck.jpg
Klingonbottomneck.jpg
Klingonbridgebulb.jpg
Klingonbridgebulb2.jpg
Klingonbulb1.jpg
Klingonshoulder.jpg
Klingondisrupters.jpg

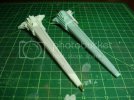
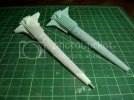
Also did a little something this week on the nacelles. I glued them up and Bondo'ed the seams. A bit more sanding and their done. If things go right tomorrow I'll install them on to the bottom hull.

Klingonnacelles.jpg
 
That bridge looks a lot better. And you can probably add the details to the shoulder plate to make up the difference.
 
That's it! I'm definately getting this kit, but I'm getting the resin AM parts for it too, they look superb! Thanks for showing us the comparison Glorfindel. Nice stuff! You're cooking now!
 
Finally went through your build here Glorfindel and it's going to be killer! With that AM gear and your handi-work, this is gonna be a beauty for sure! All lit up to boot! Nice to see these crappy kits get turned into real tight pieces...Carry on good Sir ;)
 
Pure awesomness!
Can't wait to see these aftermarket parts in action.
And I'm really starting to think about getting this kit with the AM - it's just too cool to pass by ;)
 
Grend, John, Igard, Thumbs, Solly, Q ......jeez looks like the cast of characters from either the Soprano's or The Usual Suspects ;D Thank you for the kind words gentlemen. Another mini update for this weeks fodder.
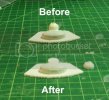
I washed my new parts!! Mom always said you should always wash your parts. So this morning I started some light blocking of the bulb with several coats of flat black, no air brush here just by hand. Next will be some coats of flat white.

Lightblocking.jpg

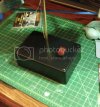
Also dove into the project box by installing 2.1mm jack, a power switch (never installed one of those before so this should be a doozy) and a brass mounting tube. The tube is cut to 8" and looks about the right height for this.

Projectbox.jpg

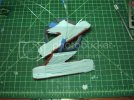
As you can tell by the pics I've installed the nacelles by using the old CA and baking soda trick being very careful not to get the superglue on the fiber. I only used a small amount to initially mount the pylons in place, but then went in with some Aves Epoxy Paste and pushed it into the narrow gap in the pylon making sure I was getting good coverage on both the pylon joint and the lower hull. I did some adjusting with the blue masking tape as you can see and really just eyeballed the angle of the nacelles as they are supposed to taper in a few degrees.

Onstand3.jpg
Onstand2.jpg
Onstand.jpg

I know the last pic is blurry but for some sick reason I like it. Looks menacing or something.
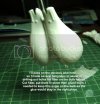
So get this. In the package for the new neck they tell you that you can use the tube that's installed in the resin for running wires through for lighting the bulb. They also tell you that you need to clean out the tube because clay can clog up the ends of the tubes. So here I am this morning shoving all sorts of things into this 1.5mm tube trying to push out the hardened clay buried somewhere in there. I finally had to disassemble an old X-wing fighter laser that had the right size rod for holding one of the lasers together. I'm jamming it there and the clay finally gives after about a half hour of fighting.
Klingons 1 - Anthony 0.

I see a soldering marathon coming up very soon. Possibly by the next post we'll have light!
 
Oddly, or all those pics. the one thing im taken with is...............

I want the desktop on your PC.


I wish I had another of these to build now :(
 
Dave yesterday I needed to quickly research the positioning of the nacelles on the hull so I Googled "Klingon K'Tinga Schematic" and came up with a bunch of stuff. I had seen this pic and said "Okay, why not".

http://enterprisedavid.deviantart.com/art/K-Tinga-143019378

So this morning I dry fitted the top hull to the lower hull and see that I have about 1.5mm gaps running the length of the join at both pylons. Hmmm, more fun with putty or strip styrene, I don't know which yet. I'll figure it out when I get there.
 
I officially hate this model. Hate is a strong word. Despise. Loathe. It nauseates me. Other then that it looks good from 60' away.
 
Glorfindel said:
I officially hate this model. Hate is a strong word. Despise. Loathe. It nauseates me. Other then that it looks good from 60' away.

Keep at it mate, take 5 then attack it again!!
 
Take a breather Glor. You've got lots done already. This kit is nothing like what I'm building, my Romulan D7 is actually rather boring.
 
It can't be as bad as the King Gidorah model I built last year. It took me over a month to figure out the seams on that one. I almost didn't finish the build because of it.

Just take a break and come back to it. Get yourself one of the star wars snap kits and do a fun build.
 
Okay....I'll tell you guys one thing. I promise I won't fling it against the wall. Even with the problems it has...and about 95% of it is my fault, because you know you can't fix stupid, the thing has this great silhouette. Something I've always liked about a Klingon ship....it's always ready to go and scruff it up.
I'm truly putting this down for a day or two. I had commented on Tony's (Painting Clinic) YouTube video the other day not to toss his Reliant build because of the Grex paint that cured so poorly over his Aztec masks. The point being don't give up. And so now I've gone full circle by rehashing that one liner Scott always says (Okay, maybe he said it once...but it stuck) "Completeion not perfection". So Igard, this why I envy your build. You have a model that's engineered properly. Today I am feeble. But tomorrow....

How about some WIP pics, eh?
First up some bridge stuff.
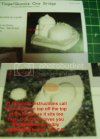
Bridge.jpg
Cutbridge.jpg
Preppedbridge.jpg
klingonbulb.jpg
Bulb2.jpg
Commanddeck.jpg
Shoulderglueup.jpg
http://i758.photobucket.com/albums/xx229/Iluvmlb
[ATTACH=full]25552[/ATTACH]

I found this stuff called Wireform for use in the impules engines. What do you think?
[ATTACH=full]25553[/ATTACH]
[ATTACH=full]25554[/ATTACH]

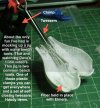
Little mock up of my lighting scheme....

[ATTACH=full]25555[/ATTACH]

Love it when the LED's go on.
And finally...

[ATTACH=full]25556[/ATTACH]

Things your not seeing in the last pic. 2 to 3mm gaps where the pylons meet the top hull. I'm sure the Aves I used to help secure the fiber in place has alot to do with this join. It was caked on. I should have known better.
Ahhh the bulb.
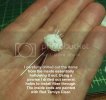
Last night I was so encouraged to work on this I tested my lighting again...all good, I test fit the pieces again...nicey nice. I break out the CA and start by gluing on the dome....excellent. Well seated, I'm happy. In order to make sure the LED's are properly aligned inside the bulb I, in my infinite wisdom, decide to glue half the bulb onto the neck first. By all accounts it looks straight and even. I'm happy 2 (son of I'm happy) I make sure again that the LED's are in a good position, they are so it's time to button her up. On goes some CA and she's nice and tight. Again, I'm happy. I'm moving along here and feel real good about this timetable we have.
Next up the Command deck and bridge. I really want this tight to the bulb so I have little light leak to worry about. I put just a bit extra CA, and.....


.....fooled ya. Of course it held. Too darn good too. Now I'm gleaming. I place the ships support rod in the panavise you see in some of the picks and I take a few steps back to get a nice overall view. I'm feeling good. Too good.

Then the agita hits. The bulb that I had secured on by gluing in one half first then closing it up with the second half....is tilted down about 8 degrees port side. I start to convulse as I reach for my Bayer Aspirin to help prevent a heart attack....I'm out. I quickly swallow 3 Advil and a quart of Metamucil. I glance at the TV just as Justin Morneau launches his second homer of the night. I look at the K'Tinga and notice....what's this? The back end of the Command Deck is not in line with the neck! It's off about 3, maybe 4 degrees also to the port side.

I wanted to scream this.

[url=http://www.youtube.com/watch?v=TQIvdFConL0#ws]The Kahn scream[/url]

But I kept replaying that Dangerfield line from Back to School "I feel like I just gave birth....to an accountant."

And things continued on it's downward spiral. This morning at the very least I wanted to try the lighting again to see how the fiber is working since I didn't do it last night after seeing the bulb tilted. The look of sorrow on my face as I hung my head down low when nothing happened when I hooked up the power just tore Kuato out of me.
I'll get back at it.
 

Latest posts

Back
Top