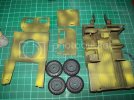
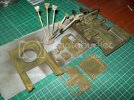
Academy 1/35 1025 Armament Carrier

Eastrock

It's All About The Fun!!!
Joined
Feb 20, 2011
Messages
1,598
Hi Herds,

Here's my entry for the seal GB, will be doing strictly OBB since I'm also entering this one in the OOB category

101_0325.jpg

100_0381.jpg

started with the hood, remove much of the injection pins. I was planning to put aluminium foil on the flooring but it would mark as an improvement.

Thanks for looking
 
I really want to build one of these so I shall be following along closely
 
Man I have 4 Academy Humvees and two tamiya kit's that I have yet to started. So I'll be keeping up with your work as well. ;)
 
Small Update:

construction is almost done but a lot of puttying, scraping and sanding still needed. the kit is pack with injection marks raised and recessed ::)

100_0393.jpg

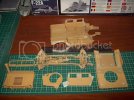
sanding will follow on the following days, before I'll start with the priming, need to check for visible injection marks and flash when tight fitting is done, Since the academy has no engine the hood will be close, and you don't want to see what's below the hood large injection marks.

Next time I'll try Tamiya kit with added details.

Thanks for looking!!!
 
Looks like your handling the kits short comings rather well the ER!! Will be following along, if you don't mind!! ;)
 
T, I did watch JamaicanModels to be a better modeler its inspiring and make me realize its fun to build at first. but making more like a model rather than a toy is a another achievement. Also I do like your work you got a ton of patience. :)
 
Nice tidy start :) Once you get past those annoying little epm's the rest will be a breeze ;D enjoy ,I will follow too ;)

Chris.
 
Eastrock said:
realize its fun to build

THE only way to look at what you do!!! ;) Best philosophy, hands down!! All the other stuff just falls into place.

Thanks for the compliment BTW..the patience is not always there but I have a tremendous amount of fun while building...one outweighs the other my friend!! ;D
 
Hey, that's the same model that I've got waiting in a corner.

I'll be watching this with interest...
 
Thanks, F2k

a bit of update"

100_0410.jpg

Chassis painted semi-gloss black, the exhaust will be pre-painted with Tamiya Dark Iron with a bit of burnt metal. The Cab is almost done need some liquid putty on the gaps before primming.

Thanks for looking, Herds!!!
 
That chassis looks really nice in the black ,looks like some good detail in there !

Chris.
 
Hi Chris,

The Chassis has some fitting issues... with 1mm difference from the transmission, aside from that need to really tight first with the cab, Since I'm entering this one in an OOB category... hands tied for the correction, it will be considered as enhancement. That's the reason why I painted black and go for woodland Scheme instead of Desert scheme.

and I planned to reconstruct the engine support the left side is badly out of shape, may I'll try it next time kits sells $2 USD converted from our currency. Most modelers choose Tamiya its a better product, but it cost twice, but its already out of stuck as per Tamiya supplier, only the available is the TOW Humvee that cost about $12. a $10 difference. S'building is a good way of cost saving and it has a lot of fun.

Regards.
 
Making pretty good progress Eastrock!!! LOL, I thought I head someone say "PAINT"!! ;D Sorry. one of my favorite words!! ;) "S'building is a good way of cost saving and it has a lot of fun" I hear you!!! I am sure you will straighten this one out with no problem! ;)
 
Took advantage of the sun for about a few hours, since we are havin an erratic weather here, heavy rains then a few minutes, then a sun will peek again.

Base color and Pre-shading on the interior, ready for dry brushing and Pinwash... then seal it again with Tamiya clear (rattle can).

100_0451.jpg


Btw the wheels are sprayed with Nato Black, for dry brushing.

Thank for looking!!!
 
Another fine update Rock!! Shading looks nice and the rubber too!!! ;D
 
Here's another update:

After the pre-shading... lightly sprayed very thin Nato Green for the color blending after that did chipping and pinwash for shadowing, seal it with gloss clear since I'm not able find any future here. after its dried did some Oil paint blending (white, Yellow orchure and Raw Umber) to get rid the monotonous color... at this stage it will depend how much you remove the oil, let it dry before sealing it with (clear/future), once dry the oil will be more opaque. next stop drybrushing with a thin base color.

oilpaint.jpg

Thanks for looking!!! comments are very much welcome.
 
:eek: Woa ! Nice weathering....

One point ! Take it with a grain of salt !!!! The doors... they look like ONE big door... is there a Recess line that we can't see ??? or run a little line in there so we can see the Division between the two !

Otherwise... I am in Awe at How good this looks.... Well done !


Norm.
 

Latest posts

Back
Top