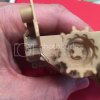
ARMOR - Academy 1/35 M1A1

Appreciate the encouragement! I managed to sneak in a few minutes to affix the rear lower hull panel:
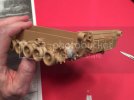
2E0D0701-C78C-4BF5-A3BC-086512D7659E_zpsp7oeklyf.jpg

I was able to get it pretty square, but there are some seams/gaps on the sides:
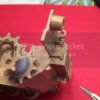
EB37C44E-8EA7-4657-BBCA-D18D645232CF_zps8uvoc5dz.jpg & B46B3120-E114-45B0-B809-9E7346FAFC81_zpseyrkvgkq.jpg

Not sure whether they'll be visible after more is assembled, but I'll probably fill them and sand/smooth anyway.

Hoping to make more progress this weekend, time permitting!
 
Got a little more progress tonight (not as much as I'd have liked, but is *was* Easter weekend). Anyway, here's what I have:

[youtube]http://youtu.be/ICam3gWDF6I[/youtube]

I did make a little more progress than where I realized I'd screwed something up. Ugh. More on that later.
 
There are a number of liquid masks available that you might want to hunt for; they will make protecting those tiny clear parts very easy.
Microscale and Vallejo are the first two that come to mind.
 
Realized I made a mistake... A short vid illustrating my mess-up:

[youtube]http://youtu.be/a68_KWNDsGY[/youtube]

Cruddy-crud-crud. :-\

This'll teach me to be careful about what I trim off when I'm doing cleanup.
 
It happens to the best of us..get a little ahead of?yourself and BAM! Wrong !!! As far as advise, well if you want it accurate then fix it, if you aren't tat concerned ten leave it..or you could also?just cover it with netting or something ..as they say, hide the crime..
 
Would it be possible to remove the small piece from the side of the lamp housing and move it to the other side or scratch a replacement? That might minimize the risk of doing more damage. Nice progress on this build though; it's looking great!
 
Thanks for the replies, fellas. "Hide the crime," had me cracking up!

Anyway, I slept on it... I'm gonna leave it. I was looking at how much cement I'd used to get my scratch-plug to fit and melt on, and even if I could get it off without too much damage to the hull and the other parts (which I'm not confident of), removing the plug will completely distort the (now) top of the lamp. The work I'd have to put into correcting that - reshaping the curve, adding back the little spurs, etc. - would be a pain for my skill level.

Plus, it'll bug me some when I look at it, and that'll serve as a reminder to not get too far ahead of myself in the future. b ;)

GM
 
What about pulling the right lamp off and just adding some small battle damage? That's my go to for hiding the crimes…
 
Hide the crime or take it off and make it look like battle damage...

Looking great so far, keep up the good work.
 
Ok... I considered everyone's advice (thanks for that), and I decided to go ahead and fix it. Spent about 45 minutes knocking it out tonight. Here's the process:

[youtube]http://youtu.be/Dp4bWnvWtKw[/youtube]

On to the Upper Turret stuff from Step 4 next!
 
Great fix on the light dude! It's fixing these little mistakes like this that always make me feel a little better about my own builds. One thing you can try to fix that detail that came off the top of the light.. Stretch some sprue very very thin. Glue it where the detail was, then once the glue has dried trim to length.
 
Thanks, guys. And I'll give the sprue-stretch thing a try one night coming up and report back on how it goes.

In the meantime, here's a short update vid... Slow going still... I'm distracted easily:

[youtube]http://youtu.be/xlmpYTGTpcQ[/youtube]
 
Generally I would guess the tape indicators are a hint to help hold the parts together as the glue dries... But since I'm not sure what the next steps of the build are, don't hold me to that.

I'm constantly dry fitting my builds together with blue painters tape to check for fit and what not; also, blue tack (a 'silly' putty type substance) comes in very handy for the same type of situation.
 
Hmm. Hadn't even thought of that, but it makes sense. I'll check ahead on the instructions and see what I can tell. And I'm familiar with blue tack from my wargaming miniature painting experience! I have some on hand, even. Thanks, Scrach!
 

Latest posts

Back
Top