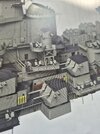
1/200 USS IOWA
- Thread starter kevin
- Start date
blakeh1
Well-Known Member
- Joined
- Oct 26, 2011
- Messages
- 1,184
I have a tool I got from MicroMark for the angle bends, works great. Clamp the part down and bend it with the razor blade.
The curved or radius bends I use trick I saw on you tube. Hold the PE part over a candle flame for a couple seconds until it changes color alittle. It becomes more pliable and won't crease or fold when you roll it around something to get the curve you need.View attachment 154401
Yep, "annealing metal" to make it "softer".
It brings back my jewelry/metalsmithing days
Generally though it involves heating until the metal is glowing slightly red, but being careful that it is not hot enough to melt and then letting it gradually cool
On the flip side, if you heat it to glowing red and then immediately quench it in water it hardens it into shape
It can be really tricky though as photo etch is often very thin making it easy to accidentally melt parts
It is something I wanted to try with photo etch to try forcing it to keep some shapes and be less bendy after applied
Not sure how effective it would be with brass though since brass is already kind of a softer metal compared to steel for example
just afraid of melting expensive parts. I be much more willing to experiment if was doing making my own photo etch though
kevin
Well-Known Member
- Joined
- Mar 21, 2024
- Messages
- 538
I learned that lesson the hard way. Melted the first part I tried it on.Yep, "annealing metal" to make it "softer".
It can be really tricky though as photo etch is often very thin making it easy to accidentally melt parts
It was Pontos PE part, but luckily Trumpeter supplied alot of its own PE with the kit. So I have the luxury of duplicate parts in some places on the model.
GCB
Well-Known Member
- Joined
- Aug 22, 2023
- Messages
- 491
Nice job Kevin...I've been spending more time at the beach than the bench lately.View attachment 154362
Today it rained and I managed to finish the aft funnel stack and get it mounted to the ship.
View attachment 154363
View attachment 154366
View attachment 154368
I haven't been very motivated to work on this project for awhile. Same old song and dance.......PE!
Completing this stage of the build has been a boost to keep me moving forward.
Yours has so much more details compared to my 1/350, but as you, slowing down due to number of PE and small parts... Well done
kevin
Well-Known Member
- Joined
- Mar 21, 2024
- Messages
- 538
I added the forward funnel stack / superstructure. There is about 1/16" gap where it meets the deck. I screwed around with it for awhile, but that's as good as it's gonna get. There is too much delicate stuff already attached to it to get aggressive enough with it for a tight fit.
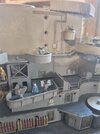
I might try to piece in a strip of plastic, not sure yet. It may just dissappear as more and more detail gets added.
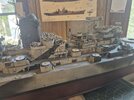
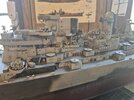
It's starting to look like something now.

I might try to piece in a strip of plastic, not sure yet. It may just dissappear as more and more detail gets added.


It's starting to look like something now.
BOATMAN
Well-Known Member
- Joined
- Oct 7, 2024
- Messages
- 1,042
YES Kevin i aggree with the chaps above your battle wagon now is beggining to look very impressive an try as i might i could not see that gap you was on about as it looks a brilliant bit of modelin to me very well done so far sir an what are those cylinder all standing in a row for ?
chrisb
chrisb
kevin
Well-Known Member
- Joined
- Mar 21, 2024
- Messages
- 538
Down Time
Well-Known Member
- Joined
- Dec 17, 2022
- Messages
- 1,775
That's a good kind of busy!!!!!Not much since the last pics.....I've been busy.View attachment 155659
Next update will be when the superstructure is done, stay tuned.
You have my full endorsement.
BOATMAN
Well-Known Member
- Joined
- Oct 7, 2024
- Messages
- 1,042
so Kevin youve been sunning your self on the beach eh an skivin lol wish we could get to the beach as how hot it has been an still is but there are loads of beaches around my area but its tryin to get a parkin space so jen an i sun ourselves out on the lawn in the garden
chrisb
chrisb
Edbert
Well-Known Member
- Joined
- May 16, 2024
- Messages
- 1,727
You missed a few footprints there!Not much since the last pics.....I've been busy.
BOATMAN
Well-Known Member
- Joined
- Oct 7, 2024
- Messages
- 1,042
HI Kevin well im now up to the stage of havin to fit some P/E an i was goin to spray the P/E GREY an just before i started i realised id nearly made a big blunder as i dint notice the very thin polathene coatin over said P/E an on both sides
NOW does your P/E have the same stuff stuck to it ? an did you spray the P/E or hand brush paint ?
chrisb
NOW does your P/E have the same stuff stuck to it ? an did you spray the P/E or hand brush paint ?
chrisb
kevin
Well-Known Member
- Joined
- Mar 21, 2024
- Messages
- 538
I've been learning as I go with all the PE on this build.
Yes, the sheets have clear plastic coating on each side, that gets peeled off and thrown away.
I tried spraying the sheet with primer then cutting off and assembling the parts. The CA glue doesn't seem to adhere to the paint well, and the paint chips easy.
Now, I'm building the sub assemblies and spraying with primer, then use the airbrush.
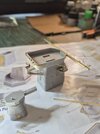
I have knocked of some of the smallest bits hand painting before. Not getting enough glue on there I guess. On larger, flatter pieces I scuff it up with a sanding stick for better paint adhesion.
The PE use to really frustrate me on the beginning on this build, but I'm getting the hang of it.
Yes, the sheets have clear plastic coating on each side, that gets peeled off and thrown away.
I tried spraying the sheet with primer then cutting off and assembling the parts. The CA glue doesn't seem to adhere to the paint well, and the paint chips easy.
Now, I'm building the sub assemblies and spraying with primer, then use the airbrush.

I have knocked of some of the smallest bits hand painting before. Not getting enough glue on there I guess. On larger, flatter pieces I scuff it up with a sanding stick for better paint adhesion.
The PE use to really frustrate me on the beginning on this build, but I'm getting the hang of it.
urumomo
Well-Known Member
- Joined
- Mar 18, 2013
- Messages
- 7,949
It actually does - the acrylic wants to bond to the CA more than the substrate so it debonds from the brass in the reorientation of the dispersion forcesThe CA glue doesn't seem to adhere to the paint well,
- Joined
- Sep 4, 2022
- Messages
- 2,619
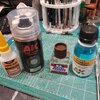
...there are PE primers available, as well as surface burnishers. The burnished leaves a dark patina, more for weathering.
I do a very fine sanding for larger pieces; I find the liquids/spray less likely to damage delicate parts.
I've been using this 'metal' CA, seems to work well, but no double blind testing to prove it any better than other 'thick' CA.
There are probably household products that would be just as effective at adding a 'tooth'.
@urumomo , I thought you commented somewhere to this effect; if not, maybe one of the other guys?

Similar threads
- Replies
- 226
- Views
- 5K

