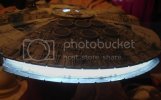
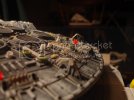
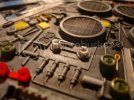
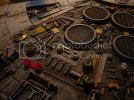
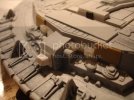
YT-1300 with blue stripes

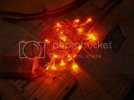
I think i will complicate the lighting task even more with this...

DSC04919_zps0034573f.jpg

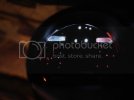
This second christmas light will be the orange/red button in the cockpit and the position lights under the fuselage.

DSC04921_zpsa5f79b0e.jpg

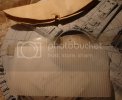
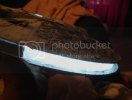
The engin won't be fine like that, even with my beloved Coffee spoons. Will add this translucid Cardboard found on the streets of TOULOUSE TOWN.

DSC04918_zpsac0af1e4.jpg

Its shape and translucid matter will help a lot to diffuse correctly the light.

Whithout :

DSC04923_zps12331229.jpg

With :

DSC04924_zps1a5716e8.jpg
DSC04925_zps793d1319.jpg
DSC04926_zpsccf42e94.jpg

I think it looks good !

DSC04927_zpse5815862.jpg
DSC04928_zps0d8182d0.jpg
DSC04929_zps993c71cf.jpg

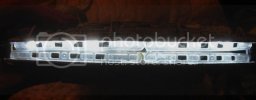
I will detail this part too, with metallic stripes or event this magic Aluminum Tape.
 
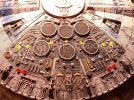
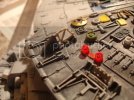
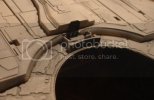
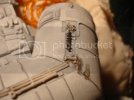
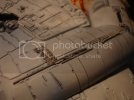
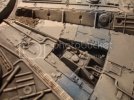
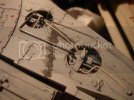
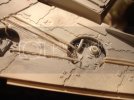
The engine part needed serious detailing. Since I don't care to be accurate with the ANH Falcon, I aded parts here and there.

DSC04930_zpsb6c021d9.jpg

I used a lot of stuff, with names I don't know in english :) the fact is : detailing is done !

DSC04935_zps41ade5c1.jpgDSC04936_zps7c50f58e.jpgDSC04939_zpscea40fdd.jpgDSC04940_zpsec62f1ce.jpg

Underneath...

DSC04941_zps4b5fc659.jpgDSC04942_zpsf0fbf0a2.jpg

This part needed detailing too...

DSC04934_zpsaafec196.jpgDSC04933_zps70798f6b.jpg

And I added rods, cables and stuff here and there.

DSC04932_zpse99659ba.jpgDSC04943_zps512d3df4.jpgDSC04944_zps2f89e277.jpg

And, yes, the Falcon broke several times when i drilled some holes for the rods... It's very fragile.
 
Thanks Quaralane ! :)

I'm working on the control panels of the cockpit, modifying the figures too, to have two guys piloting it. The paint is done concerning the details on the engine area, and I'm engraving the panel on the docking rings parts. :)
 
Looking good, up to the old standard!

A quick tip on the cockpit. I don't know if you can do this, but if you can print out your control panel onto decal film and then put that on clear styrene, you will get a much better look.
 
It's done already, sorry :(

And I don't have a printer, nore do I have the possibility to order any kind of decal paper in the near future. I have to deal with what I've got in hand, in order to save money and restore the House. :)

But later, maybe, for the Cut-away version. I will do it this way. :)
 
No problem, I just recently figured this out for myself. I look forward to the time you do use that tip!
 
Was ill and busy form some weeks now but manage to resume the build yesterday.

The cockpit is done, the orange/red lights are done (beneath the YT-1300), even more detailing here and there...

Have to post some pictures, but since Photobucket changed A LOT, it's not that easy anymore to do anything. But will do, that's a promise ! :D
 
Here are the update about my Blue Strips Falcon :)


The pilots are no good copies from F-4 1/72 model kits. I painted some basic colors, blue, orange, black but didn't painted them well since they will be not visible. There's no need to do it right IMHO.


The control panels have been cut and glued on. There was a huge gap ahead so I completed it with cables and plastic parts painted in black. That will not be seen since the windows are not that clear...


With the power on, the panels are barely visible, the pilots and the seats are on the way...


Some leds will help to light the gunpit. I use the perfect object for it : a box for candies (dragées).


Cut in half I'll place some panels with holes drilled in it to let the light pass on. That will not be very visible but the ambiance will be there.


I detailed with some parts here and there...


Use some parts provided by some broken lighter was not a bad idea but it's note the right shape with the other cables. I let this one be however...


I used some U shape Profile and Wueen Mary II model kit parts to detail the dish. Once painted it rocks !


That's the same plastic profile with a U shap I used on the Cockpit.


The lights ahead with some cut plastic spoons. This will help to glue and maintain the original parts here.


The big deal was to count the number of orange leds I've got, and drill some holes in the right places. It was done fiar and easy, easier than I thought indeed !
I couldn't place all the lights I wanted or needed but the job is done. Though I'm not satisfied with the orange lights for the cockpit. The pilots are blocking the lights. Too bad.


The two halves together. Not top notch but I'm satisfied with the ambiance lights... It helps to check the light leaks too. :)


I have to do something for the engines. Maybe adding some details here and there. Same thing for the batteries, they will be accessible underneath but I need to make some socket in order to pull them out when I'll need to replace the batteries.


Last night I sand and sans again the gap around the cockpit. And engrave the details gone... THat was not easy but the result is here... Will show you this later.

Now All i have to do is check the light leaks, join the two halves of the ship, comple and detail the trenches. The docking rings have been glued on one half but clearly need to be cut a little since the thickness of the ship is now different.
Will need som "L" plastic profile and stuff... Don't have it for the moment. If I m' not patient enough (I'm returning to Paris in 2 weeks) I'll go with plastic spoons as usual :) :D
 
What's the name in english for the plastic stick you can use at the office, for example ? It's no spoon, right ? In french it's "touillette". :D
 
YOULI said:
What's the name in english for the plastic stick you can use at the office, for example ? It's no spoon, right ? In french it's "touillette". :D
Youli...I have no idea what you are talking about.... :-\ ::)
 

Latest posts

Back
Top