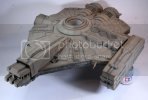
Xs Stock Light Freighter 1/72

Cheers guys, Q there is two cockpit options 1/144 and 1/72 the 1/144 as you can imagine is a lot more spacious, also I've jammed the back wall up against the seats for it to stand freely.
 
JohnSimmons said:
Cheers guys, Q there is two cockpit options 1/144 and 1/72 the 1/144 as you can imagine is a lot more spacious, also I've jammed the back wall up against the seats for it to stand freely.
Yours is looking great. Me, I'd probably go with the 1/144 cockpit to be more faithful to the game. But that's just me
 
"This is what insanity must look like"!!!!! Wow, just really great work. Nice of you to share such mad skills. More Power!!!! :D
 
Thanks for the comments guys, I layed on the primer last night (took a whole small bottle of Vallejo Green Brown Primer), and boy did my hand ache after holding that resin lump for 30 minutes lol. Fortunately a bottle of tamiya paint fits super snug in the middle hole so I can use that to keep it off the table. I'll post some pics later when I pop out to the shed, it's a nice feeling when you get the primer on, you feel like your really getting the work done ;D
 
JohnSimmons said:
..........it's a nice feeling when you get the primer on, you feel like your really getting the work done ;D
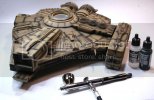
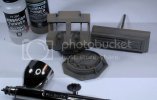
Yeah......thats as far as I've got......on all my projects ;D

Looking forward to seeing how she looks

John
 
Cheers J, well here's what she looks like and hopefully for not too long because it's a little to brown for my liking lol:
IMG_5642_zps92bacf4f.jpg
 
It looks great, but I must concur, a little too brown....
But might work for a Trade Federation ship's base color.
;D ;D ;D
 
Well there is a method to my madness remember its still just a primer coat and the next layers will get lighter and lighter :)
 
Thanks so much guys. Ok I managed to scrape an hour out in the shed this evening and I've pre shaded the lot with thinned down black Vallejo primer through the badger velocity. Usually my velocity can't handle the thickness of Vallejo paint (even the thin primers clog up and dry up the tip) but I tried out there new formula thinner and it worked a treat! It sprayed just like good' ol tamiya paint :)
IMG_5648_zpsd893b6cf.jpg
Then I moved onto Israeli Sand primer mixed just a bit more than the pre shade, this is getting closer to the base coat that I'm after:
IMG_5651_zps1b6d5779.jpg
 
ModelMakerMike said:
COOL Keep the updates and pix coming!!!!
Lovin' it!
;D
I'm trying I'm trying! Lol I don't have half the time I used too dude.
CTspeedshop said:
Looking mighty fine John!!! ;D
Cheers CT ;)
Quaralane said:
Definitely starting to shape up
I hope so Q :)
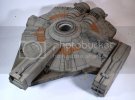
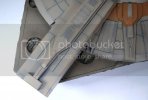
Ok guys I got the base coat done tonight, a little too much pre shade is showing through but there's still lots of colours to go on yet so I think it will look ok. The mandibles have a mix of metallic grey flat brown and black on them and the orange/brown markings were painted with Vallejo Model Colours thinned with there new formular and it went through the airbrush a treat ;)
IMG_5658_zpsddeec171.jpg
IMG_5661_zps0dc67609.jpg
IMG_5663_zpse85ab0a1.jpg
 
Coming along great.....can't wait to get painting myself

On a side note....if this design was around 2,000 years before the battle of Yavin, how come there were no YT ships in the prequels?.....(tiny Millennium Falcons that you need to freeze frame the movie and use a magnifying glass to see them doesn't count :p)

Thats why the Prequels sucked....no pirate ships!

John
 

Latest posts

Back
Top