USAF Thunderbird - Early '70s edition

Scale Model Addict - Model Tips, Guides, Tools & Tech, Tutorials, and Community

Help Support Scale Model Addict:

Edbert

Well-Known Member
Joined
May 16, 2024
Messages
3,123
I started on this a while back, never posted anything about it so here's a start.

I made the 4-ship 1/72 Phantom T-bird kit as a child remember having the hanging from the ceiling. I am positive there was no paint, just slopped glue with fingerprints and crooked stickers.

I've been jonesing to make a new one since coming back to the hobby in 2024, but there are no new kits and despite there being some "not very old" ones on the market they are all pretty expensive all things considered. Also, despite the F-16 being one of my favorite jets I wanted an older one. F-100 was my first choice, followed by F86 or even F87. But back then they did not paint the dark blue thunderbird on the underside, that started with the F4, so...Phantom it is!

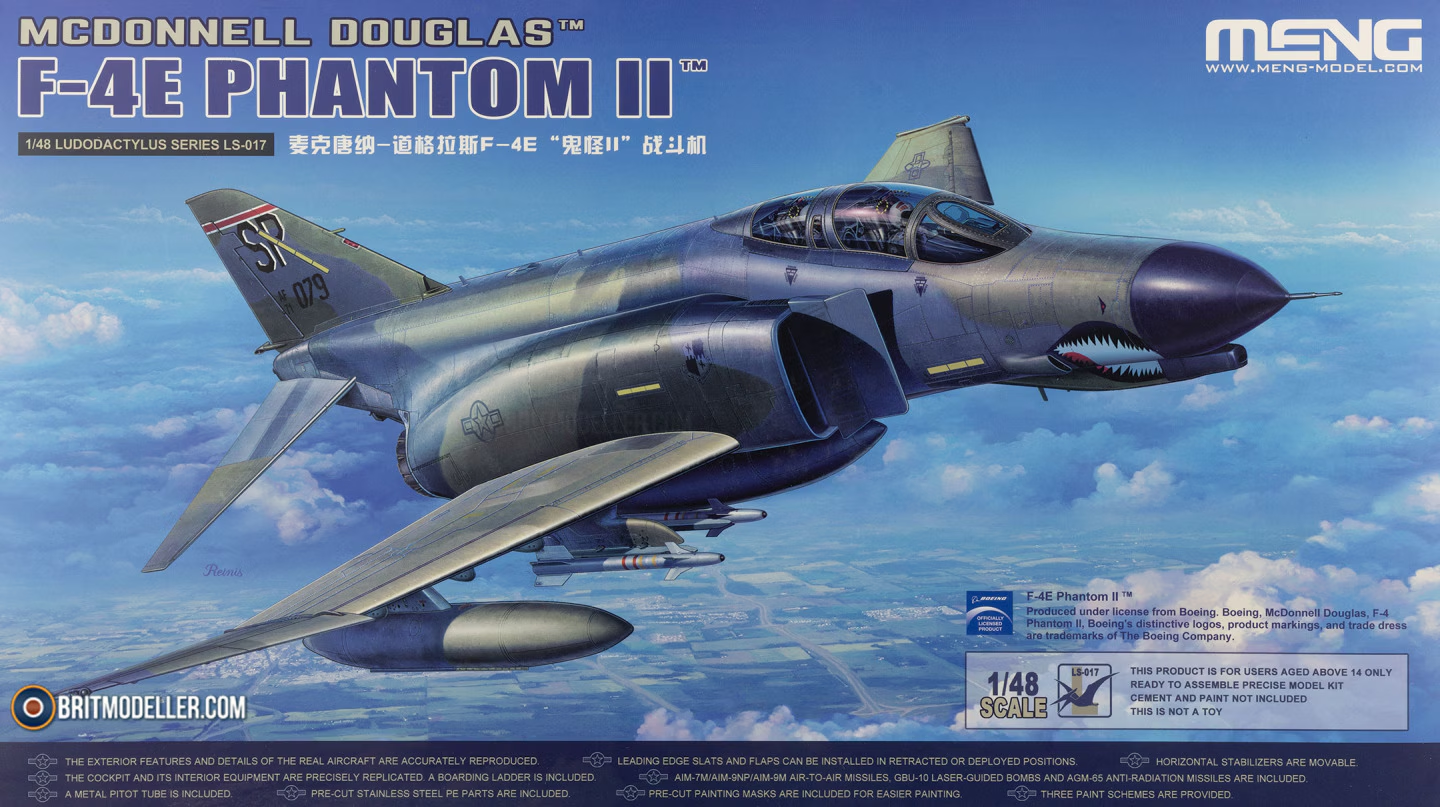
I was able to purchase a Meng "E" model, open box sealed bags at my local IPMS show last fall for $20 off lowest retail. I know it was the E-models they used during the short period of time before they moved to the T38. I also found out at that show as my 1st time ever judging that landing gear issues disqualify 40-60% of all models from a prize. Depsite always building open cokcpit models with no pilot, I decided to do an in-flight kit and what better for that than a T-bird?
1770394823657.png

This is the kit I bought, Meng is one of my favorite "new" manufacturers. I knew I'll need to address the vulcan, but what I did not know at the time was that the T-birds used the "hard wing" versions while the E-models usually had slats. I'm guessing here, that while the aerobatics are definitely "maneuvering" it is not the same as ACM, and that slat deployment might increase turn-rates it might cause movements less than ideal with a wingman feet away. So how to conver the slat-wing to a hard-wing is something I've put off until later.

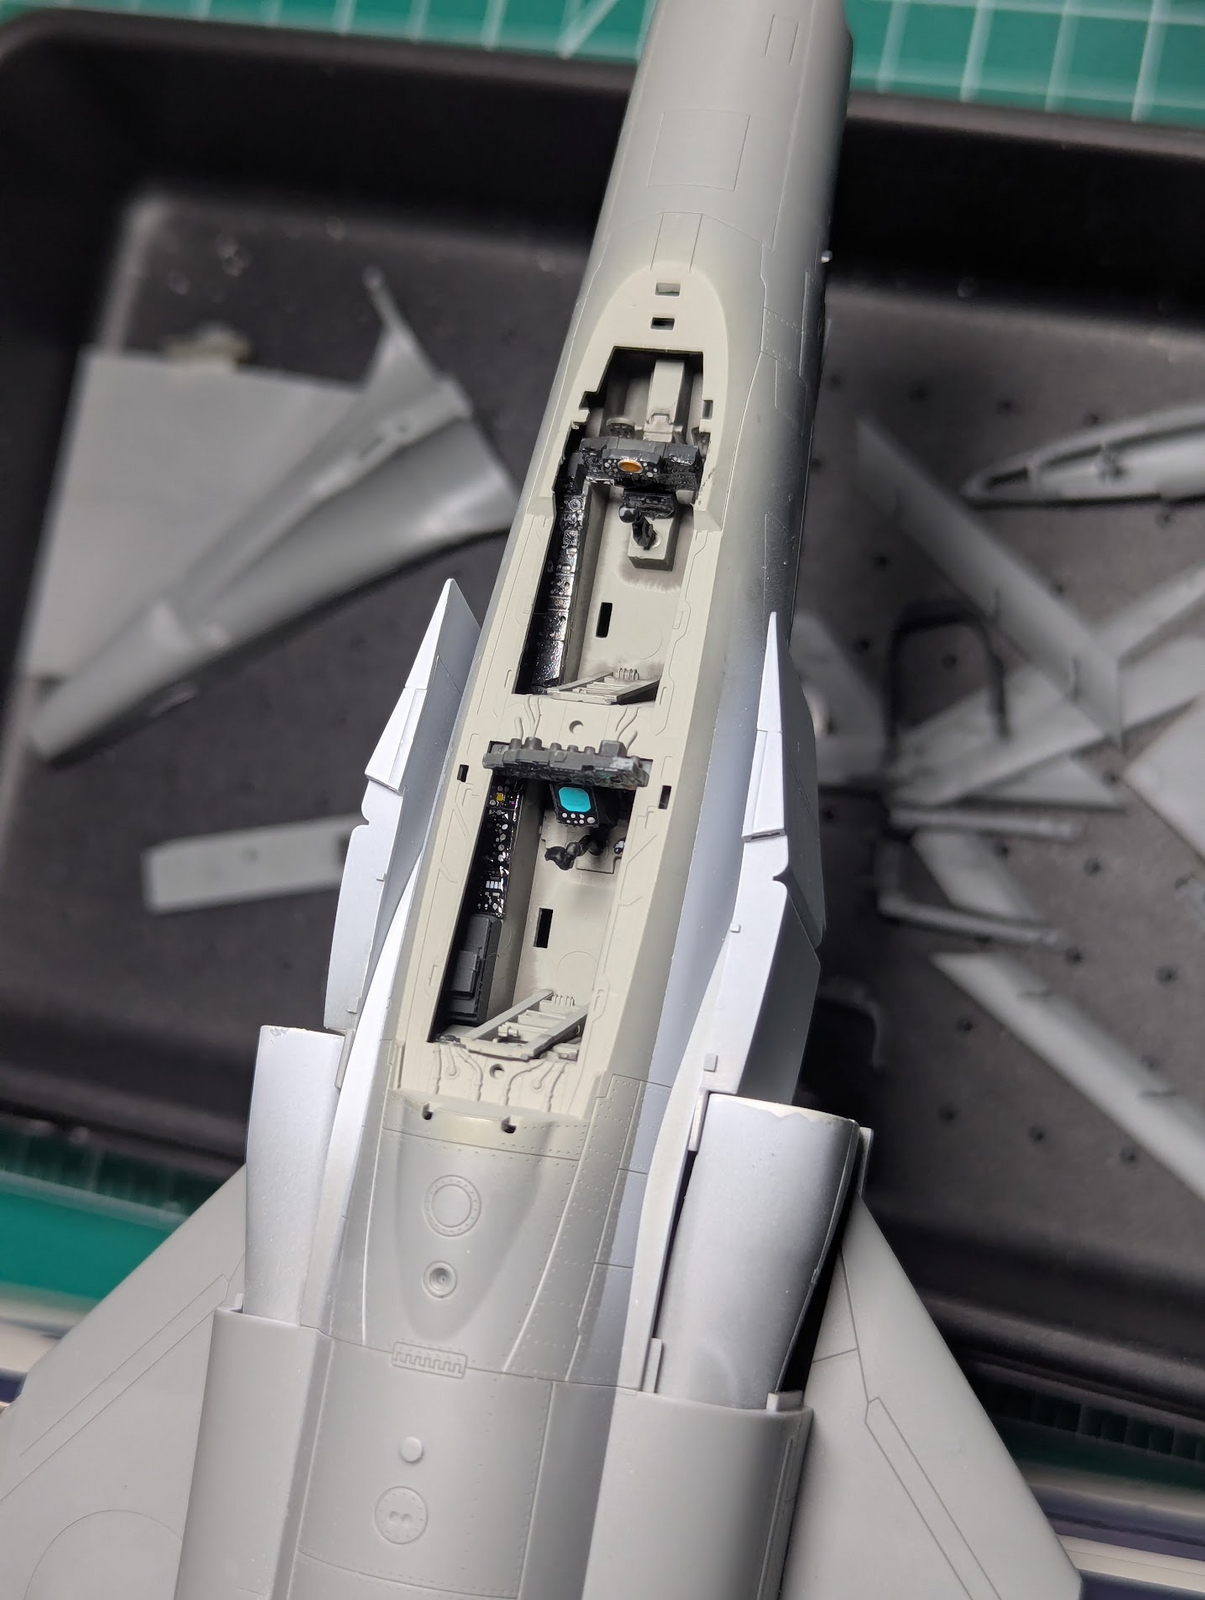
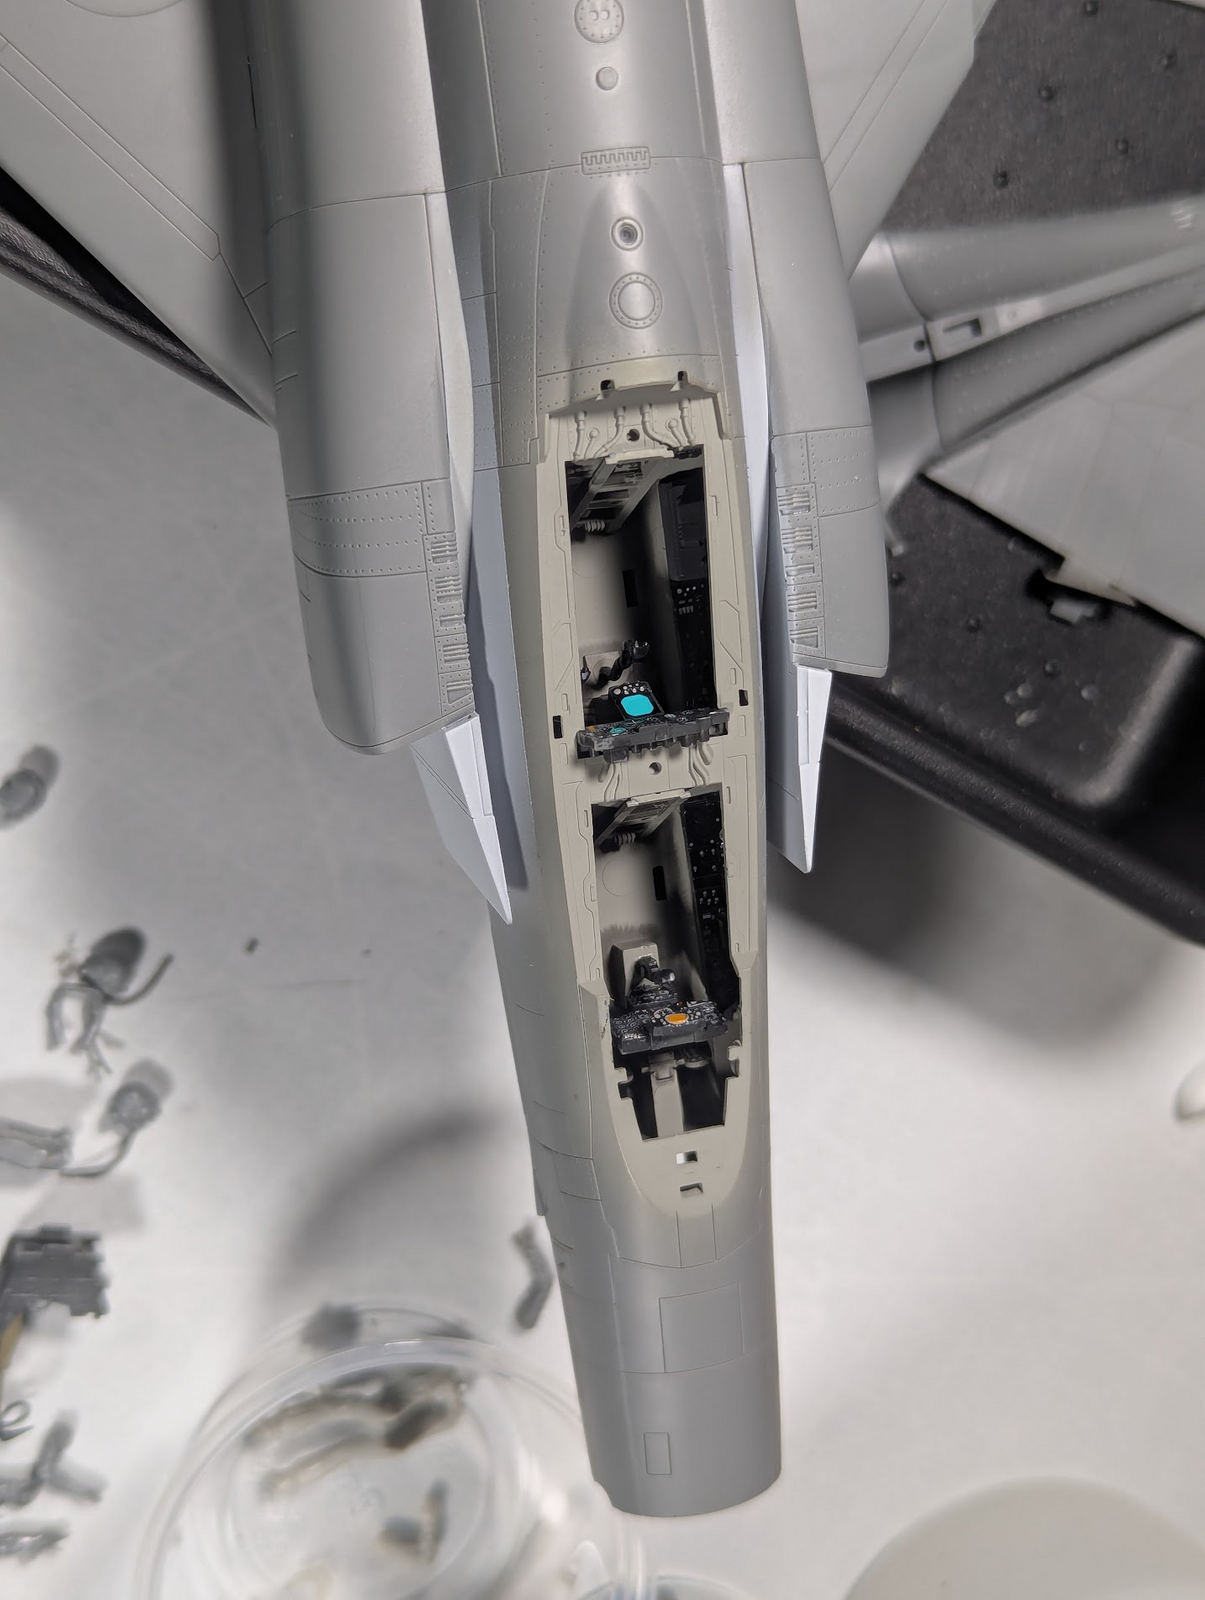
Assembly went quick and flawless as is my experience with Meng kits. I realized just now that I did not take pictures of that intial assembly, probably becuase it was so fast and easy. But below are some shots of the status as of today.
1770399034324.png

1770399062897.png


Learning from last time, I painted white (final exterior color) in the gaps behind the intakes to avoid dusting with the final coat. The cockpit came out okay, I did not go crazy on it because with the wheels-up build the canopy will not only be closed but also full of human so even harder to see. It was at this point I realized Meng did not give me pilots, rut roh!

Time to get my inner Dexter out! (AKA dremel and X-acto)
1770399349359.png

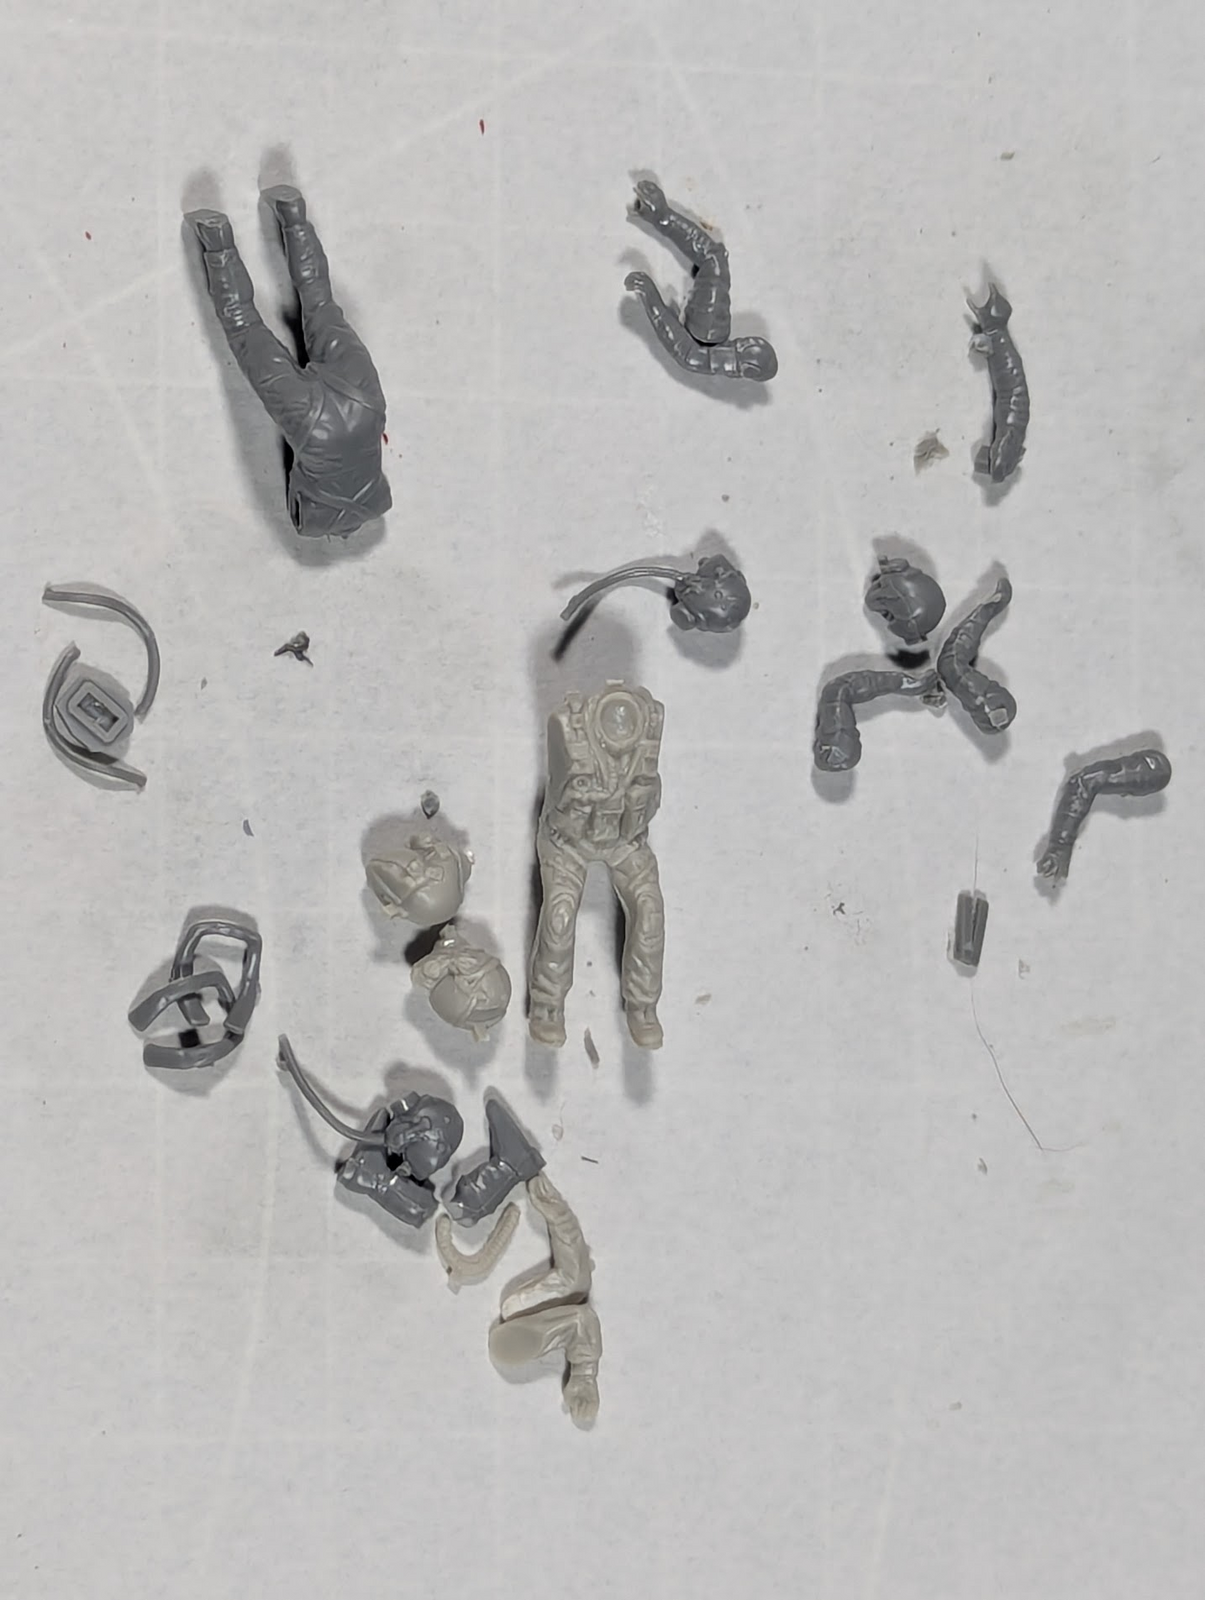
From the spare-parts bin...the light gray was a Tamiya F-16 pilot, he looked good, but I need two. The darker gray is from a Meng EA-18, which should be a perfect fit for the Meng F-4 right? Wrong!
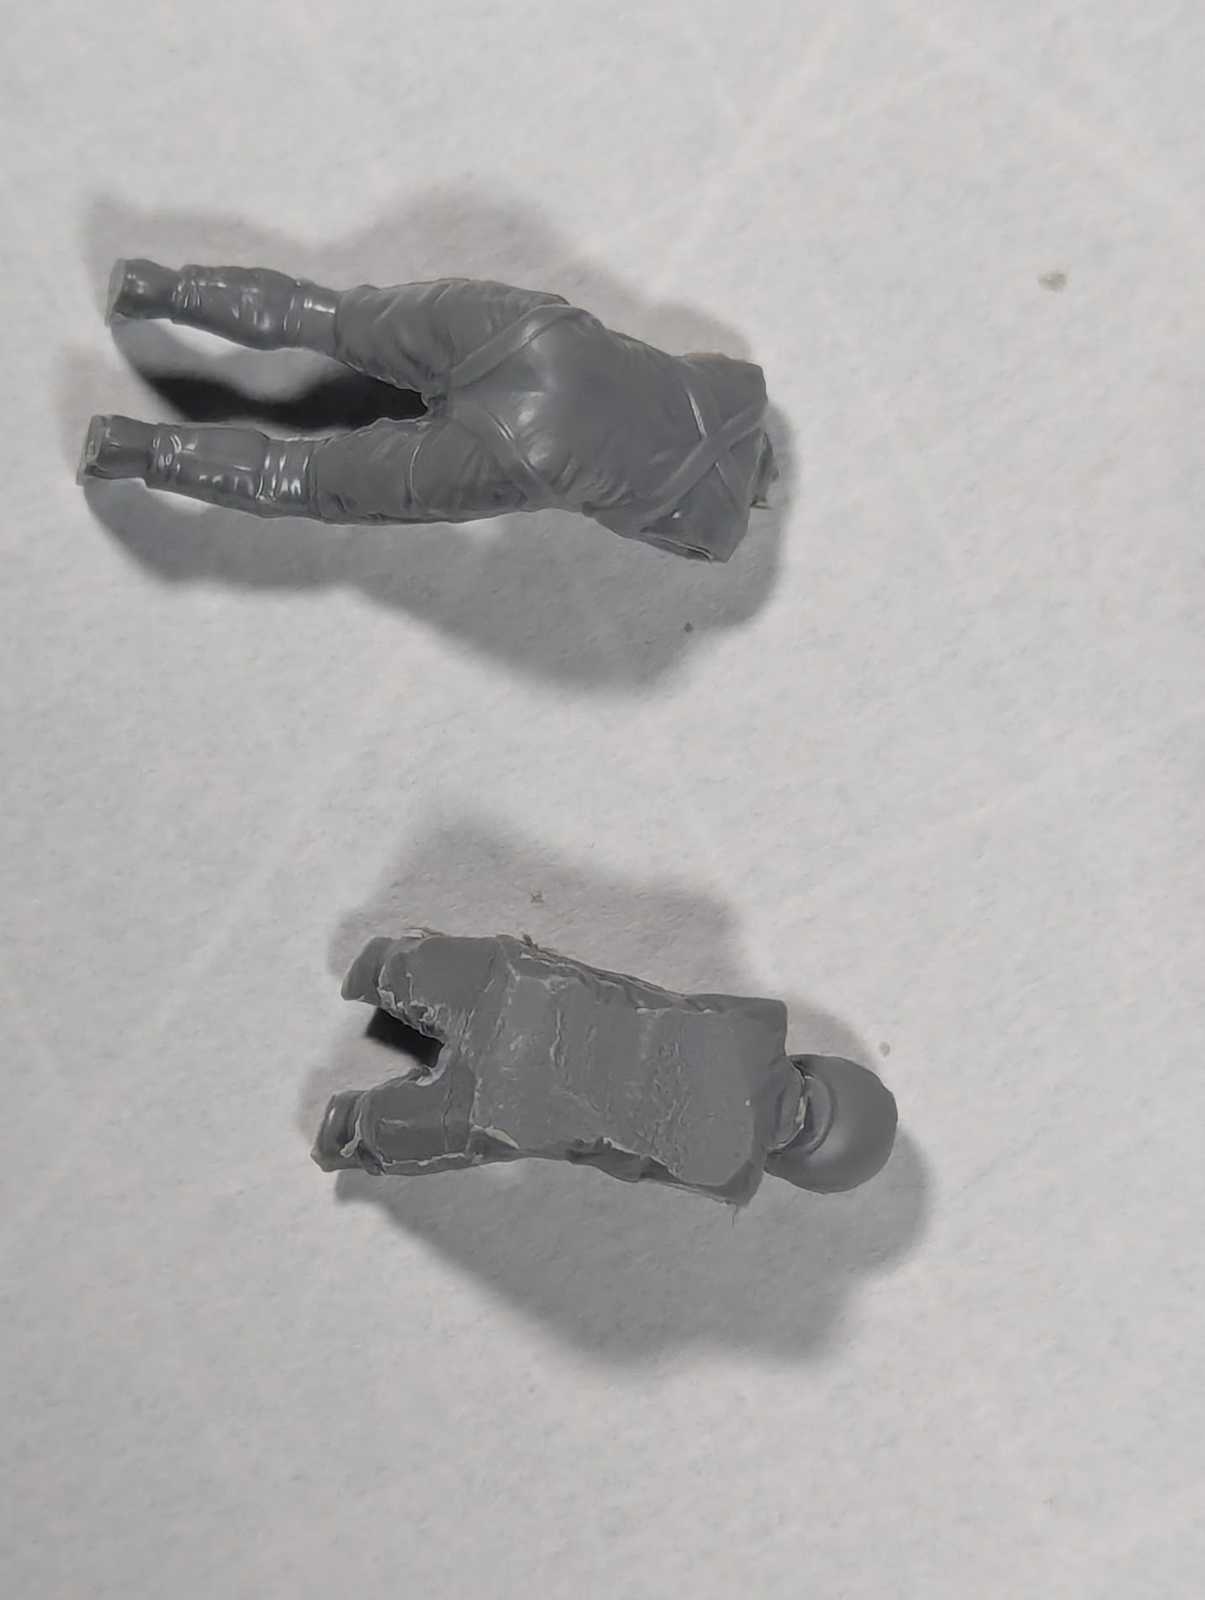
1770399437827.png


I had to grind large parts of his back, butt, and thighs to get him to fit into the ejection-seat. Then amputate both legs right below the knee, they fit now.

Not putting the wheels down save a HUGE amount of time and effort (painting/assembling/detailing), and I have not done that since at least 40 years ago. I can see a few spots need attention to get perfect, but no big deal there.
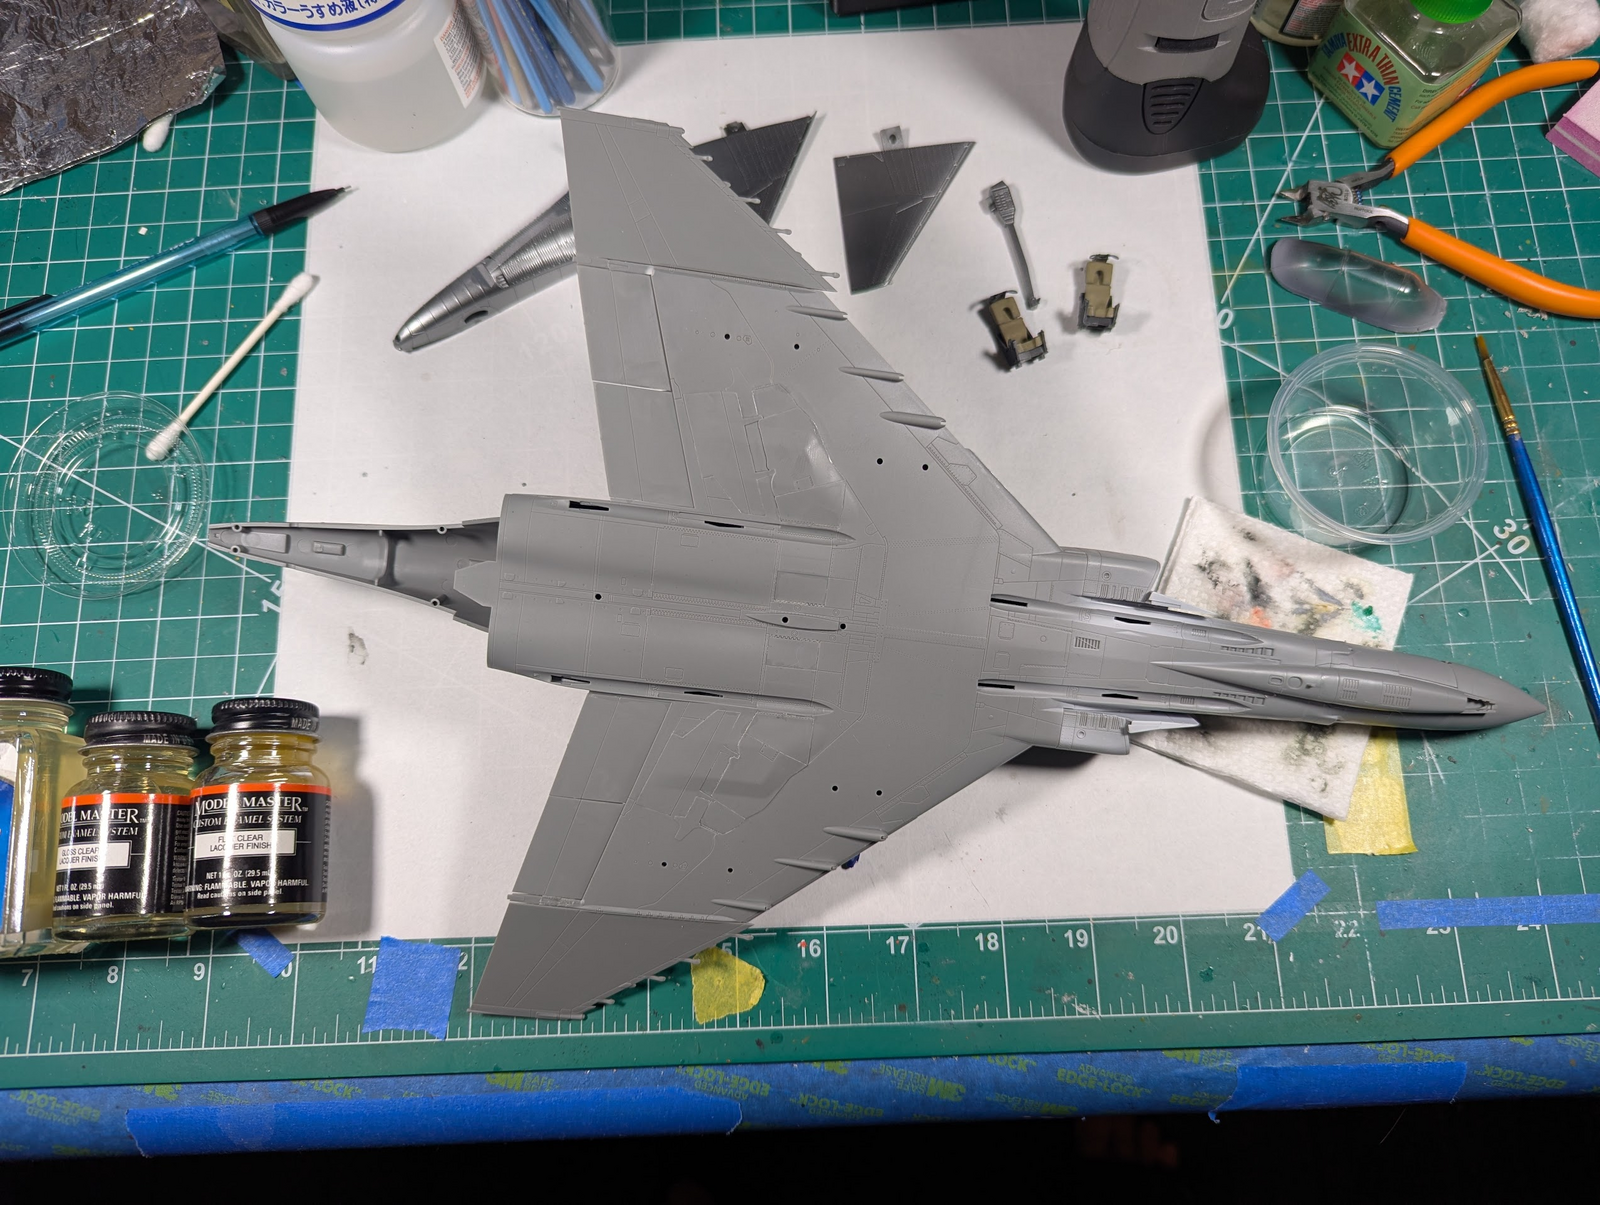
1770399673246.png

I'm thinking that all I need to do for the hard wing is grind off those bulges and extensions and glue the slats flush. If anyone knows please advise. Of course I'll leave the missiles off and the drop tanks and ordinance. Should the holes where the AIM-120s go be adjusted?

The final coat will be gloss-white of course, and I do not intend to do any pre or post shading, maybe some very light panel-lining, we'll see. As of right now I am planning on painting the big-blue-bird on the underside, as well as the striping. Leaving only the tail (circle of stars) and small items as stickers. Will have to see how that goes, lots to do before then. I may use the horizontal stabs as a test. I did buy a sticker sheet to use as a template, so can back out of that idea.
 
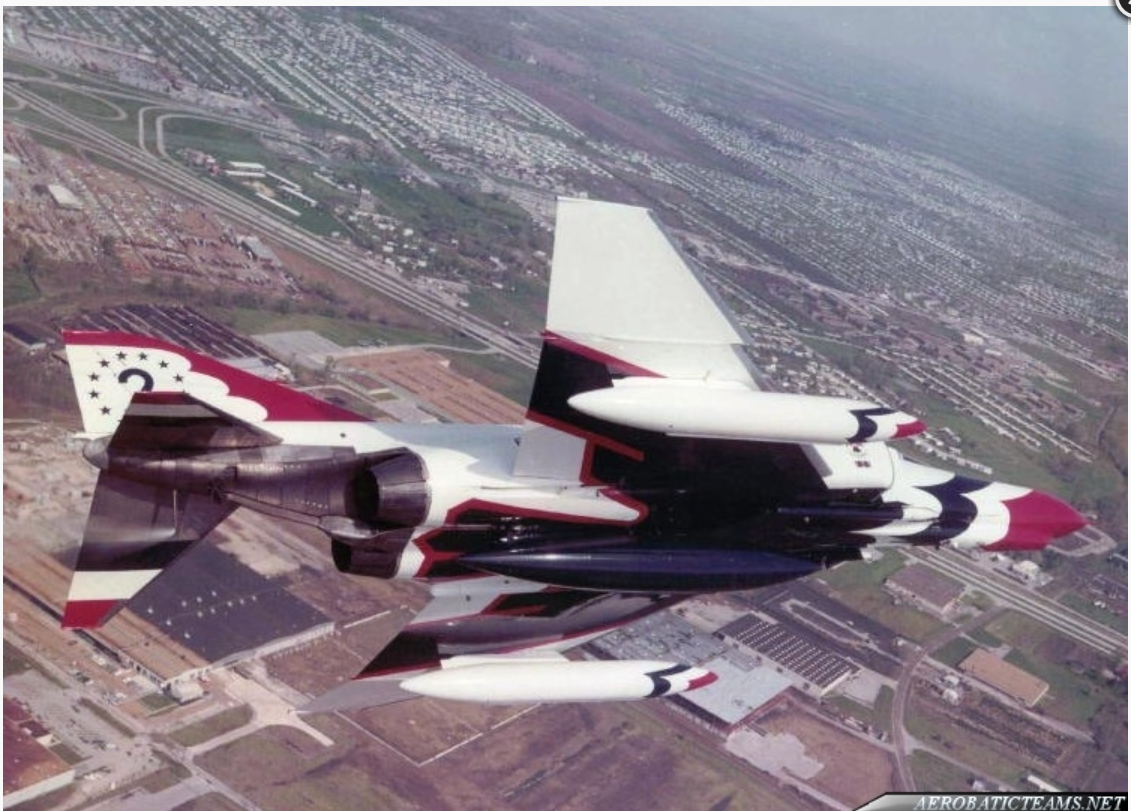
It's amazing to me that flying brick was ever used as a demo team jet. That said, it did look fantastic in the T-Bird livery. Look forward to seeing your build. Can't go wrong with any F-4 type.
 
With some research, they did perform at a small number of air shows WITH drop tanks it seems. It was done on those occasions when whatever airfield the show was at could not accommodate refueling, hard to image but it did happen. Photographs of that are harder to find, but do exist.

1770485881983.png

That said, it did look fantastic in the T-Bird livery
Indeed it did!
 
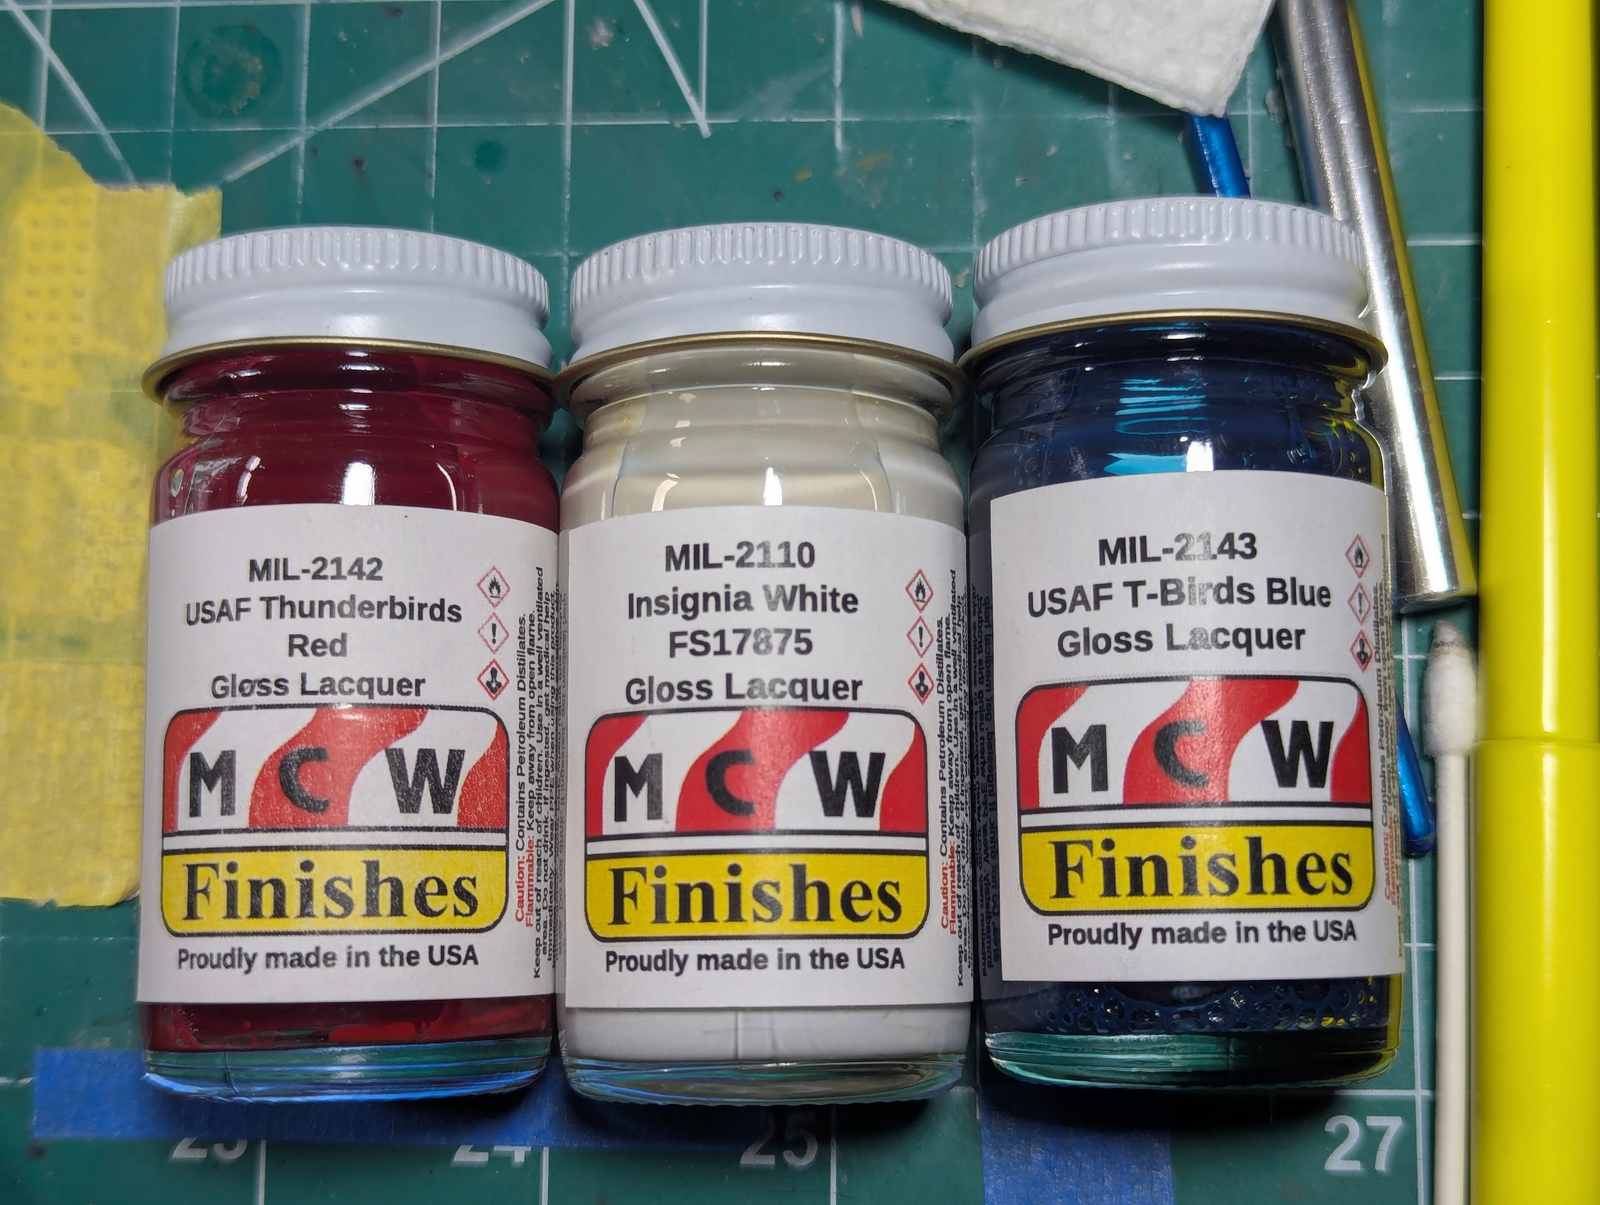
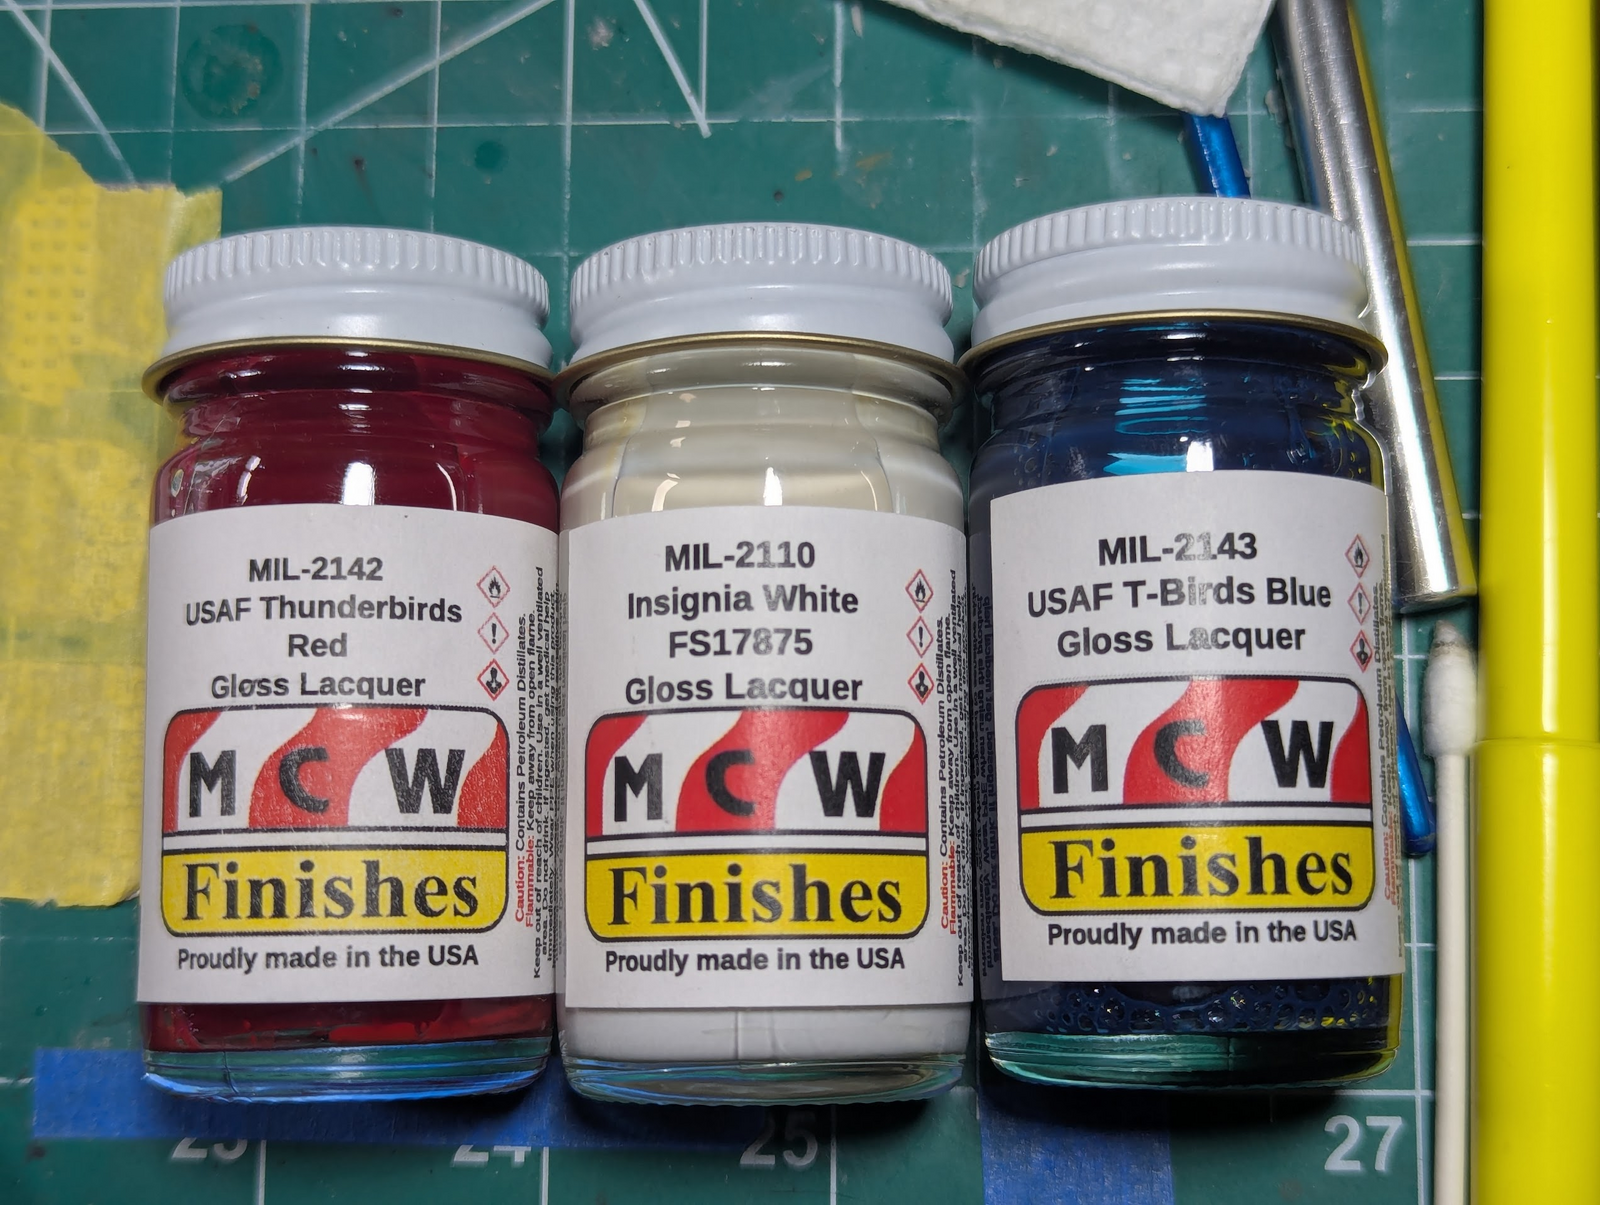
I'm going to try out a new paint. I say new when they've been around for a while, I mean new to me. I believe they are popular in the automotive crowd, but I needed high gloss for this kit so here we go.

I've heard that their thinner is called "MLT" which is the nickname give to Mr. Color leveling thinner, in this case it stands for Mild Lacquer Thinner, but reports are it can be used on the Tamiya acrylics the same way.

1770734118054.png


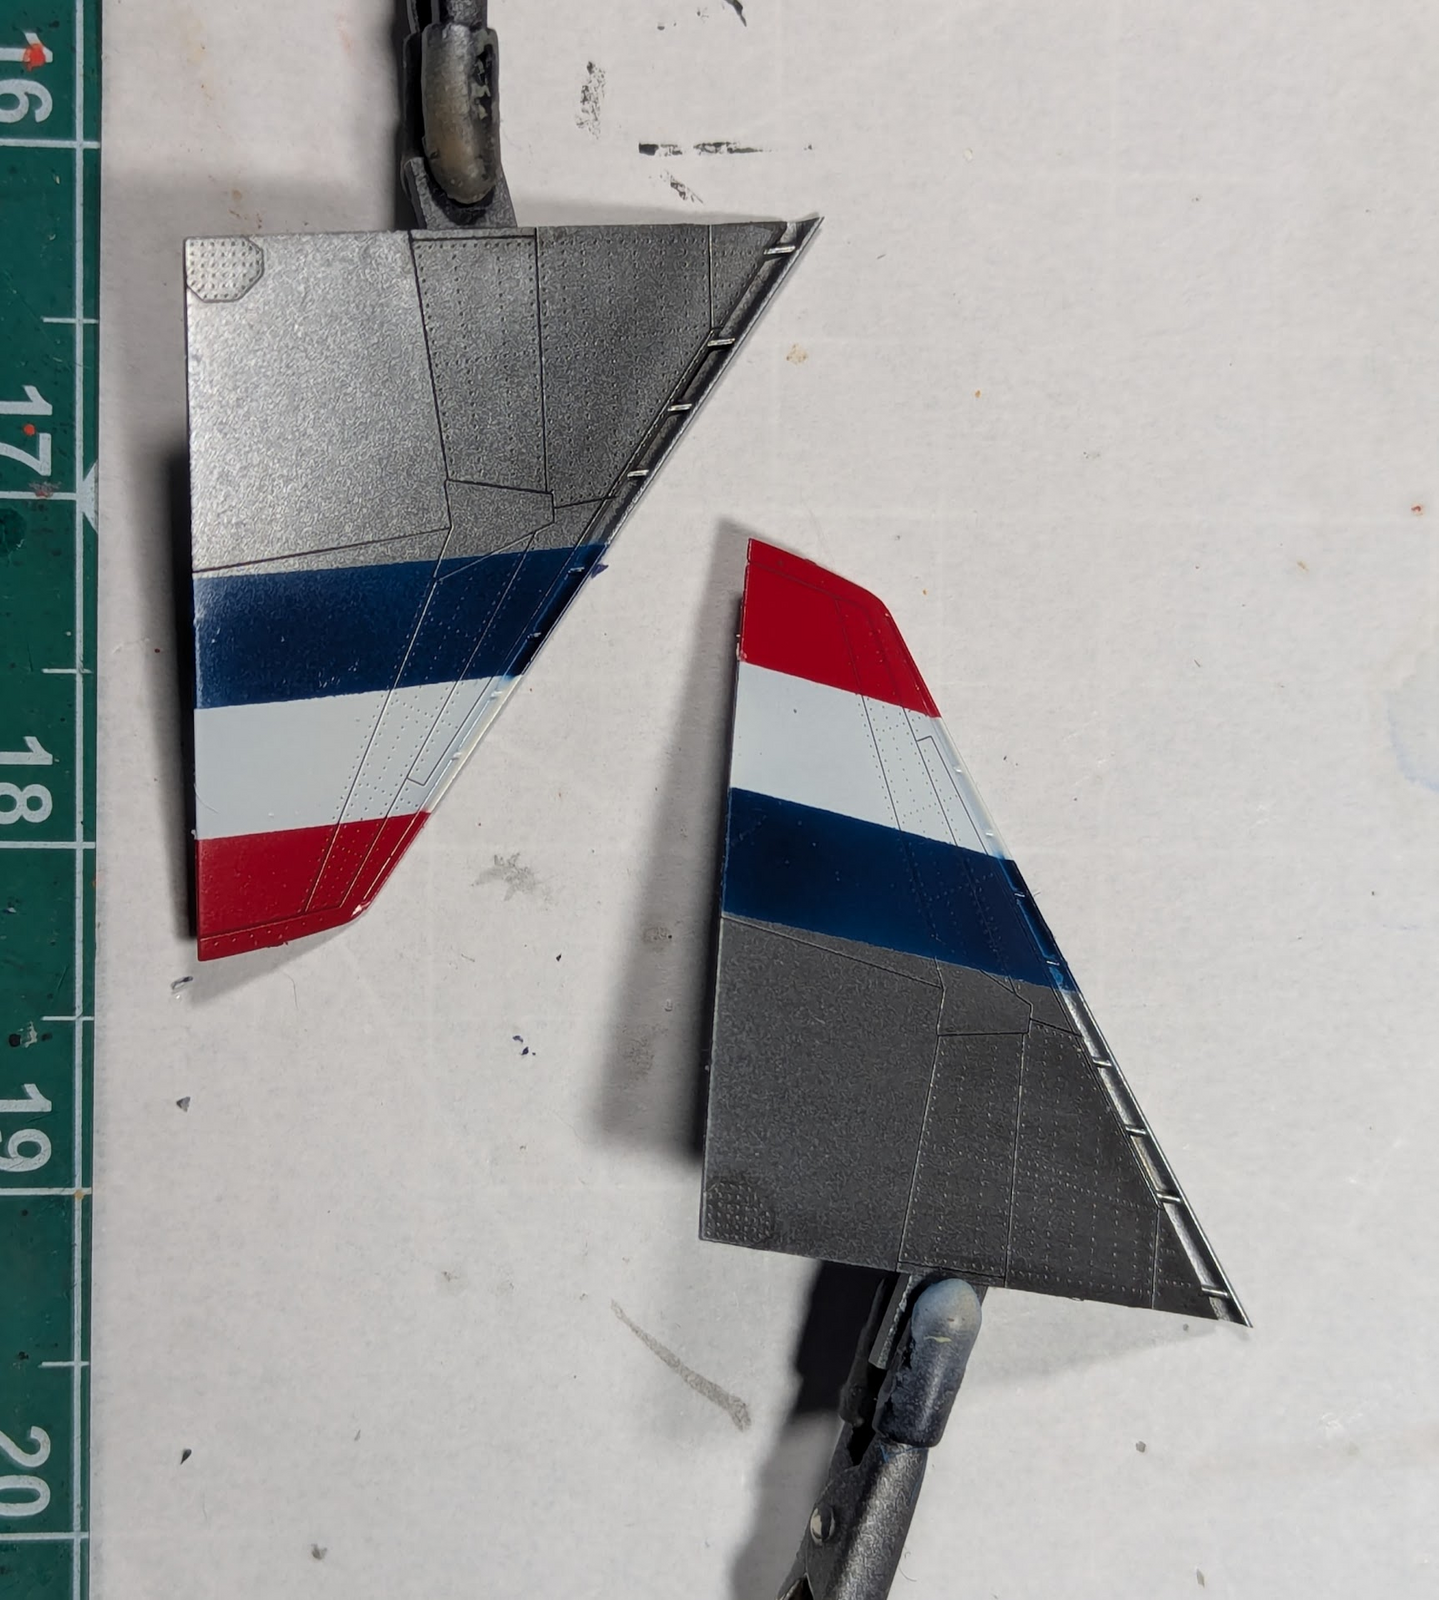
Initial testing (remember I intend to paint almost all of the stickers) is positive.

1770734234946.png


The apparent color variation, primarilly in the silver (Alclad) is due to lighting source and the subjects not being flat.
 
As an Amazon Associate we earn from qualifying purchases. Product prices and availability are accurate as of the date/time indicated and are subject to change.
That leading edge will need some silver on it, this was just to try out the color part. Both the blue and the red went on top of a white undercoat.
 
LOOK very good Edbert should be a nice colourfull model very well done so far
chrisb
 
Pilot uniforms were overall dark blue, usually with red helmets. That was easy enough, but I decided they should have red gloves too. Now it looks like Spiderman is in the cockpit, will have to consider at least painting the gloves.

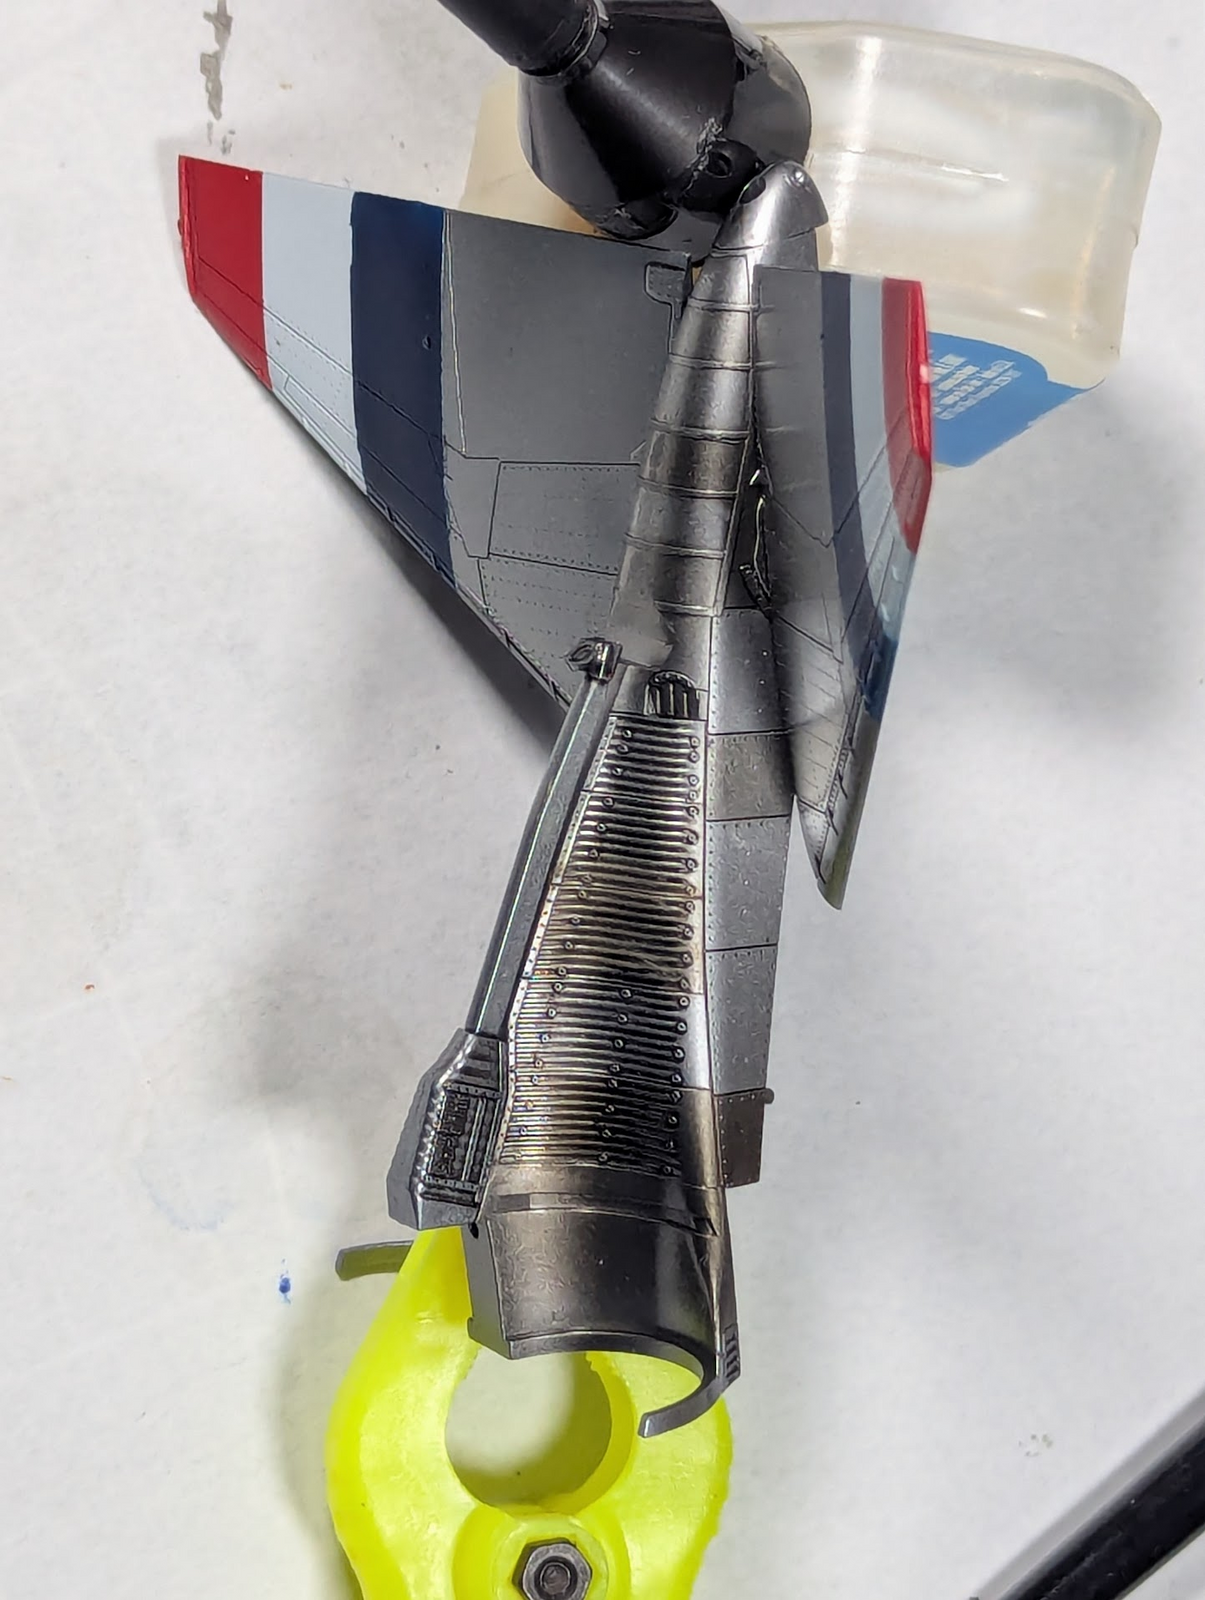
So I directed attention to the metallic rear section instead.

1770845866788.png


At least this angle shows the reflectiveness (?) of the paint.
 
I think this applies to aircraft (literally) and automotive subjects...If I want to apply a gloss white top-color, should I do a black-base to enhance panel lines or a white/gray primer.

Typically the only gloss aircraft I do are bare-metal, and of course a gloss black base is recommended for that, because it is about the contrast and color variations.

In this case, it is a solid gloss-white that gets washed and polished for air shows. Just wondering about an opaque gloss white. What would you do?
 
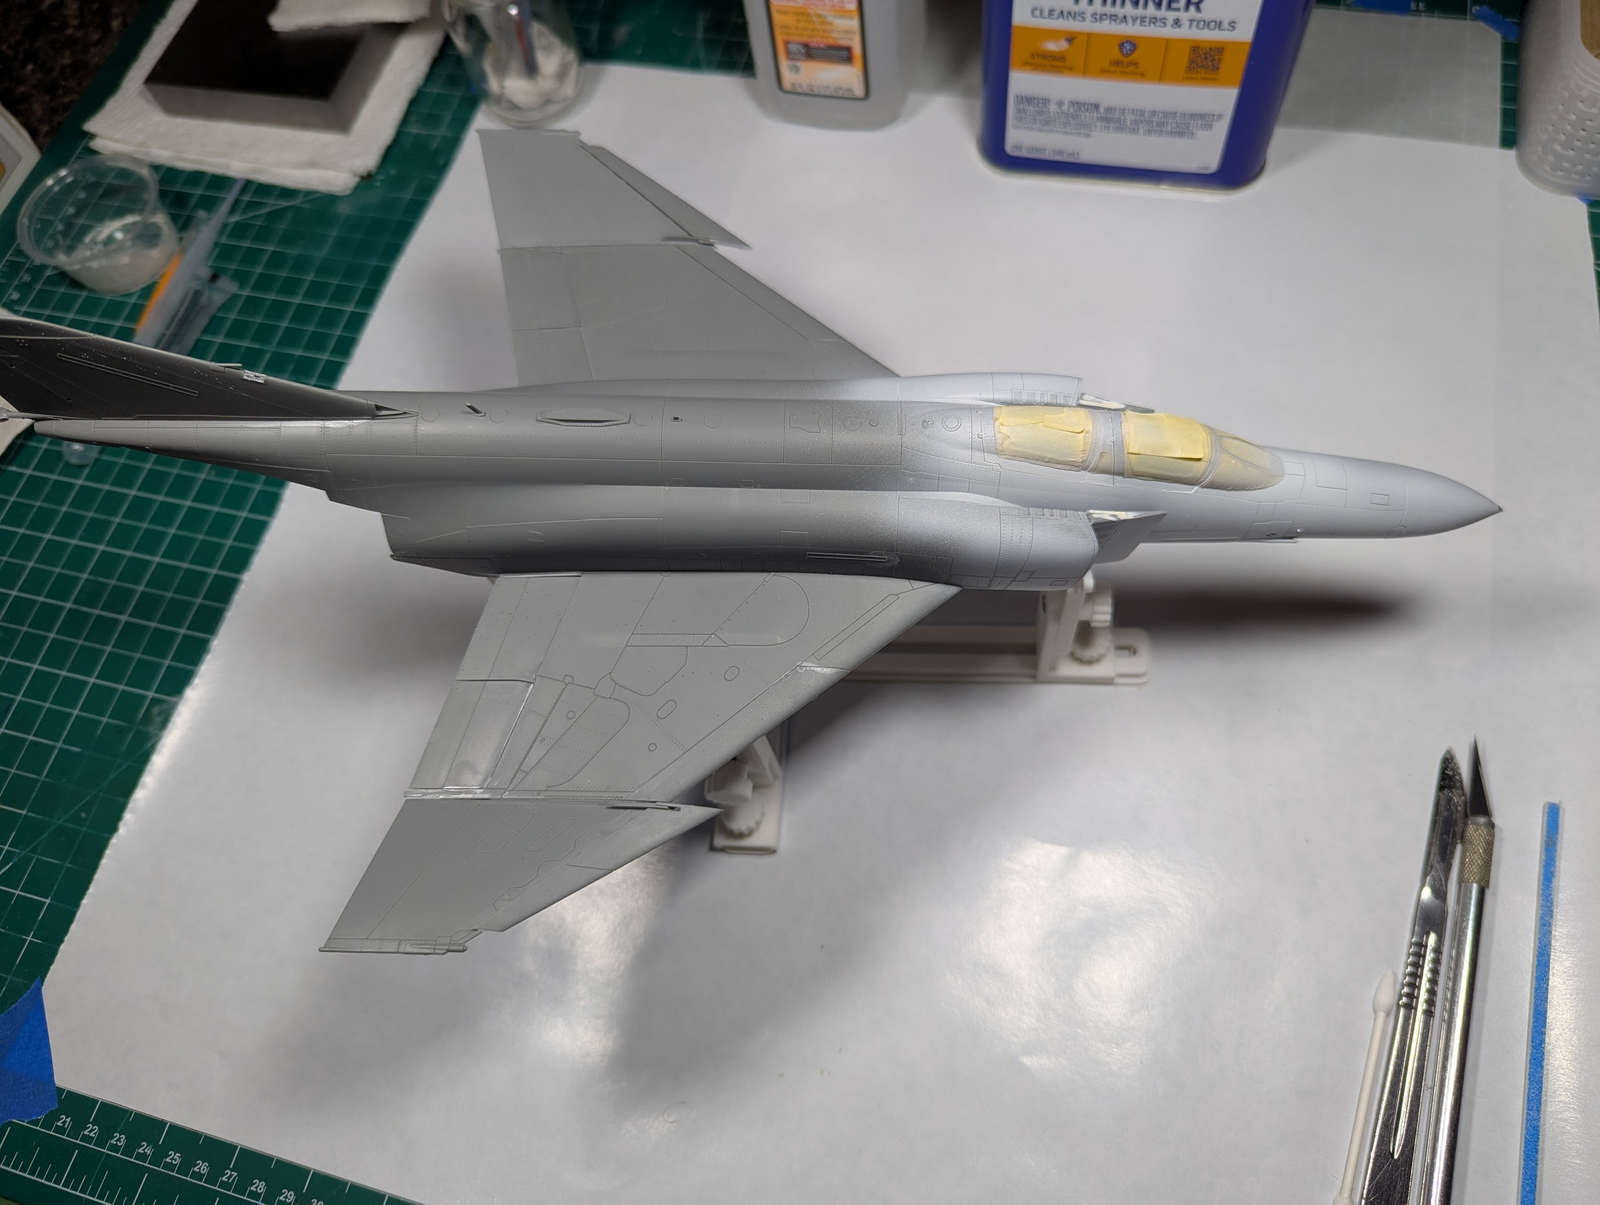
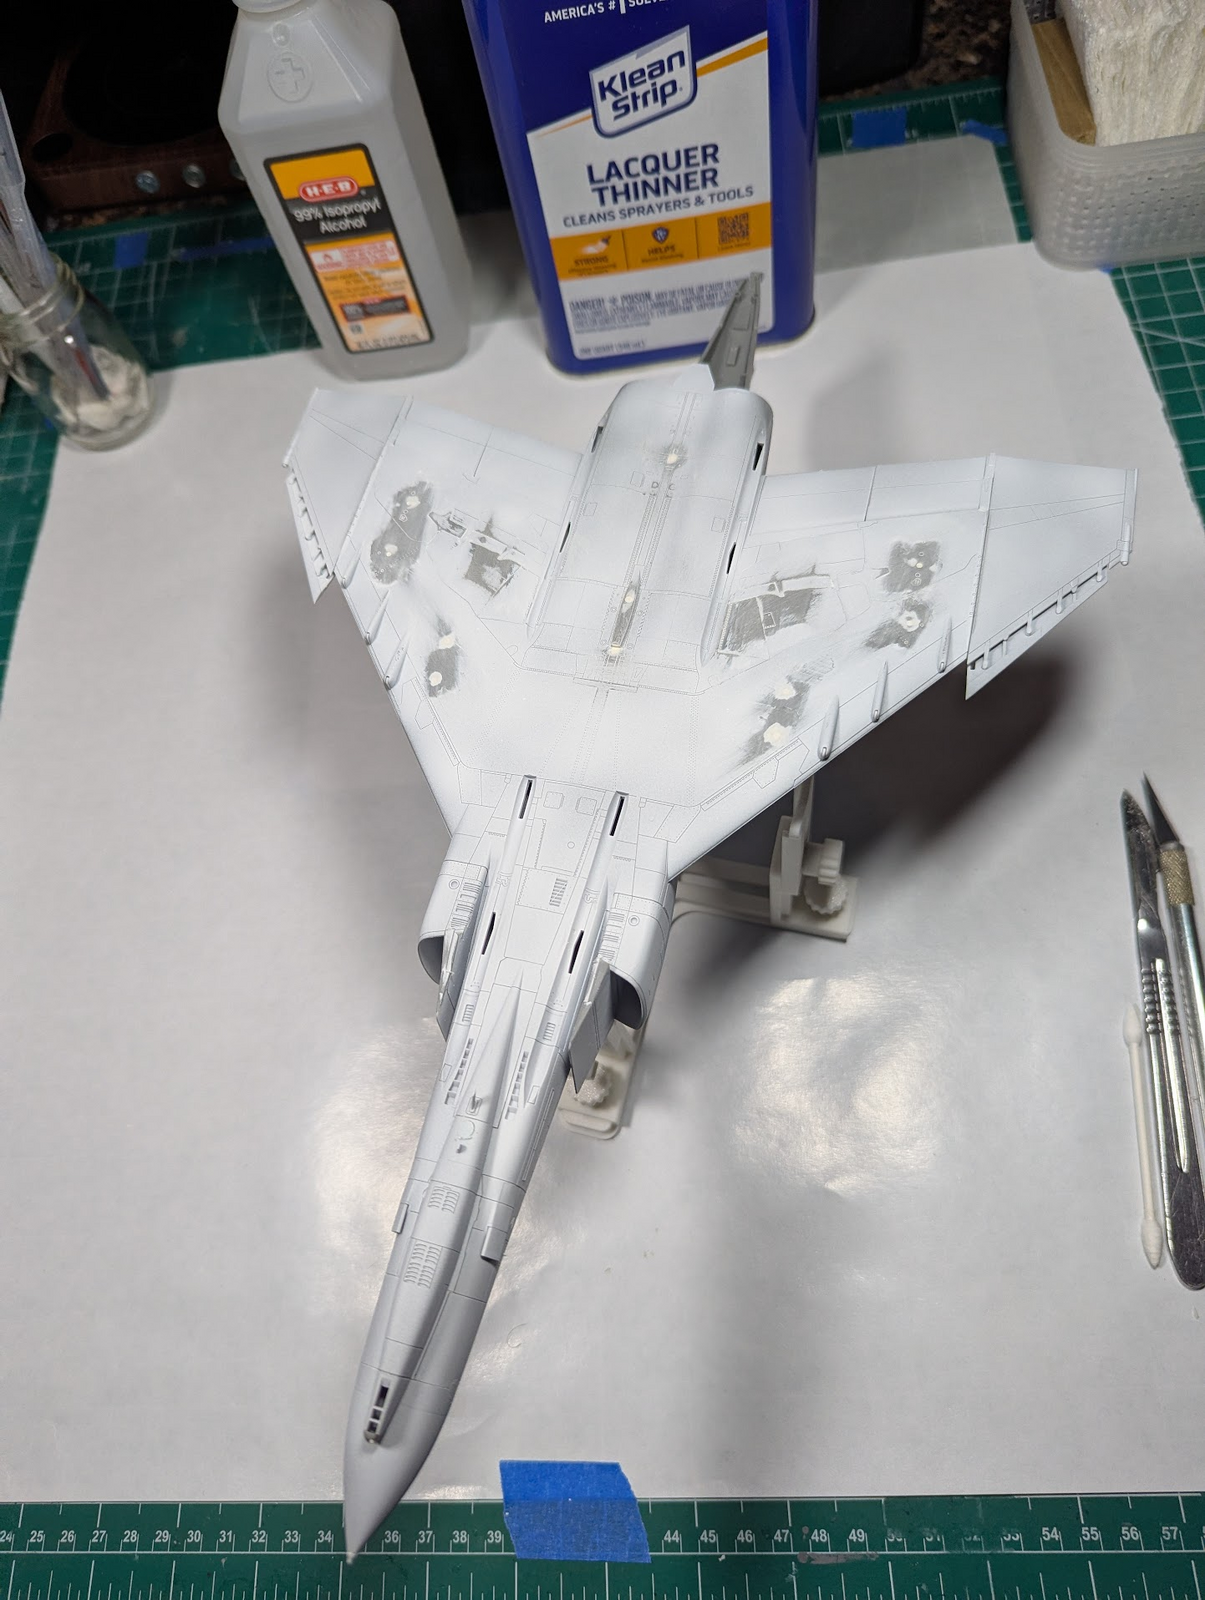
Full disclosure, I kinda started with white. This is Mr. Finishing Surfacer 1500 in white. This layer is there to find flaws and allow final sanding though. I'm wrapping that up and intend to put the actual pre-paint coat down tomorrow.

1771287745531.png

1771287761839.png
 
I would NEVER use that harsh big-box-store thinner on my paint (if you are wondering) I use it as putty-thinner and Q-tip/airbrush cleaning only.
 
Going to mount it on a stand?
Of some sort yes, have not decided details at this time.

There are hundreds of "stands", and I can 3D print in plastic or resin. But right now I am thinking of acrylic rods in the Jet-exhausts. I have tooling and experience at bending acrylic for PC water-cooling. I think I could do an interesting mount with that. Air shows do not typically have the flames of AB showing, they are more into smoke effects. Do not think I want to try the smoke stuff though, so options are WIDE open now.

Maybe the typical mount makes more sense.
 
What would you do?
I'd put silver under the white. Most white paint, especially gloss, has very poor "hide." I think that is partially due to titanium dioxide being a very heavy pigment. I also would use a flat white, as it has better hide than the gloss. Once the painting is done, overcoat with a clear gloss.
 
I'd put silver under the white. Most white paint, especially gloss, has very poor "hide." I think that is partially due to titanium dioxide being a very heavy pigment. I also would use a flat white, as it has better hide than the gloss. Once the painting is done, overcoat with a clear gloss.
Would you paint the silver over the entirety or use it as a pre-shade on panel lines? I have Mr. Surfacer 1500 in white for coverage and opacity.

Too late on the gloss paint though. I was going to treat this aircraft to an automotive paint approach, that is what these guys specialize in.

1771345139712.png
 
Would you paint the silver over the entirety or use it as a pre-shade on panel lines?
I'd use silver as a base coat. However, with your Mr. Surfacer coat, I don't think you'll need it. I'd still use a darker color for pre-shading the panel lines. Perhaps a blue, rather than a black?
 
I like what you are doing with this, those metallics look exquisite,

for the pre shading I'd look at using a gray which would just show up enough to 'highlight ' the panel but wouldn't change the overall white topcoat too much, just a gentle hint of a darker panel line.
 
Pilot uniforms were overall dark blue, usually with red helmets. That was easy enough, but I decided they should have red gloves too. Now it looks like Spiderman is in the cockpit, will have to consider at least painting the gloves.

So I directed attention to the metallic rear section instead.

View attachment 179750

At least this angle shows the reflectiveness (?) of the paint.
I got a question about your process with the Alclad. After it's painted do you put down a clear varnish on top and what do you do about the decals? Alclad is a lacquer so I assume you use a lacquer varnish, or not? Can you clear lacquer over decals without ruining them?
 
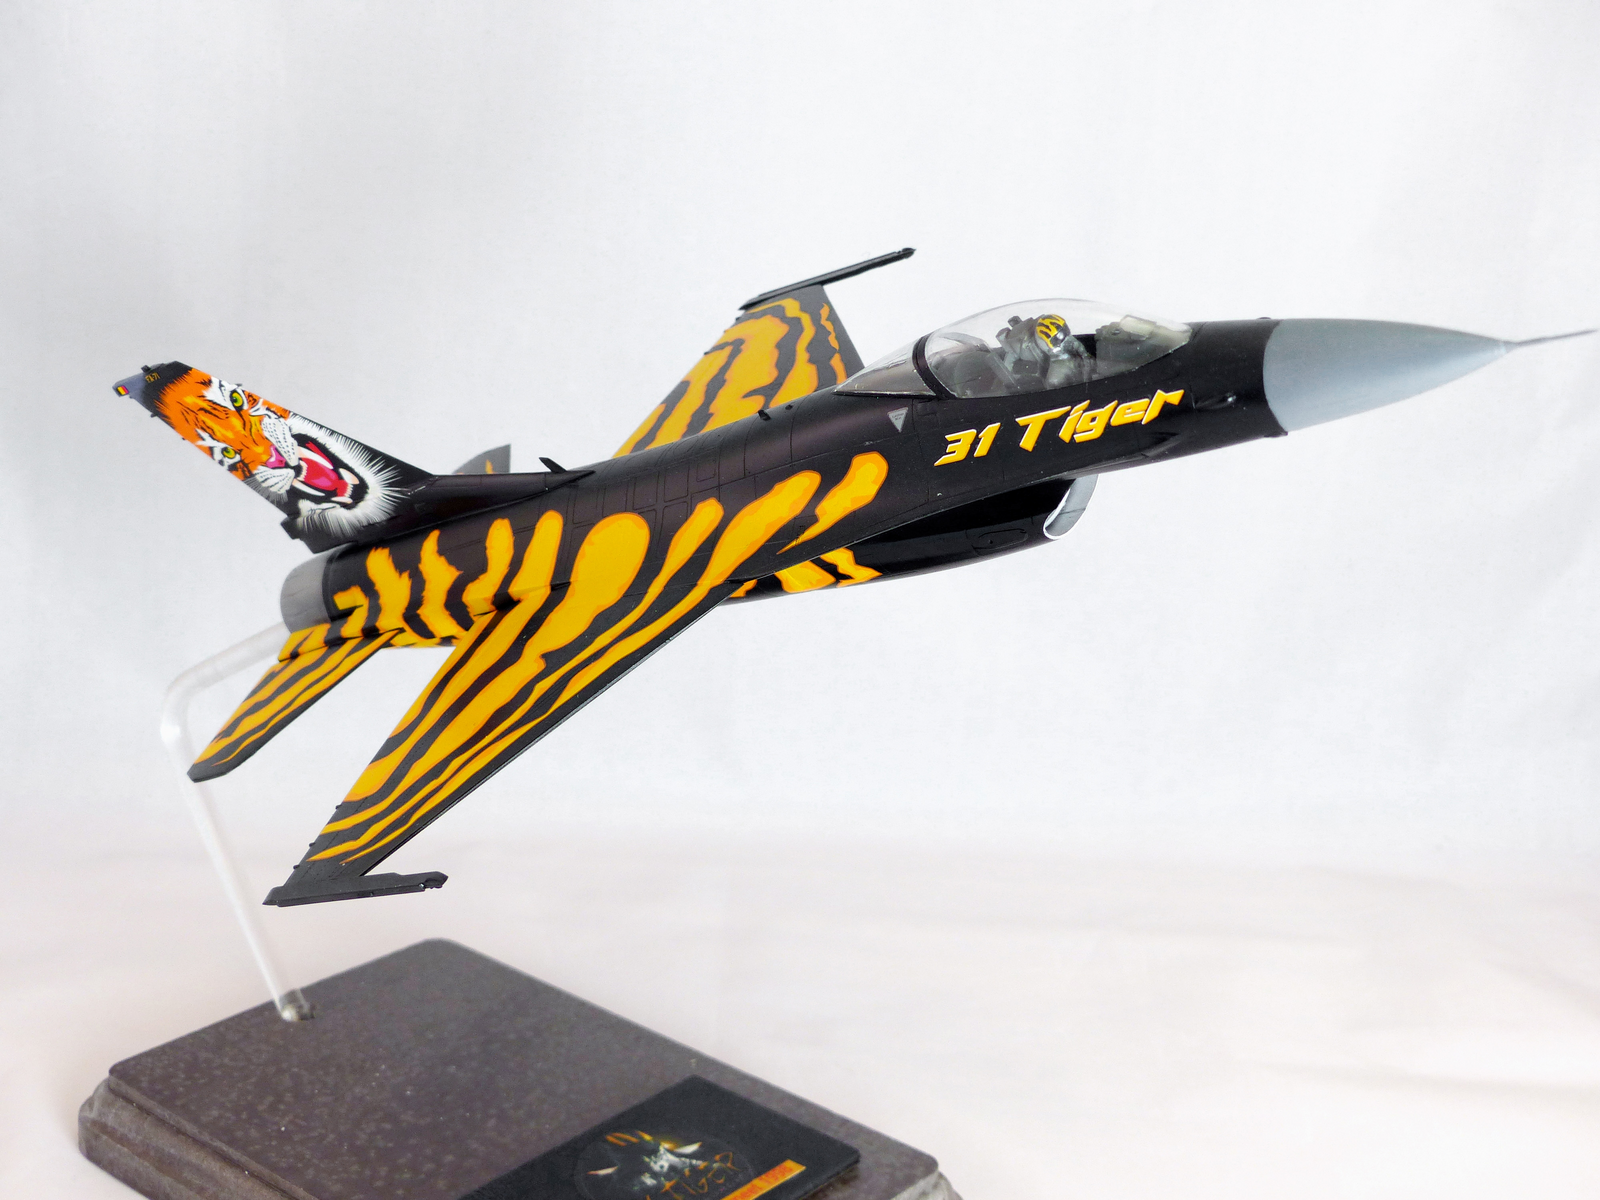
For display I am thinking of something like this.

1771369011324.png

(not my model, not my photo, taken from finescalemodeler yet their page shows bad links)

I think I'll bank it harder, and to show top and bottom better I am thinking of a motorized base that rotates the rod. Most in-flight displays involve drilling holes and/or mounting hardware inside the model. Not only have I sealed mine up, but I'm not a fan of molesting the body like that. A simple rod up the exhaust seems easier.
 
I got a question about your process with the Alclad. After it's painted do you put down a clear varnish on top and what do you do about the decals? Alclad is a lacquer so I assume you use a lacquer varnish, or not? Can you clear lacquer over decals without ruining them?
I use Alclad Gloss Black Base as a primer, I know it is not, but I do. If you try to thin it out using Alclad thinner it might take 14-days to harden/cure, don't do that :)

The gloss black is important to make the silver look right when sprayed thin. Once there's a full (enough) covering of silver, I come back in with Tamiya acrylic "smoke" (X-19) with varying levels and masking portions/components in between to get the color variations.

Before applying stickers I use a gloss coat, sometimes X-22 and sometimes floor polish, depending on mood.
 
Last edited:
What do you do with prop planes?
This will be my 1st ever wheels-up display. I'm always a cockpit-open kind of guy. So "I don't know" is the only answer I have.

A few months back I was a judge (in training) as an IPMS show, following their rules. I saw over half of the entries be ruled out of competition just because of landing gear and associated parts. Decided then and there that if I want to try and enter a contest I need to do it in-flight.

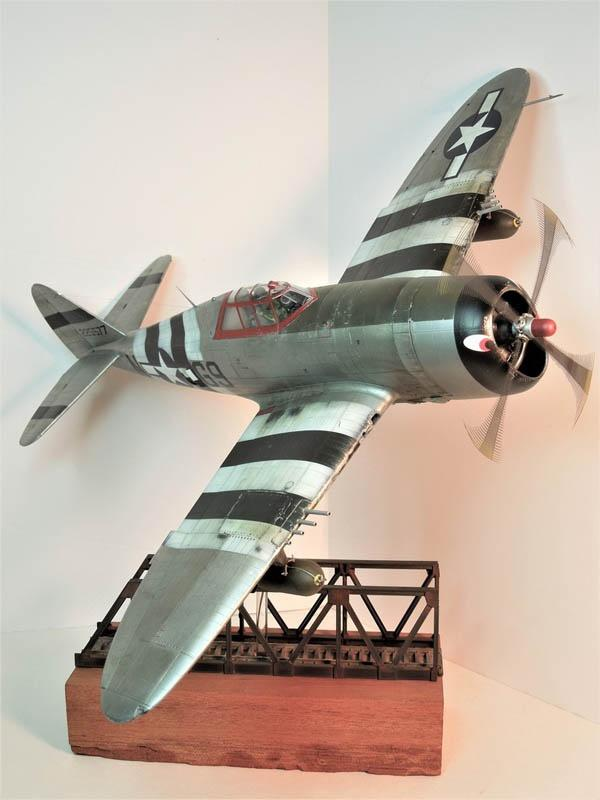
These can be printed with clear resin in the 3D printer I own. If I were to do this (likely) it will be the route I take.
1771370648431.png
 
Decided then and there that if I want to try and enter a contest
Competition is over-rated. As Patton may have said, "All glory is fleeting." To paraphrase some lines from The Magnificent Seven:

"
If he is the best with airbrush and hobby knife, with whom does he compete?"

"Himself."

I try to make each build better than the last. If I succeed, I'm happy. If I fail, then maybe I learned something—and I love learning. To each his own. I wish you the best in pursuit of IPMS gold.
 
I started on this a while back, never posted anything about it so here's a start.

I made the 4-ship 1/72 Phantom T-bird kit as a child remember having the hanging from the ceiling. I am positive there was no paint, just slopped glue with fingerprints and crooked stickers.

I've been jonesing to make a new one since coming back to the hobby in 2024, but there are no new kits and despite there being some "not very old" ones on the market they are all pretty expensive all things considered. Also, despite the F-16 being one of my favorite jets I wanted an older one. F-100 was my first choice, followed by F86 or even F87. But back then they did not paint the dark blue thunderbird on the underside, that started with the F4, so...Phantom it is!

I was able to purchase a Meng "E" model, open box sealed bags at my local IPMS show last fall for $20 off lowest retail. I know it was the E-models they used during the short period of time before they moved to the T38. I also found out at that show as my 1st time ever judging that landing gear issues disqualify 40-60% of all models from a prize. Depsite always building open cokcpit models with no pilot, I decided to do an in-flight kit and what better for that than a T-bird?

View attachment 179098
This is the kit I bought, Meng is one of my favorite "new" manufacturers. I knew I'll need to address the vulcan, but what I did not know at the time was that the T-birds used the "hard wing" versions while the E-models usually had slats. I'm guessing here, that while the aerobatics are definitely "maneuvering" it is not the same as ACM, and that slat deployment might increase turn-rates it might cause movements less than ideal with a wingman feet away. So how to conver the slat-wing to a hard-wing is something I've put off until later.

Assembly went quick and flawless as is my experience with Meng kits. I realized just now that I did not take pictures of that intial assembly, probably becuase it was so fast and easy. But below are some shots of the status as of today.

View attachment 179099
View attachment 179100

Learning from last time, I painted white (final exterior color) in the gaps behind the intakes to avoid dusting with the final coat. The cockpit came out okay, I did not go crazy on it because with the wheels-up build the canopy will not only be closed but also full of human so even harder to see. It was at this point I realized Meng did not give me pilots, rut roh!

Time to get my inner Dexter out! (AKA dremel and X-acto)

View attachment 179101
From the spare-parts bin...the light gray was a Tamiya F-16 pilot, he looked good, but I need two. The darker gray is from a Meng EA-18, which should be a perfect fit for the Meng F-4 right? Wrong!

View attachment 179102

I had to grind large parts of his back, butt, and thighs to get him to fit into the ejection-seat. Then amputate both legs right below the knee, they fit now.

Not putting the wheels down save a HUGE amount of time and effort (painting/assembling/detailing), and I have not done that since at least 40 years ago. I can see a few spots need attention to get perfect, but no big deal there.

View attachment 179103
I'm thinking that all I need to do for the hard wing is grind off those bulges and extensions and glue the slats flush. If anyone knows please advise. Of course I'll leave the missiles off and the drop tanks and ordinance. Should the holes where the AIM-120s go be adjusted?

The final coat will be gloss-white of course, and I do not intend to do any pre or post shading, maybe some very light panel-lining, we'll see. As of right now I am planning on painting the big-blue-bird on the underside, as well as the striping. Leaving only the tail (circle of stars) and small items as stickers. Will have to see how that goes, lots to do before then. I may use the horizontal stabs as a test. I did buy a sticker sheet to use as a template, so can back out of that idea.
I'm curious what about landing gear penalizes most people?
 
Alclad is a lacquer so I assume you use a lacquer varnish, or not? Can you clear lacquer over decals without ruining them?
I use Alclad clear gloss lacquer over decals. Works just fine. And the great thing about it is that you can apply Ammo enamel washes over it and just wipe off the excess with a paper towel (but not the Tamiya panel washes; those are a pain to clean off).
 
This will be my 1st ever wheels-up display. I'm always a cockpit-open kind of guy. So "I don't know" is the only answer I have.

A few months back I was a judge (in training) as an IPMS show, following their rules. I saw over half of the entries be ruled out of competition just because of landing gear and associated parts. Decided then and there that if I want to try and enter a contest I need to do it in-flight.

These can be printed with clear resin in the 3D printer I own. If I were to do this (likely) it will be the route I take.
View attachment 180605
In this pic does the P47 have photoetched prop blades or 3rd print resin? Looks very nice.
I am not anti-competition and shows can be very motivating and I am open to critique, but what I want to avoid is starting to build models to suit others' tastes. If I build a model landing gear up or any other way I just want to do my absolute best in making it look the way I want it looking on my shelf and to do the original justice.
 
In this pic does the P47 have photoetched prop blades or 3rd print resin?
I cannot be sure, it looks like PE except that it also looks at keast semi-transparent. Wonder of it could be both?

I hear you on the show/contest topic, I've never entered one before and kind of want to. That just proves I typically build for myself.

But also, there were so many entries, and our shows are blind judging on purpose, so I did not know whose model belonged to who, so zero opportunity to provide feedback unless the contestant came to us.
 

Latest posts

Back
Top