USAF Thunderbird - Early '70s edition

Scale Model Addict - Model Tips, Guides, Tools & Tech, Tutorials, and Community

Help Support Scale Model Addict:

I'm curious what about landing gear penalizes most people?
Crooked bits, misalignment (one side does not match the other), doors/covers not straight or even. Basically crooked stuff. It was our first step, look at all 20+ models (1/48 propellers were split into 4 categories since there were about a hundred of them) and rule out any with crooked stuff, including antennas/aerials, propellors, guns, insignias too high or low on one side or the other. Funny that if the roundels were too far inboard it was okay as long as it was that way on both sides. Then we moved to things like seams and quality of paint application.

I was equally surprised at what does not count for anything, like correct markings, camouflage (either colors or hard-vs-fuzzy edges), incorrect components, cockpit details (biggest surprise there, hyper detailing gets no credit unless as a tie-breaker), presentation (detailed base of piece of wood).
 
Crooked bits, misalignment (one side does not match the other), doors/covers not straight or even. Basically crooked stuff. It was our first step, look at all 20+ models (1/48 propellers were split into 4 categories since there were about a hundred of them) and rule out any with crooked stuff, including antennas/aerials, propellors, guns, insignias too high or low on one side or the other. Funny that if the roundels were too far inboard it was okay as long as it was that way on both sides. Then we moved to things like seams and quality of paint application.

I was equally surprised at what does not count for anything, like correct markings, camouflage (either colors or hard-vs-fuzzy edges), incorrect components, cockpit details (biggest surprise there, hyper detailing gets no credit unless as a tie-breaker), presentation (detailed base of piece of wood).
Yes I know a guy who judges and he told me the hyper detailing can actually hurt the judging. It creates more opportunities for mistakes. Like you said details may help with tie breakers. Now that I think about it, he was telling me about a tie that was resolved when they finally noticed a small mistake with an added detail. They hadn't noticed until they were basically putting both the models under a microscope so to speak.
 
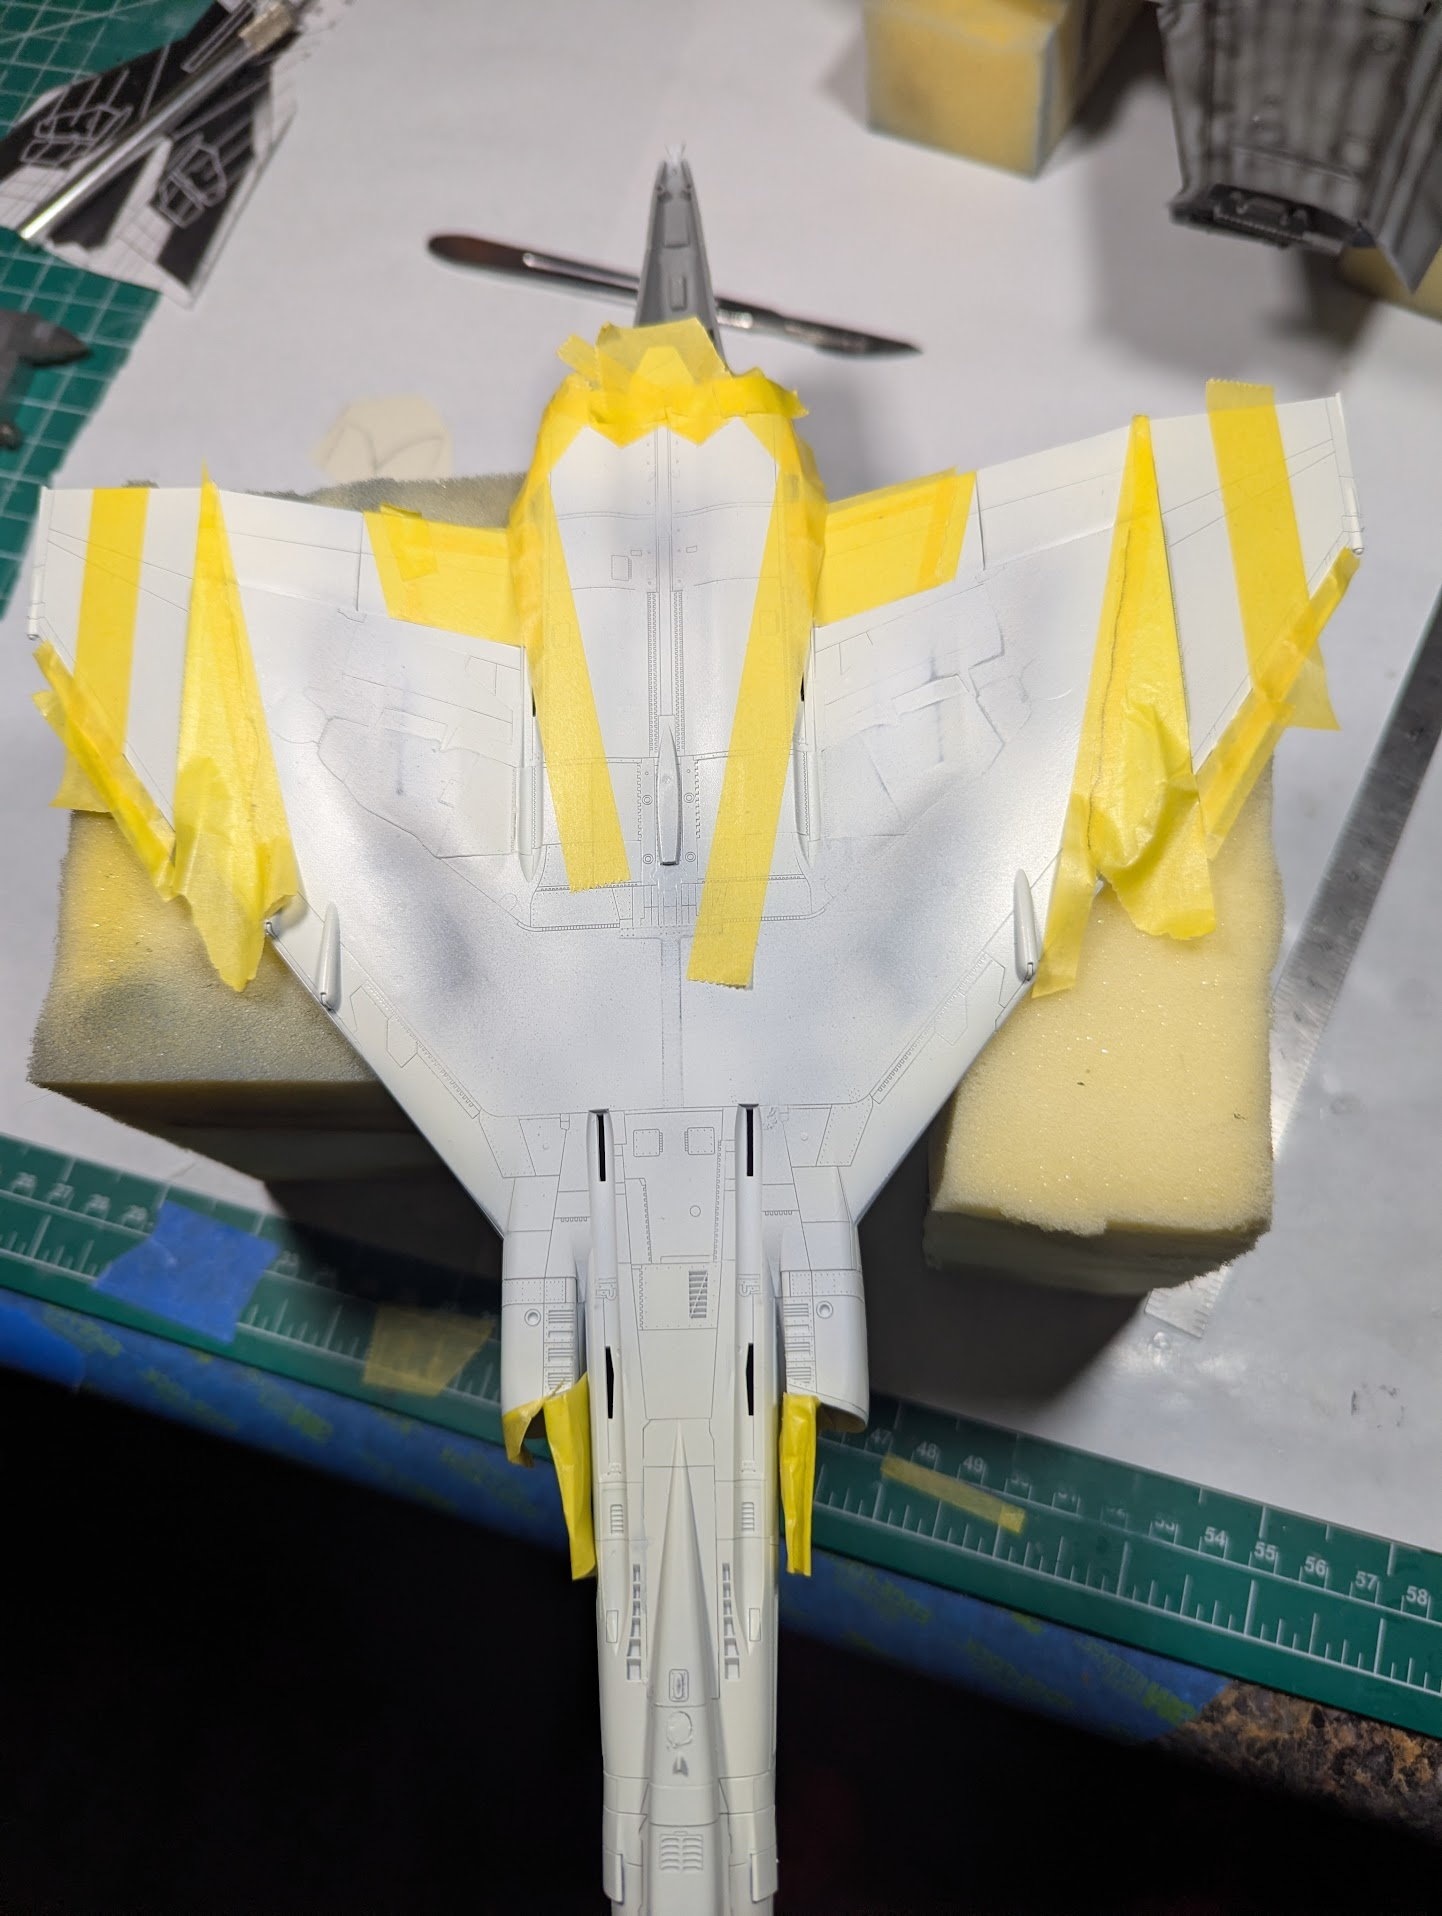
I feel like I have the gloss white base down, but that is the easy part. Now begins the masking for the T-bird underside.

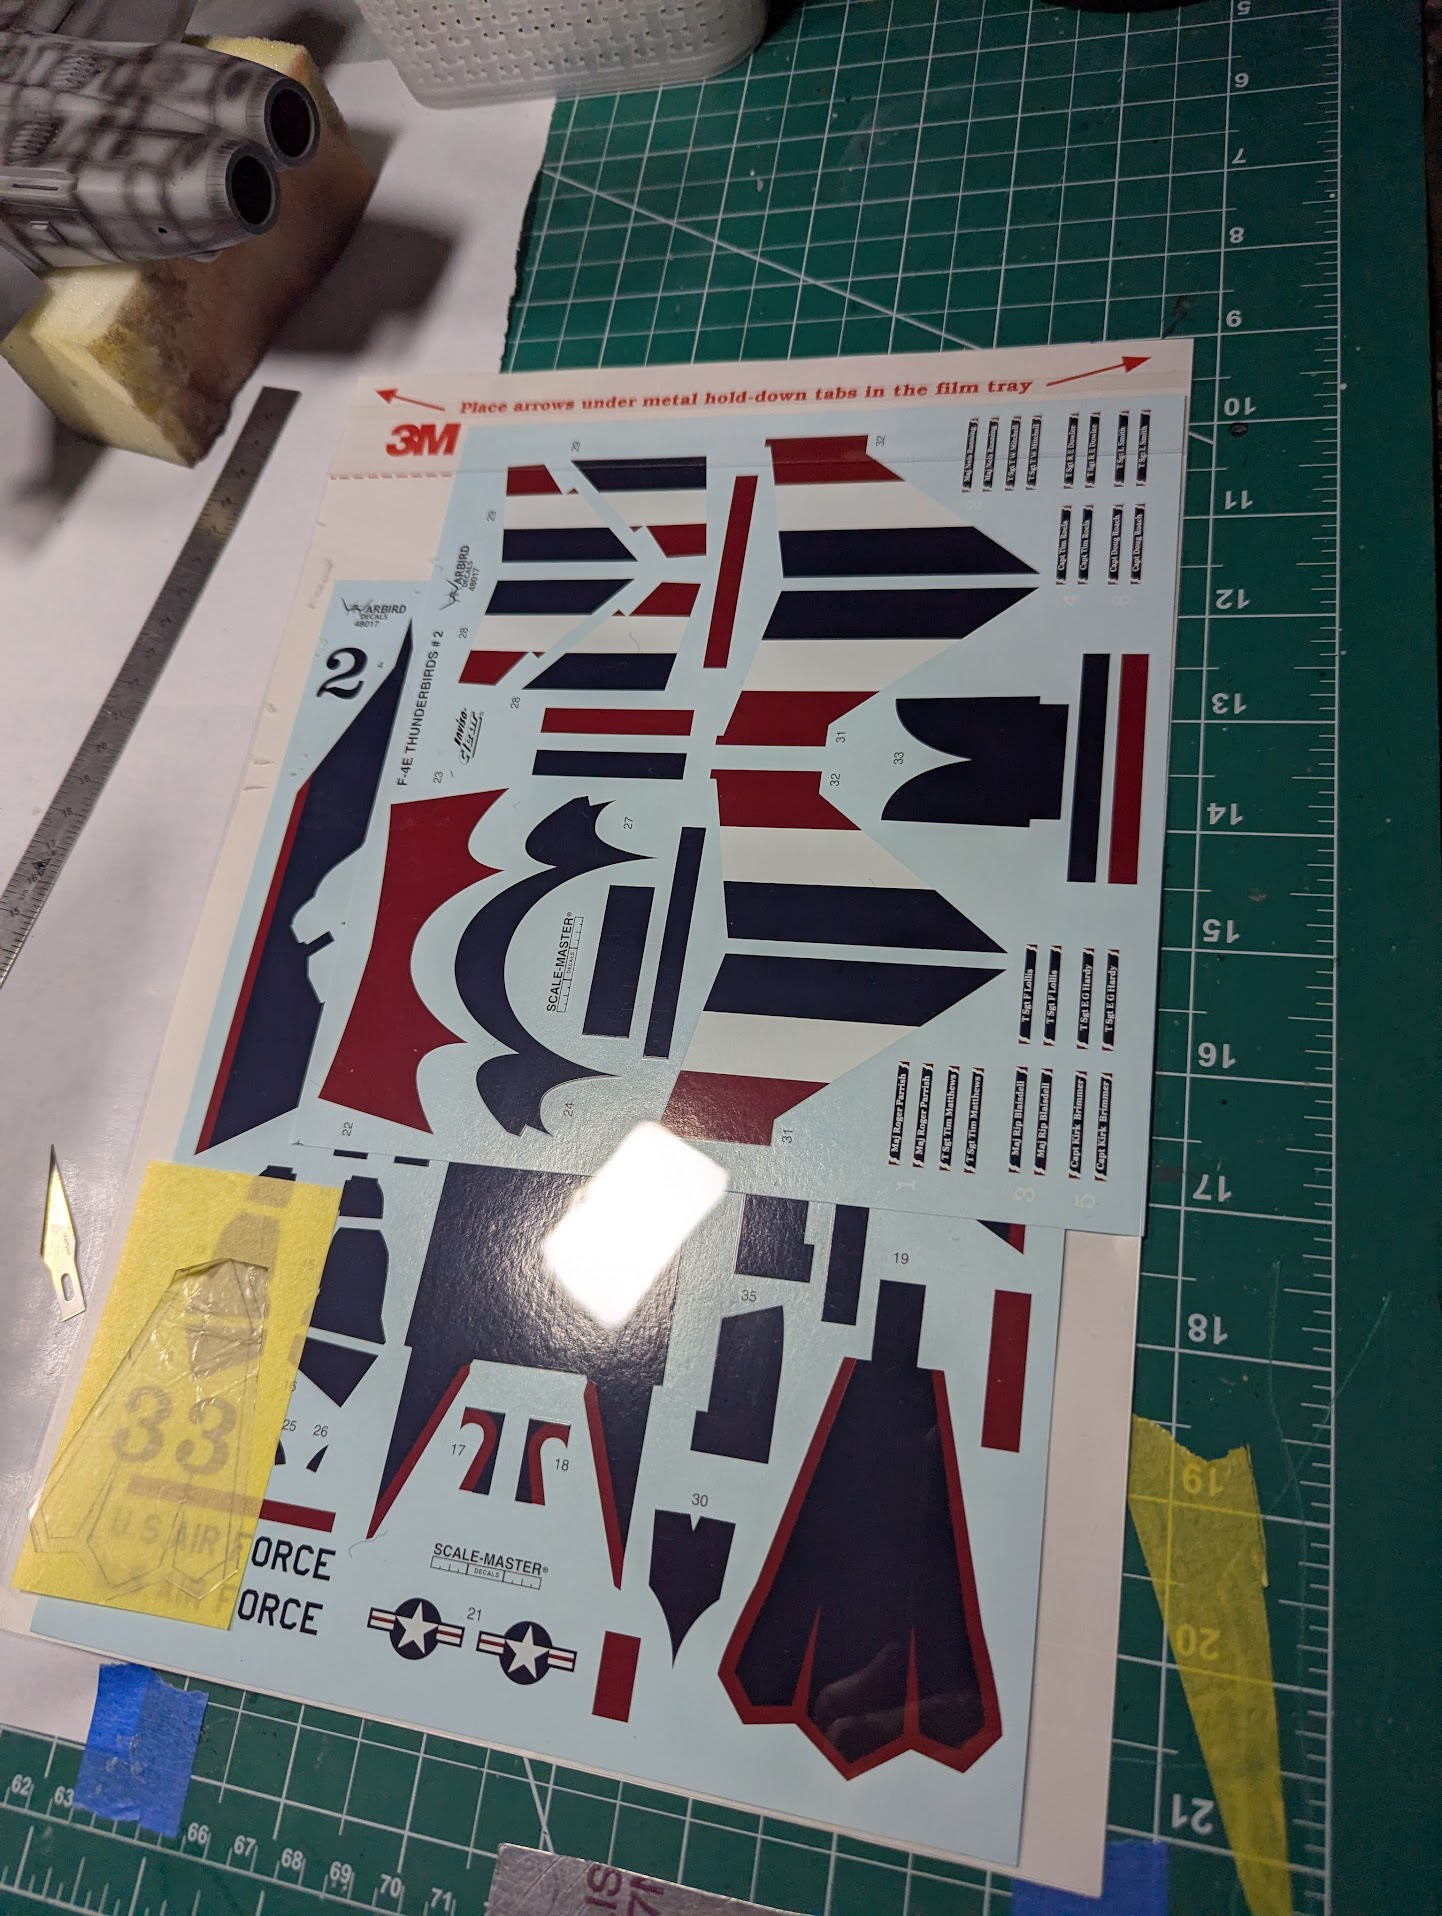
I did reconsider painting it as opposed to using stickers. But when trying to use the sticker set as patterns...I realized they were off.

Could be Meg's fault, could the the 3rd party stickers, but I am taking this as a sign, that paint was the right choice.

1773106217884.png

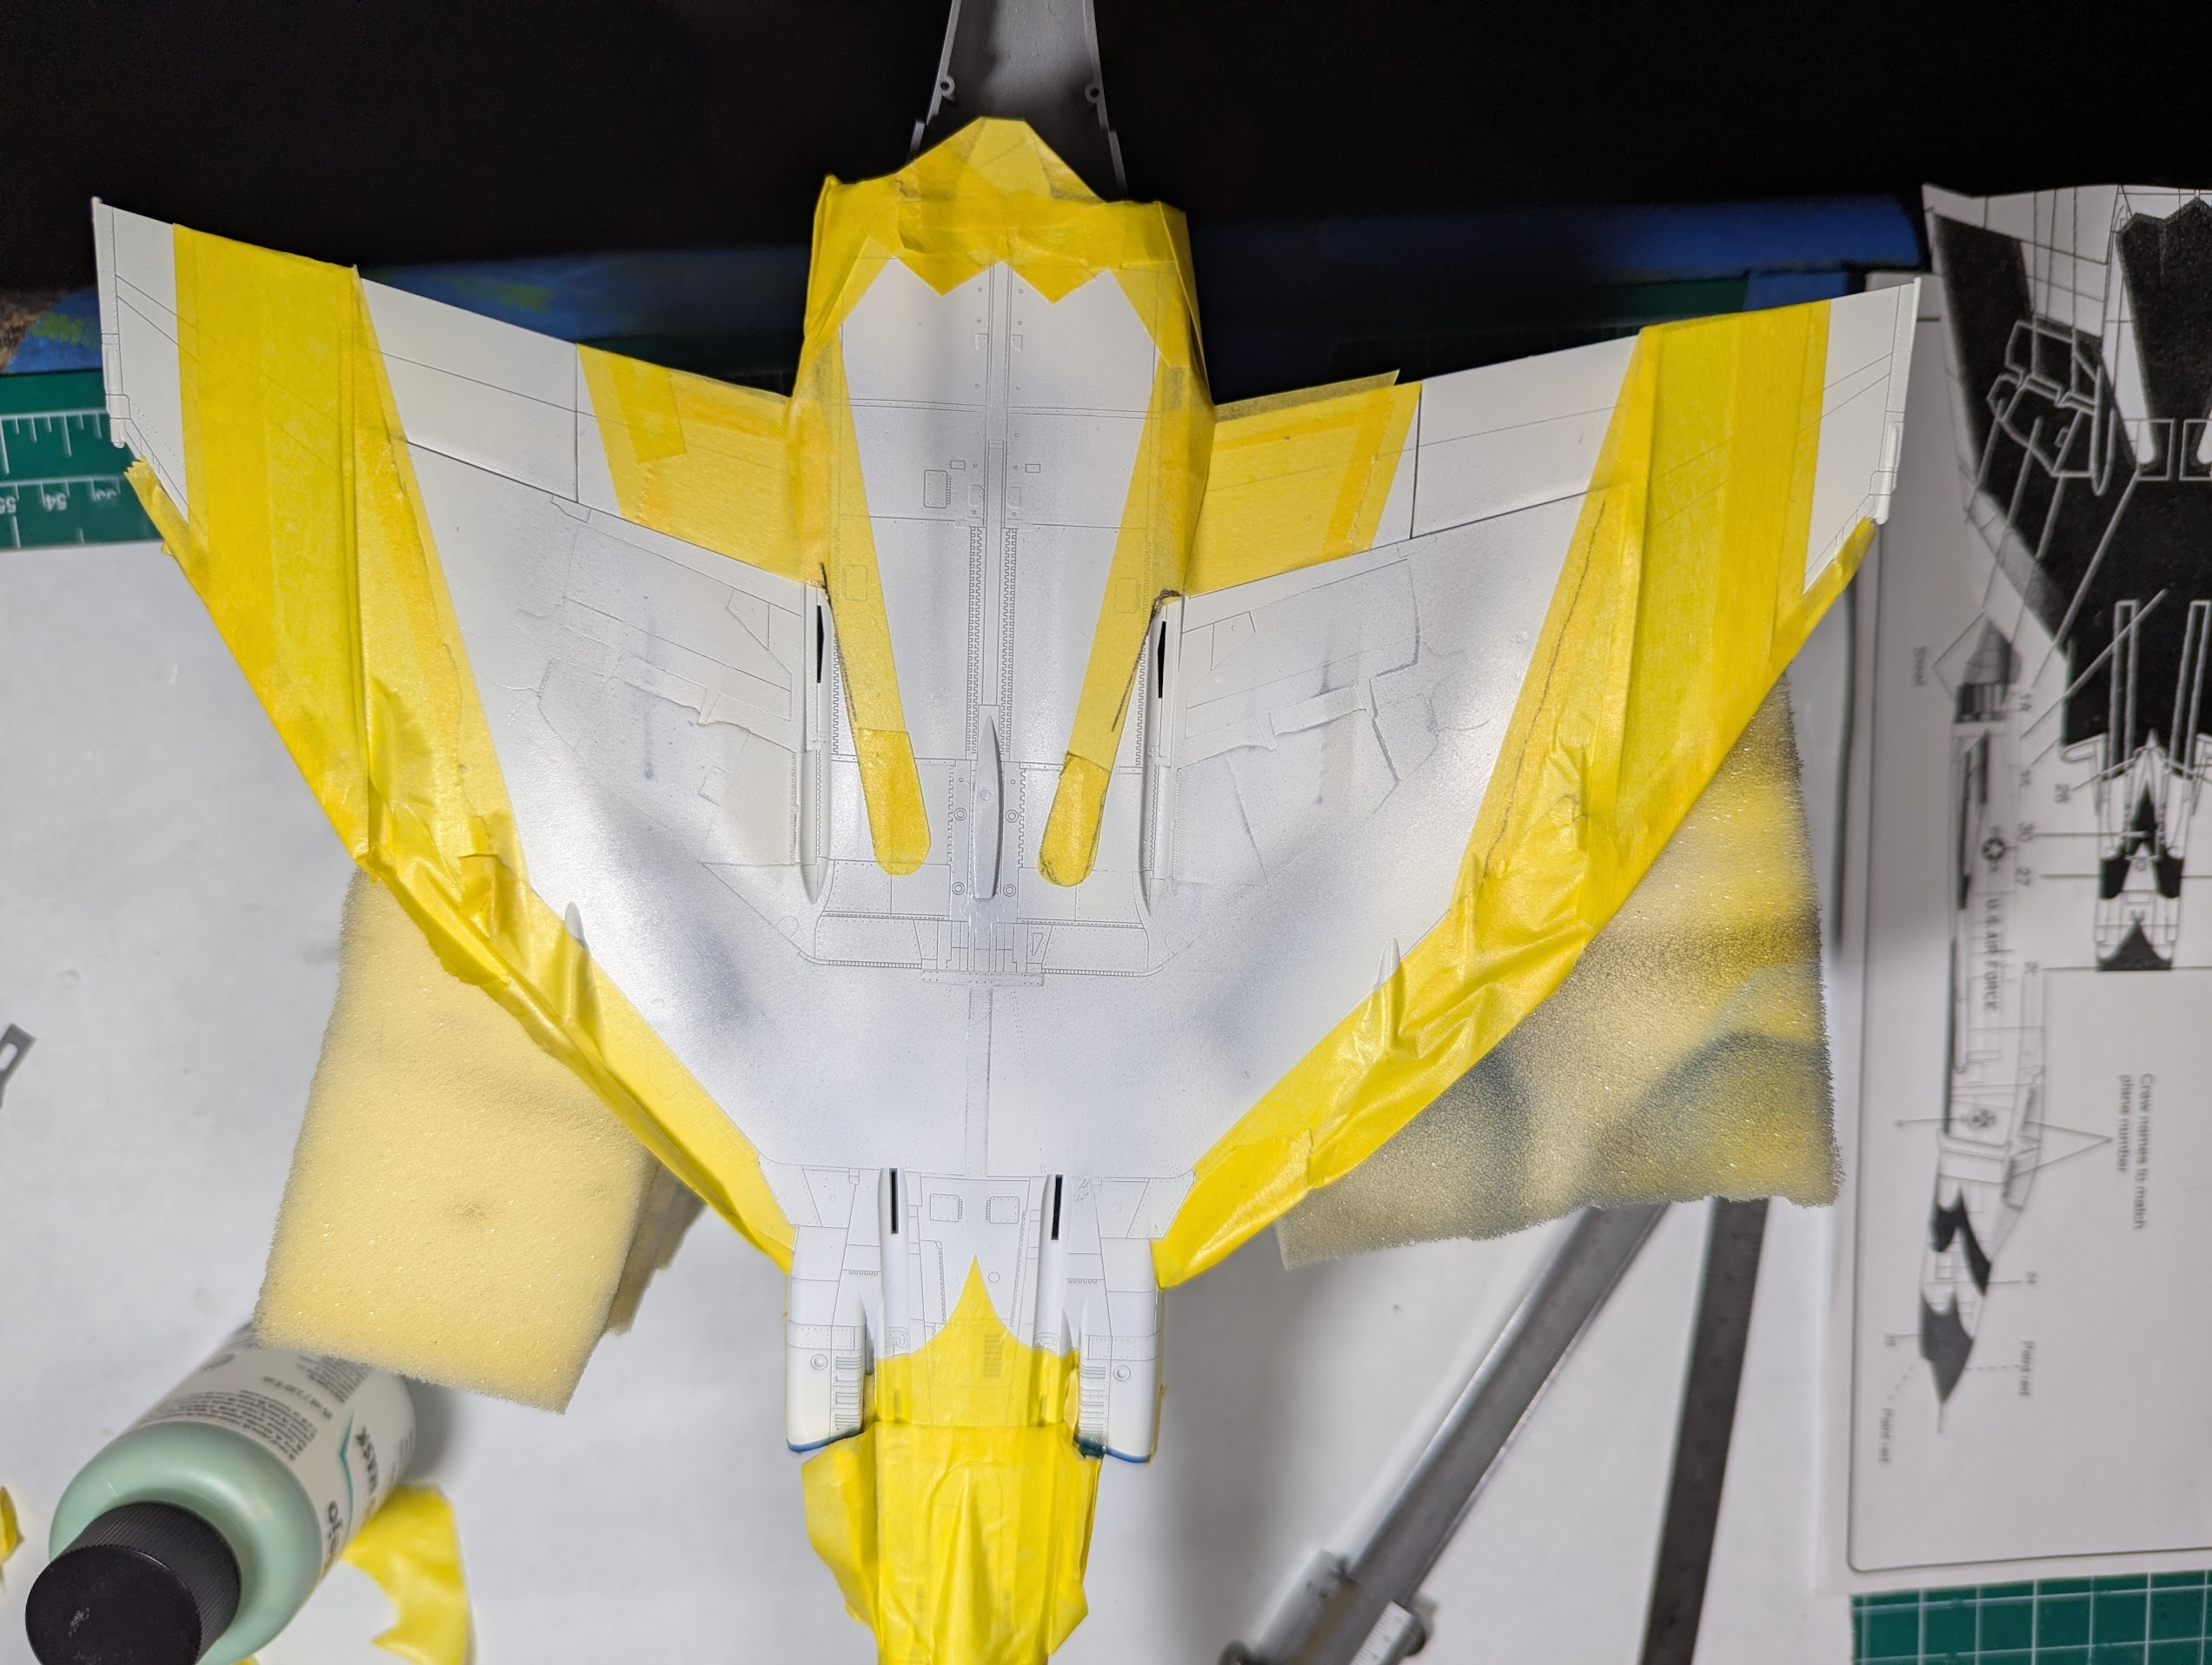
The straight line part was easy-peasy with tape.

1773106160583.png

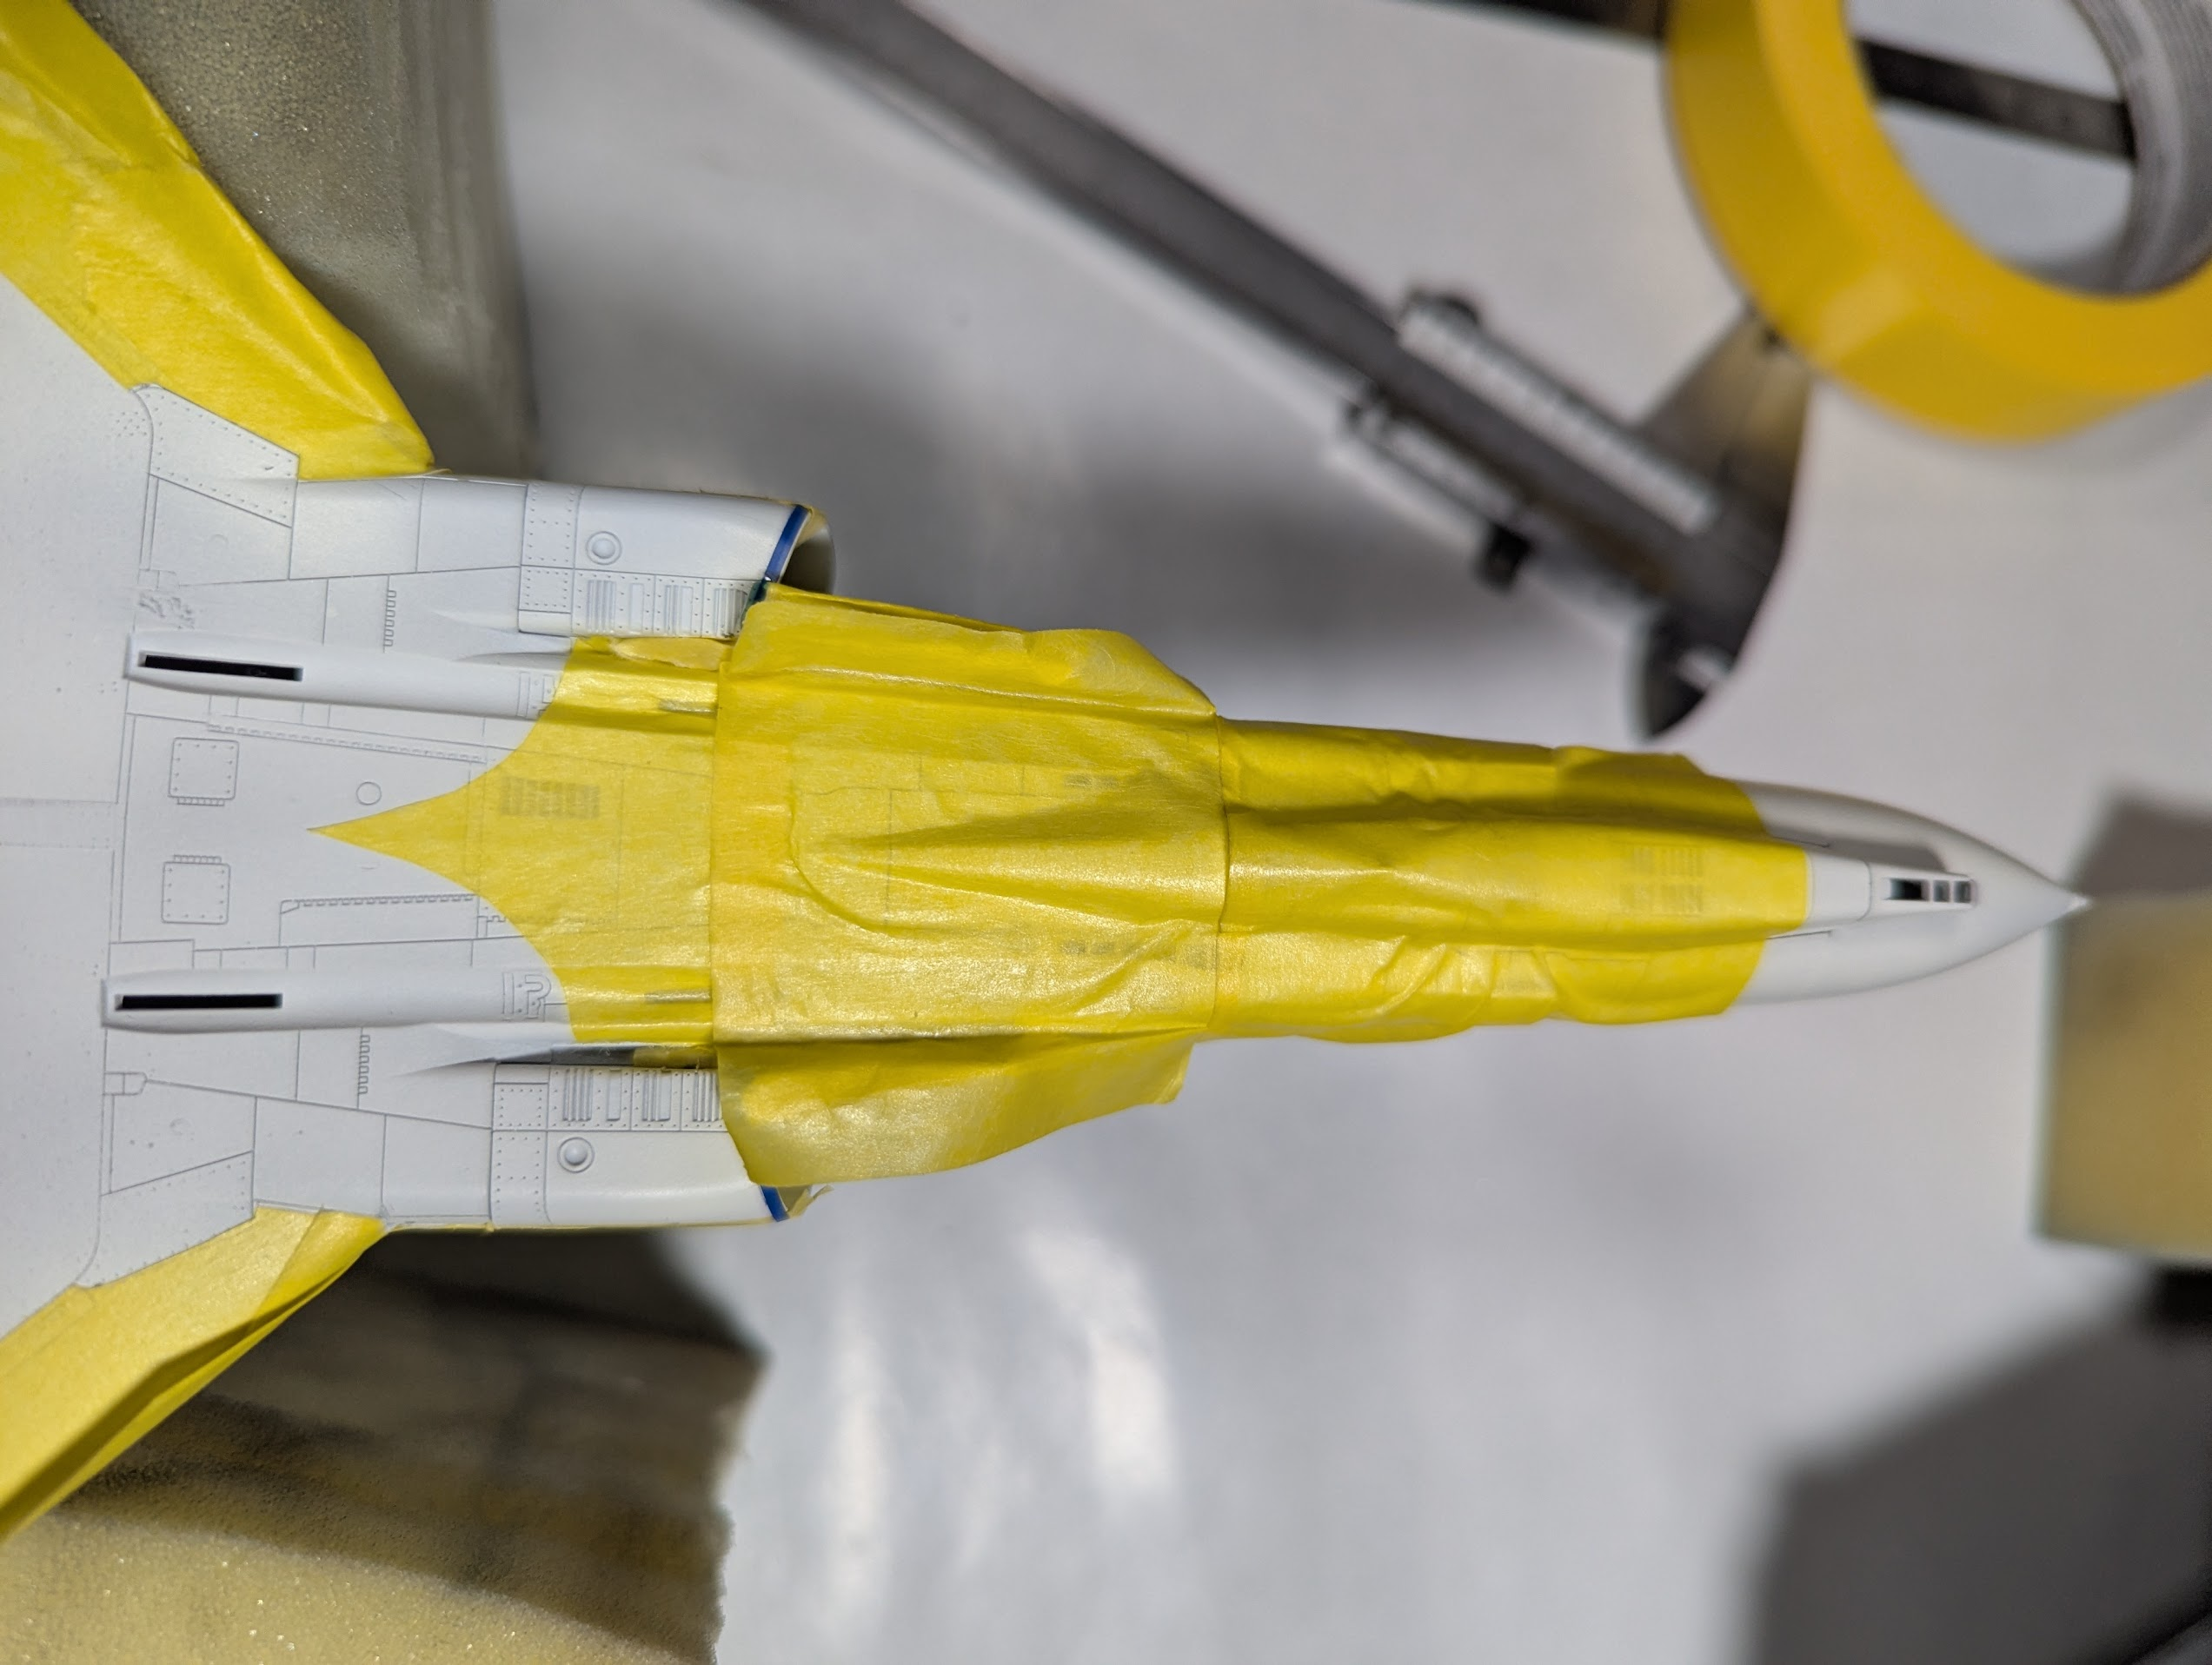
Here you can see I was using acetate as a liner for cutting tape and frisket into the curvy bits.

1773106312348.png

Still pretty easy until getting to the nose bits.

1773106356000.png

Which is where I'll call it quits for the night and try again after a caffeinated morning.
 
I feel like I have the gloss white base down, but that is the easy part. Now begins the masking for the T-bird underside.

I did reconsider painting it as opposed to using stickers. But when trying to use the sticker set as patterns...I realized they were off.

Could be Meg's fault, could the the 3rd party stickers, but I am taking this as a sign, that paint was the right choice.

View attachment 182940
The straight line part was easy-peasy with tape.

View attachment 182939
Here you can see I was using acetate as a liner for cutting tape and frisket into the curvy bits.

View attachment 182941
Still pretty easy until getting to the nose bits.

View attachment 182942
Which is where I'll call it quits for the night and try again after a caffeinated morning.
Using acetate to cut?
 
I feel like I have the gloss white base down, but that is the easy part. Now begins the masking for the T-bird underside.

I did reconsider painting it as opposed to using stickers. But when trying to use the sticker set as patterns...I realized they were off.

Could be Meg's fault, could the the 3rd party stickers, but I am taking this as a sign, that paint was the right choice.

View attachment 182940
The straight line part was easy-peasy with tape.

View attachment 182939
Here you can see I was using acetate as a liner for cutting tape and frisket into the curvy bits.

View attachment 182941
Still pretty easy until getting to the nose bits.

View attachment 182942
Which is where I'll call it quits for the night and try again after a caffeinated morning.
that is going to be sweet looking
 
As an Amazon Associate we earn from qualifying purchases. Product prices and availability are accurate as of the date/time indicated and are subject to change.
Just a masking material like tape. Designed for airbrushing on paper or illustration board (how I learned to use an airbrush before trying one on models) but it has applications here as well. It allows sharper lines than tape ever can, but does not work well on curved surfaces and definitely not on complicated surfaces. I'd be worried about using it with lacquer paints unless mild, it has a plasticy (technical term for the chemists here) feel to it. Generally not something a scale modeler should go buy, but I have a bunch of the stuff lying around from my days as an illustrator.

Here's what AI says...
Frisket paper (or film) is a low-tack, repositionable, adhesive-backed masking material used by artists, illustrators, and airbrushers to cover, protect, and mask specific areas of a project. It allows for sharp, clean edges while painting or drawing, and can be removed without damaging the artwork underneath.

Types:
Available in matte or gloss finishes, and in sheets or rolls.

Usage:
Used to create masks for airbrushing, watercolor painting, and technical illustration.

Matte Frisket:
Can be drawn on directly, allowing designs to be prepared off-surface.

Gloss Frisket:
Offers high transparency, making it easy to see the artwork underneath.
 
Thanks, ya I could have googled it, but I grew up before the internet, my first instinct is to ask people.
I prefer the personal approach too. I thought it interesting that i left out the repositionable/reusable part (think like a stencil) but AI left out any applicability to modeling. I think the upper surfaces of a wing would be a possible use to mask different colors, but not the fuselage. Here I was using it to trace the decals since it is much easier to see through than any tape other than scotch or packing tape, but the adhesive with those is way too strong.
 
Yup, I still have a roll of it from days long past... Along with some amberlith somewhere! Thinking about canopy masking, might frisket be good for the flat panes as well?
As long as you can burnish properly I think so. Easy to cut perfect corners for sure.
 
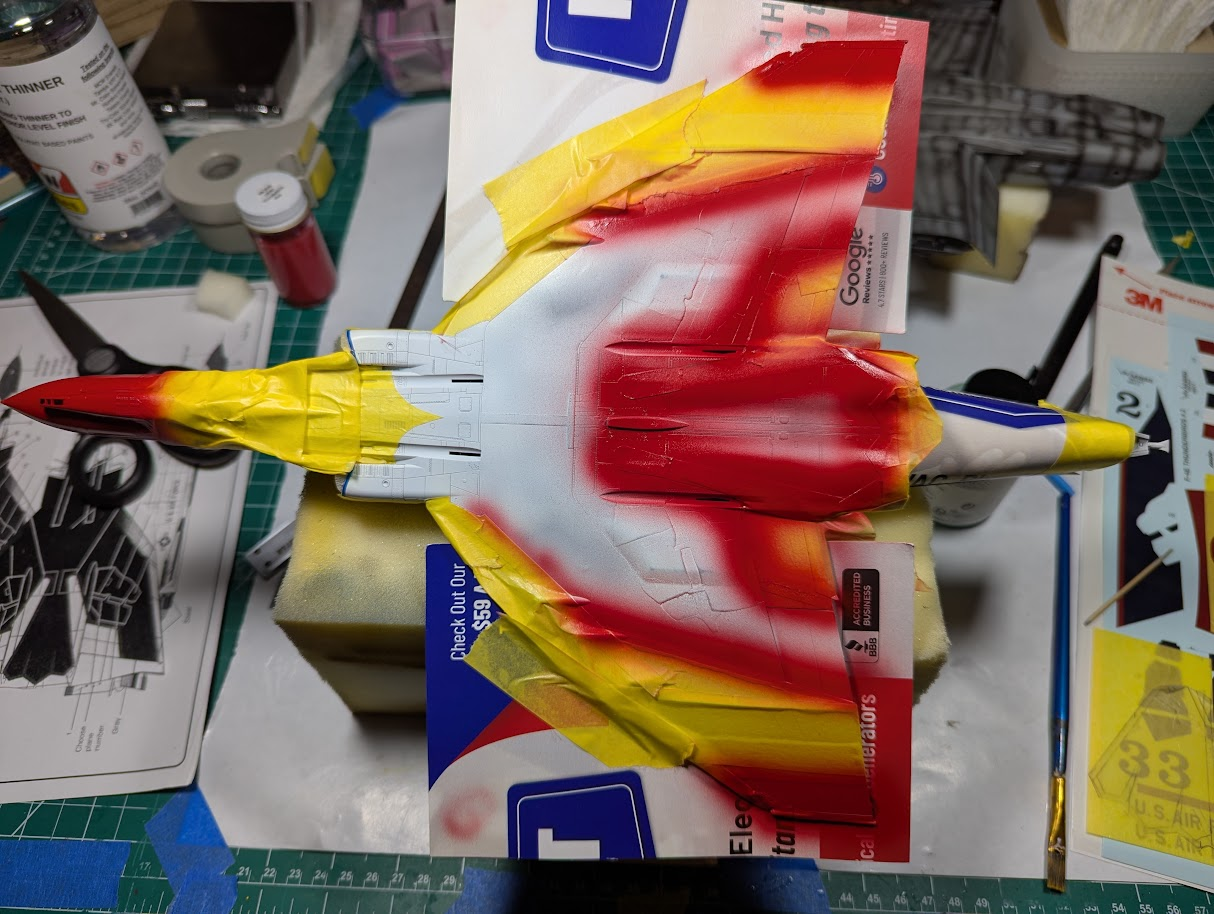
Back to the plane. I got the red laid down, think it is gonna work great, but much of the tape needs to stay until I apply the blue.

1773173881118.png


I need to let it harden more before messing with it, right now I'm trying to decide if putting some white down under the blue is needed, do not want the red overspray (underspray?) to show.

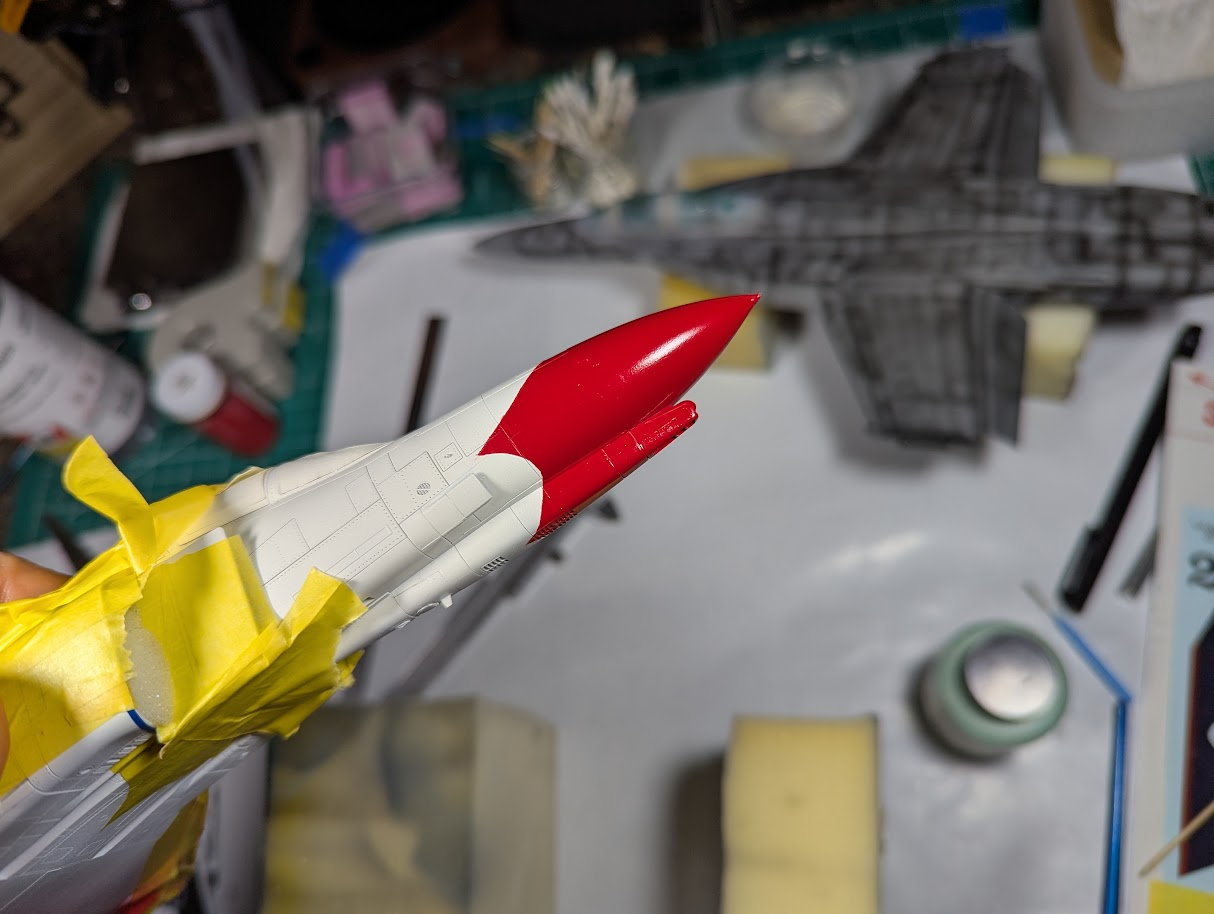
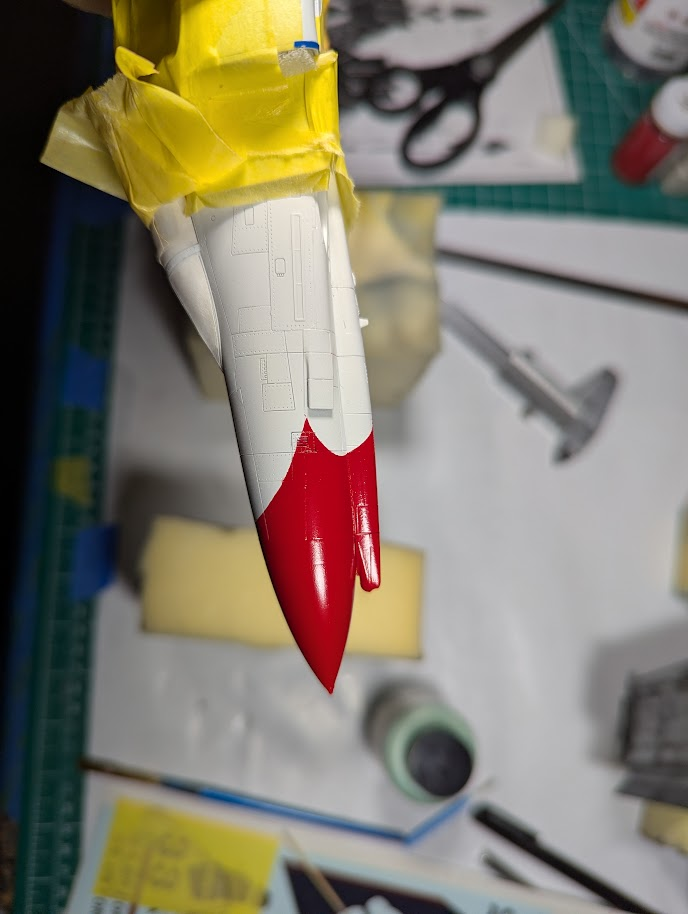
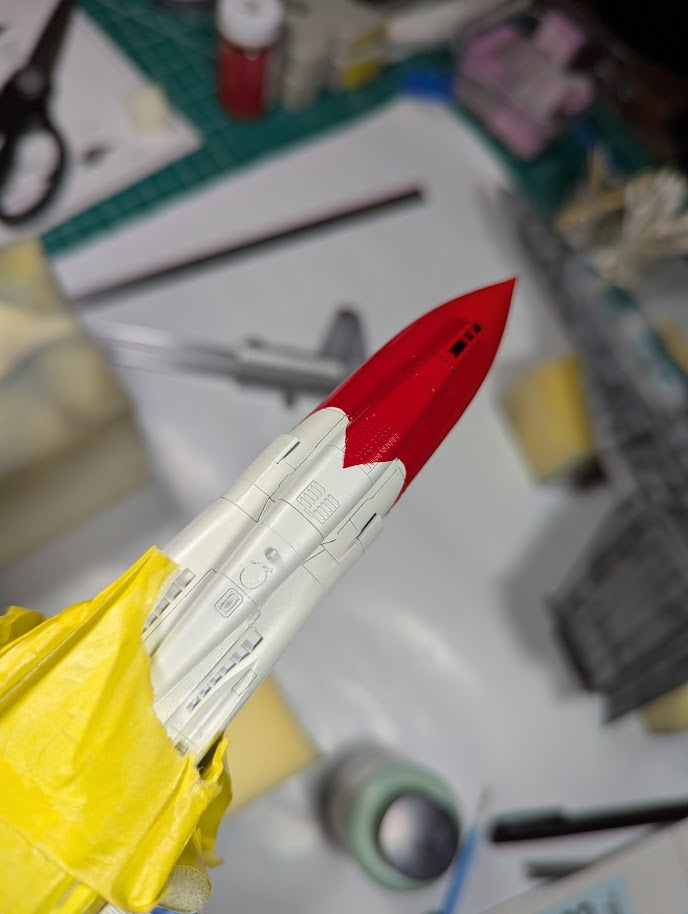
But I could remove the mask on the nose.

1773174059741.png

1773174068643.png

1773174090600.png


That is an optical illusion on the last one, the lines are smooth.
 
Just a masking material like tape.
Back in the dark ages, articles in American modelling magazines often used to mention frisket masking foil, but I don't think I've ever actually seen it (or a similar product) on this side of the Atlantic. Probably because airbrushing for illustration purposes was much more widespread in the USA than in Europe.
 
Back to the plane. I got the red laid down, think it is gonna work great, but much of the tape needs to stay until I apply the blue.

View attachment 183014

I need to let it harden more before messing with it, right now I'm trying to decide if putting some white down under the blue is needed, do not want the red overspray (underspray?) to show.

But I could remove the mask on the nose.

View attachment 183015
View attachment 183016
View attachment 183017

That is an optical illusion on the last one, the lines are smooth.
Nice paint job!
 
Really impressive to be painting the markings instead of decals, especially with the precision you have here. In the long run paint always looks better and will be very durable. I always worry that like 10 years down the line decals could start lifting or cracking
 
This will be my 1st ever wheels-up display. I'm always a cockpit-open kind of guy. So "I don't know" is the only answer I have.

A few months back I was a judge (in training) as an IPMS show, following their rules. I saw over half of the entries be ruled out of competition just because of landing gear and associated parts. Decided then and there that if I want to try and enter a contest I need to do it in-flight.

These can be printed with clear resin in the 3D printer I own. If I were to do this (likely) it will be the route I take.
View attachment 180605
 
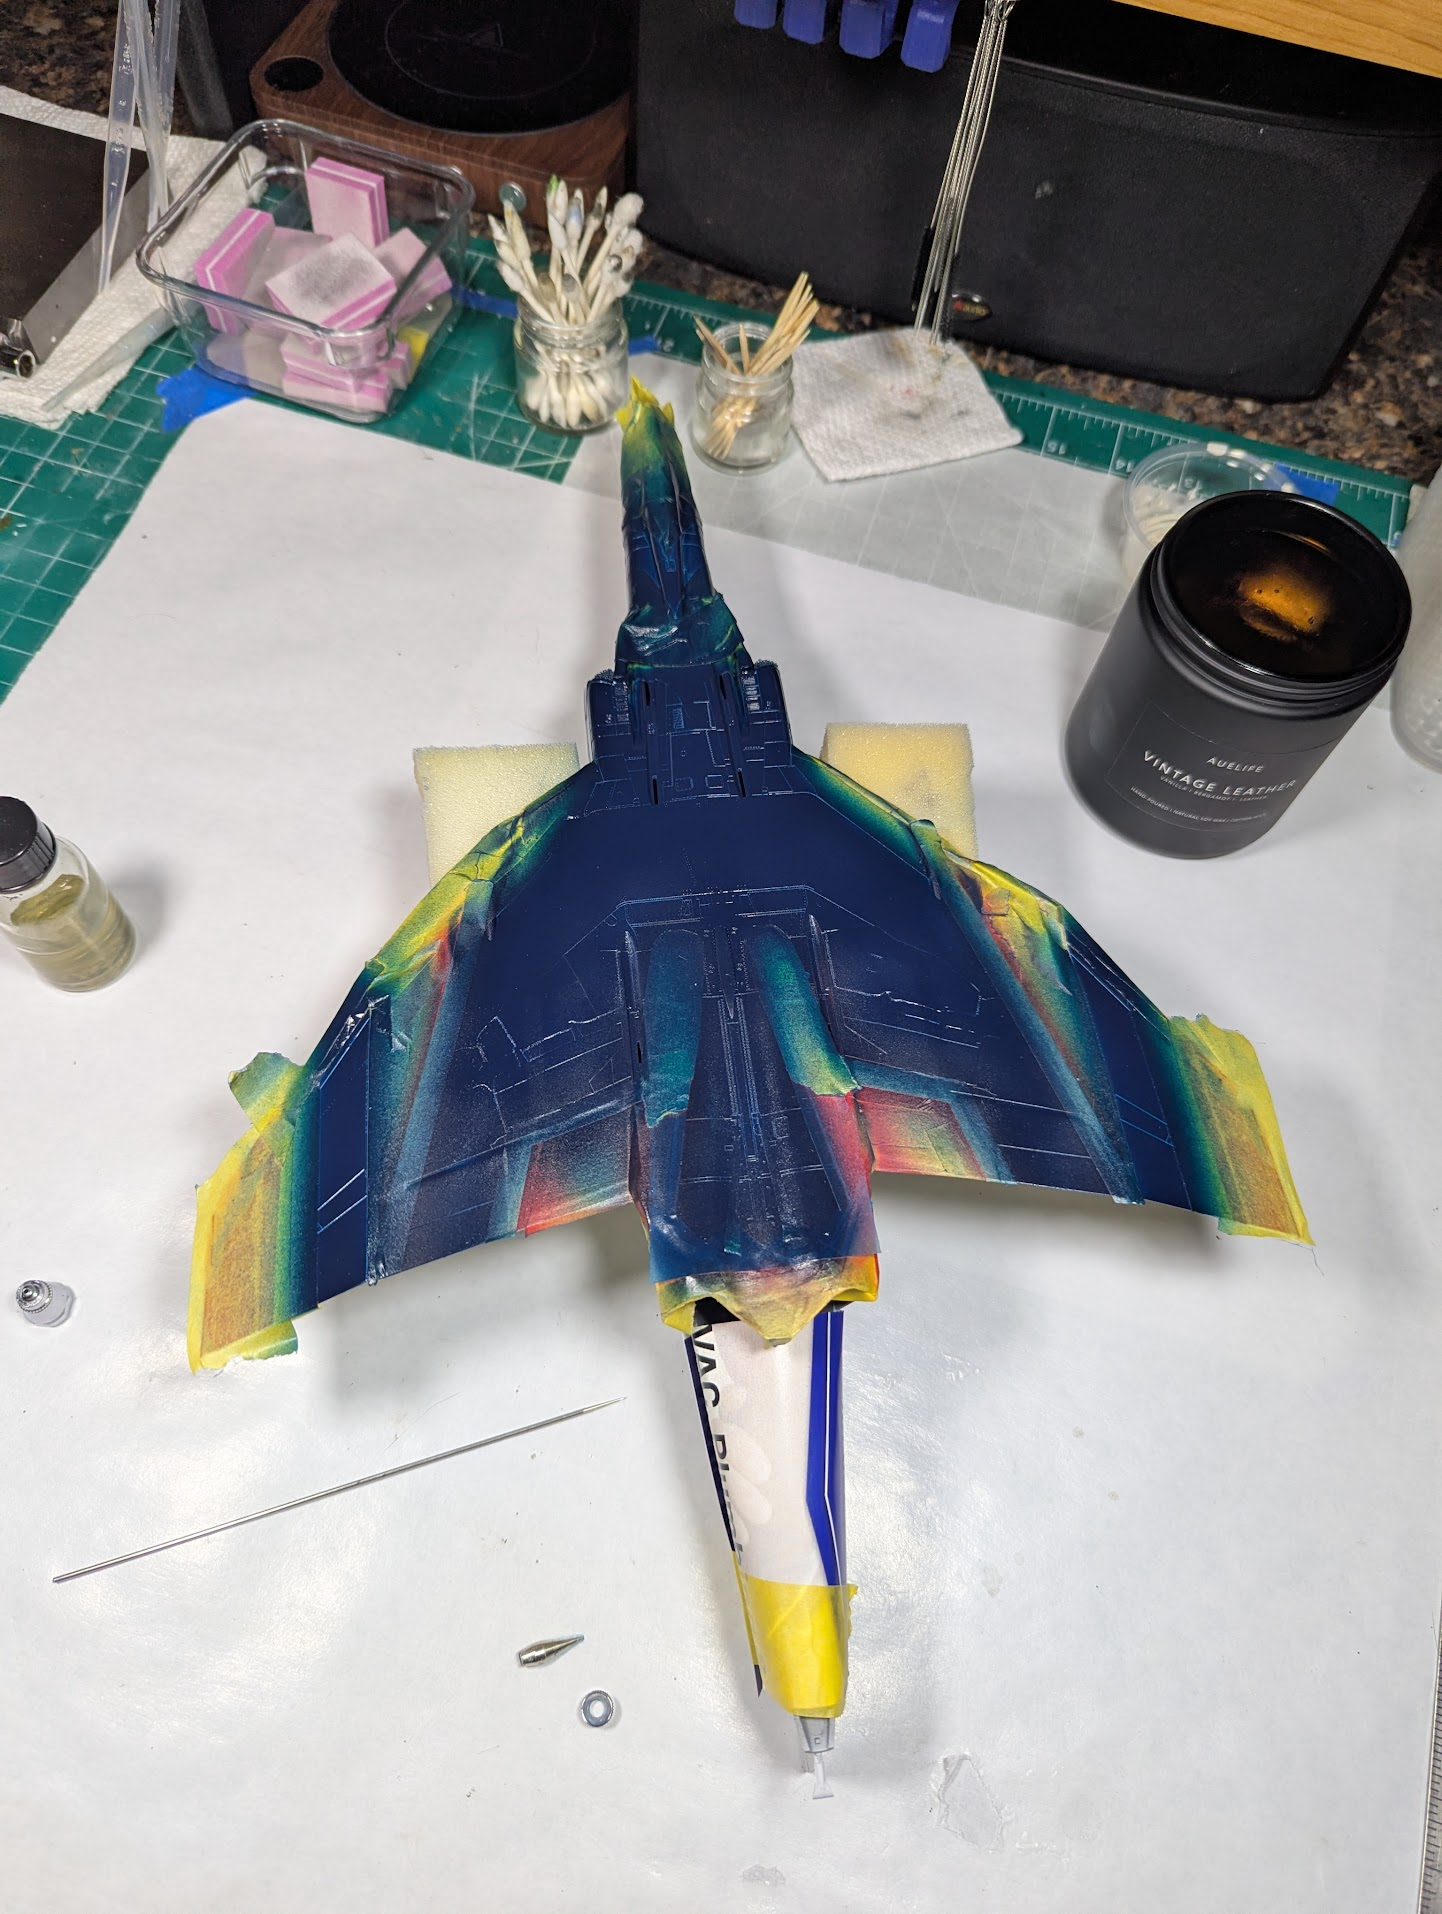
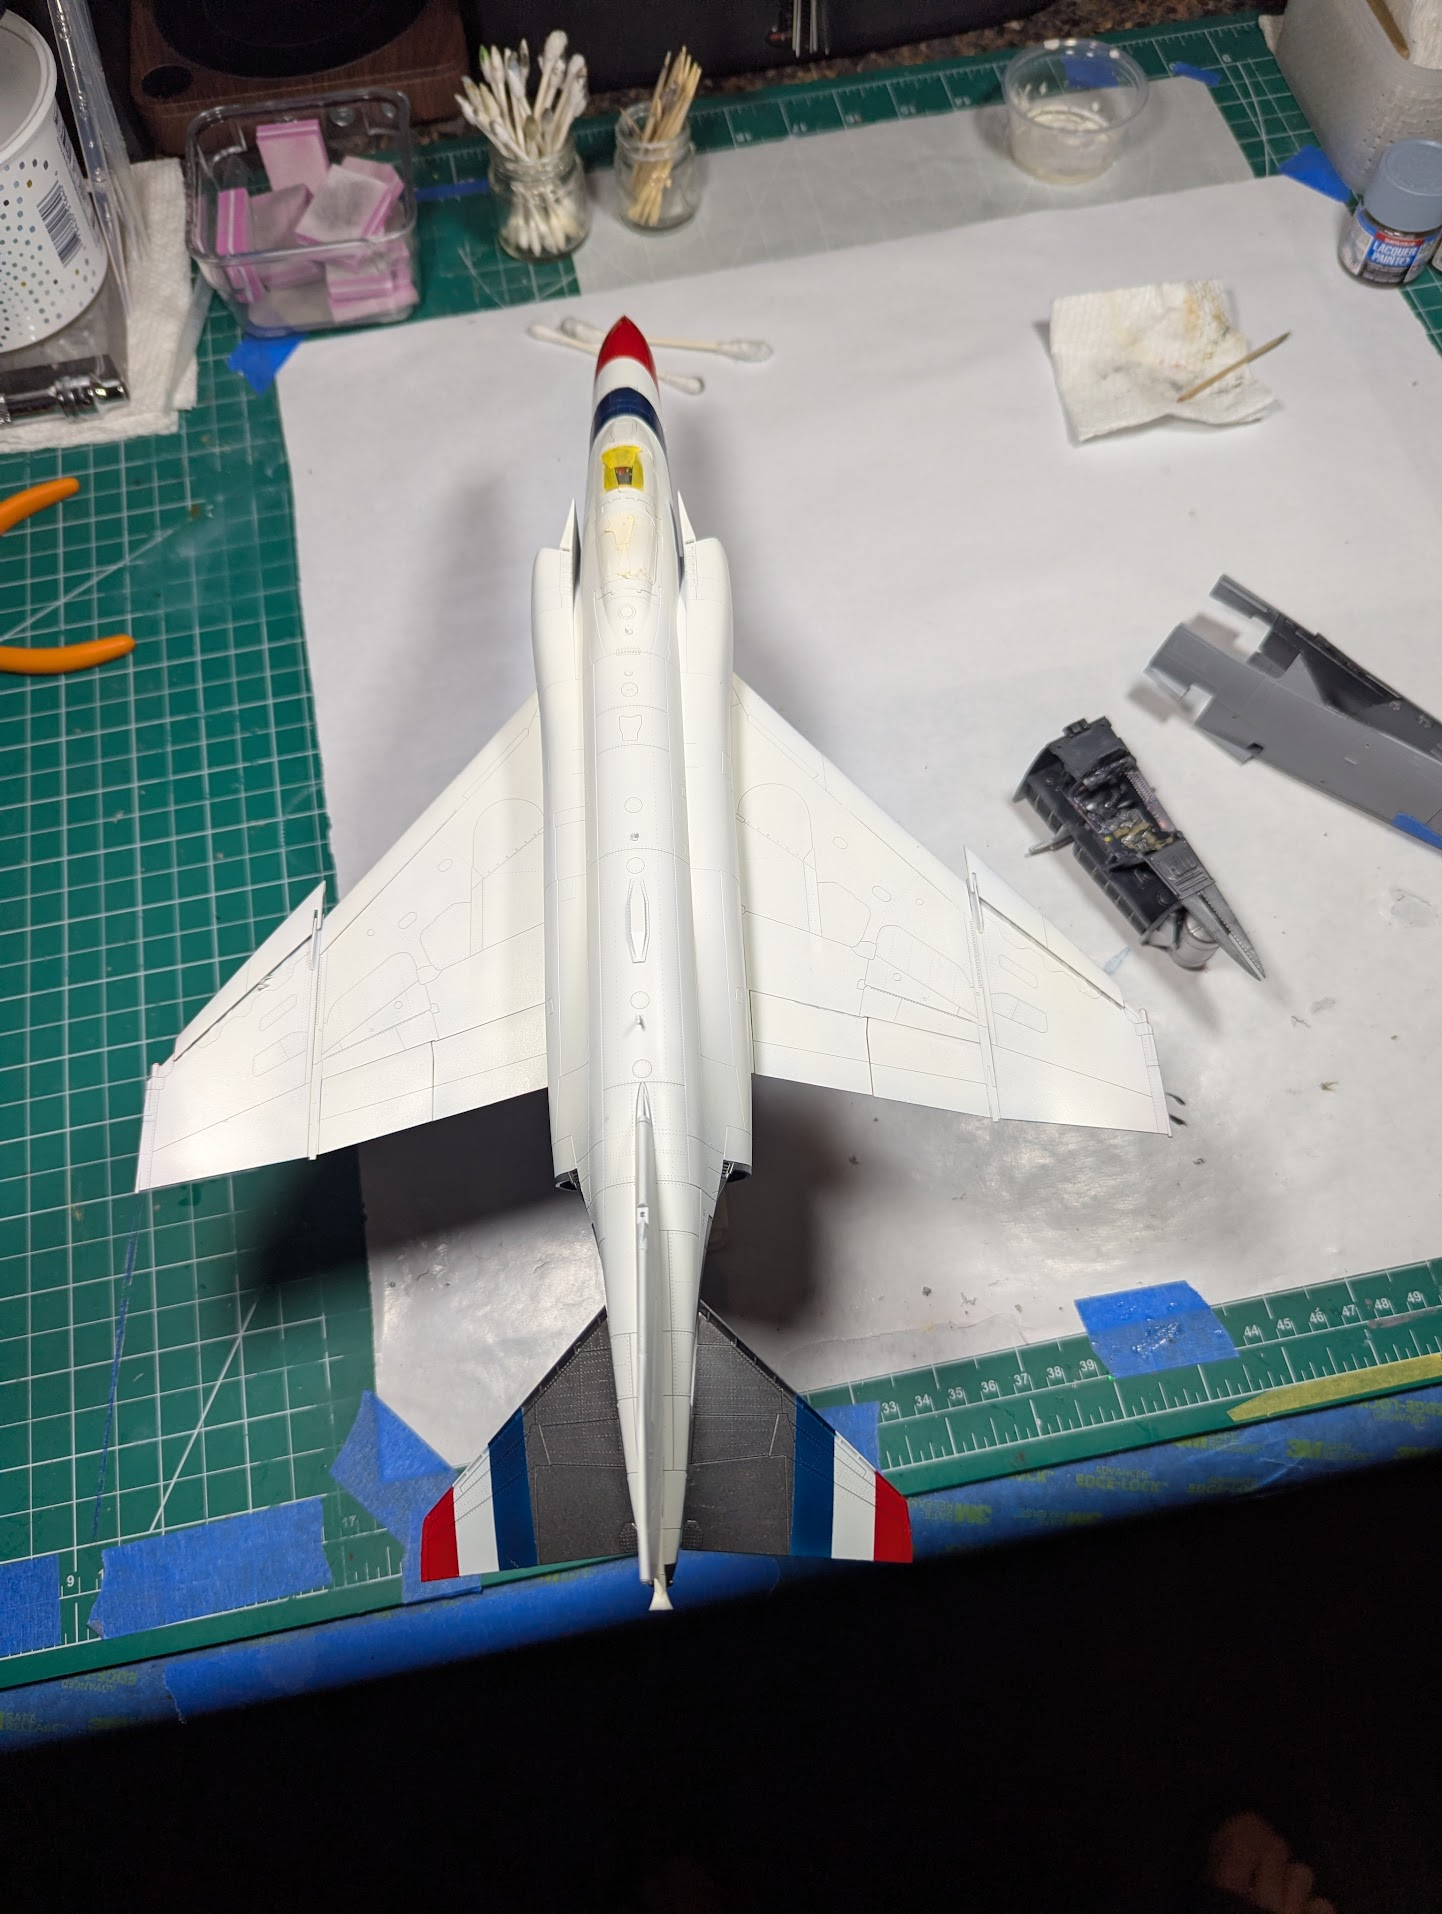
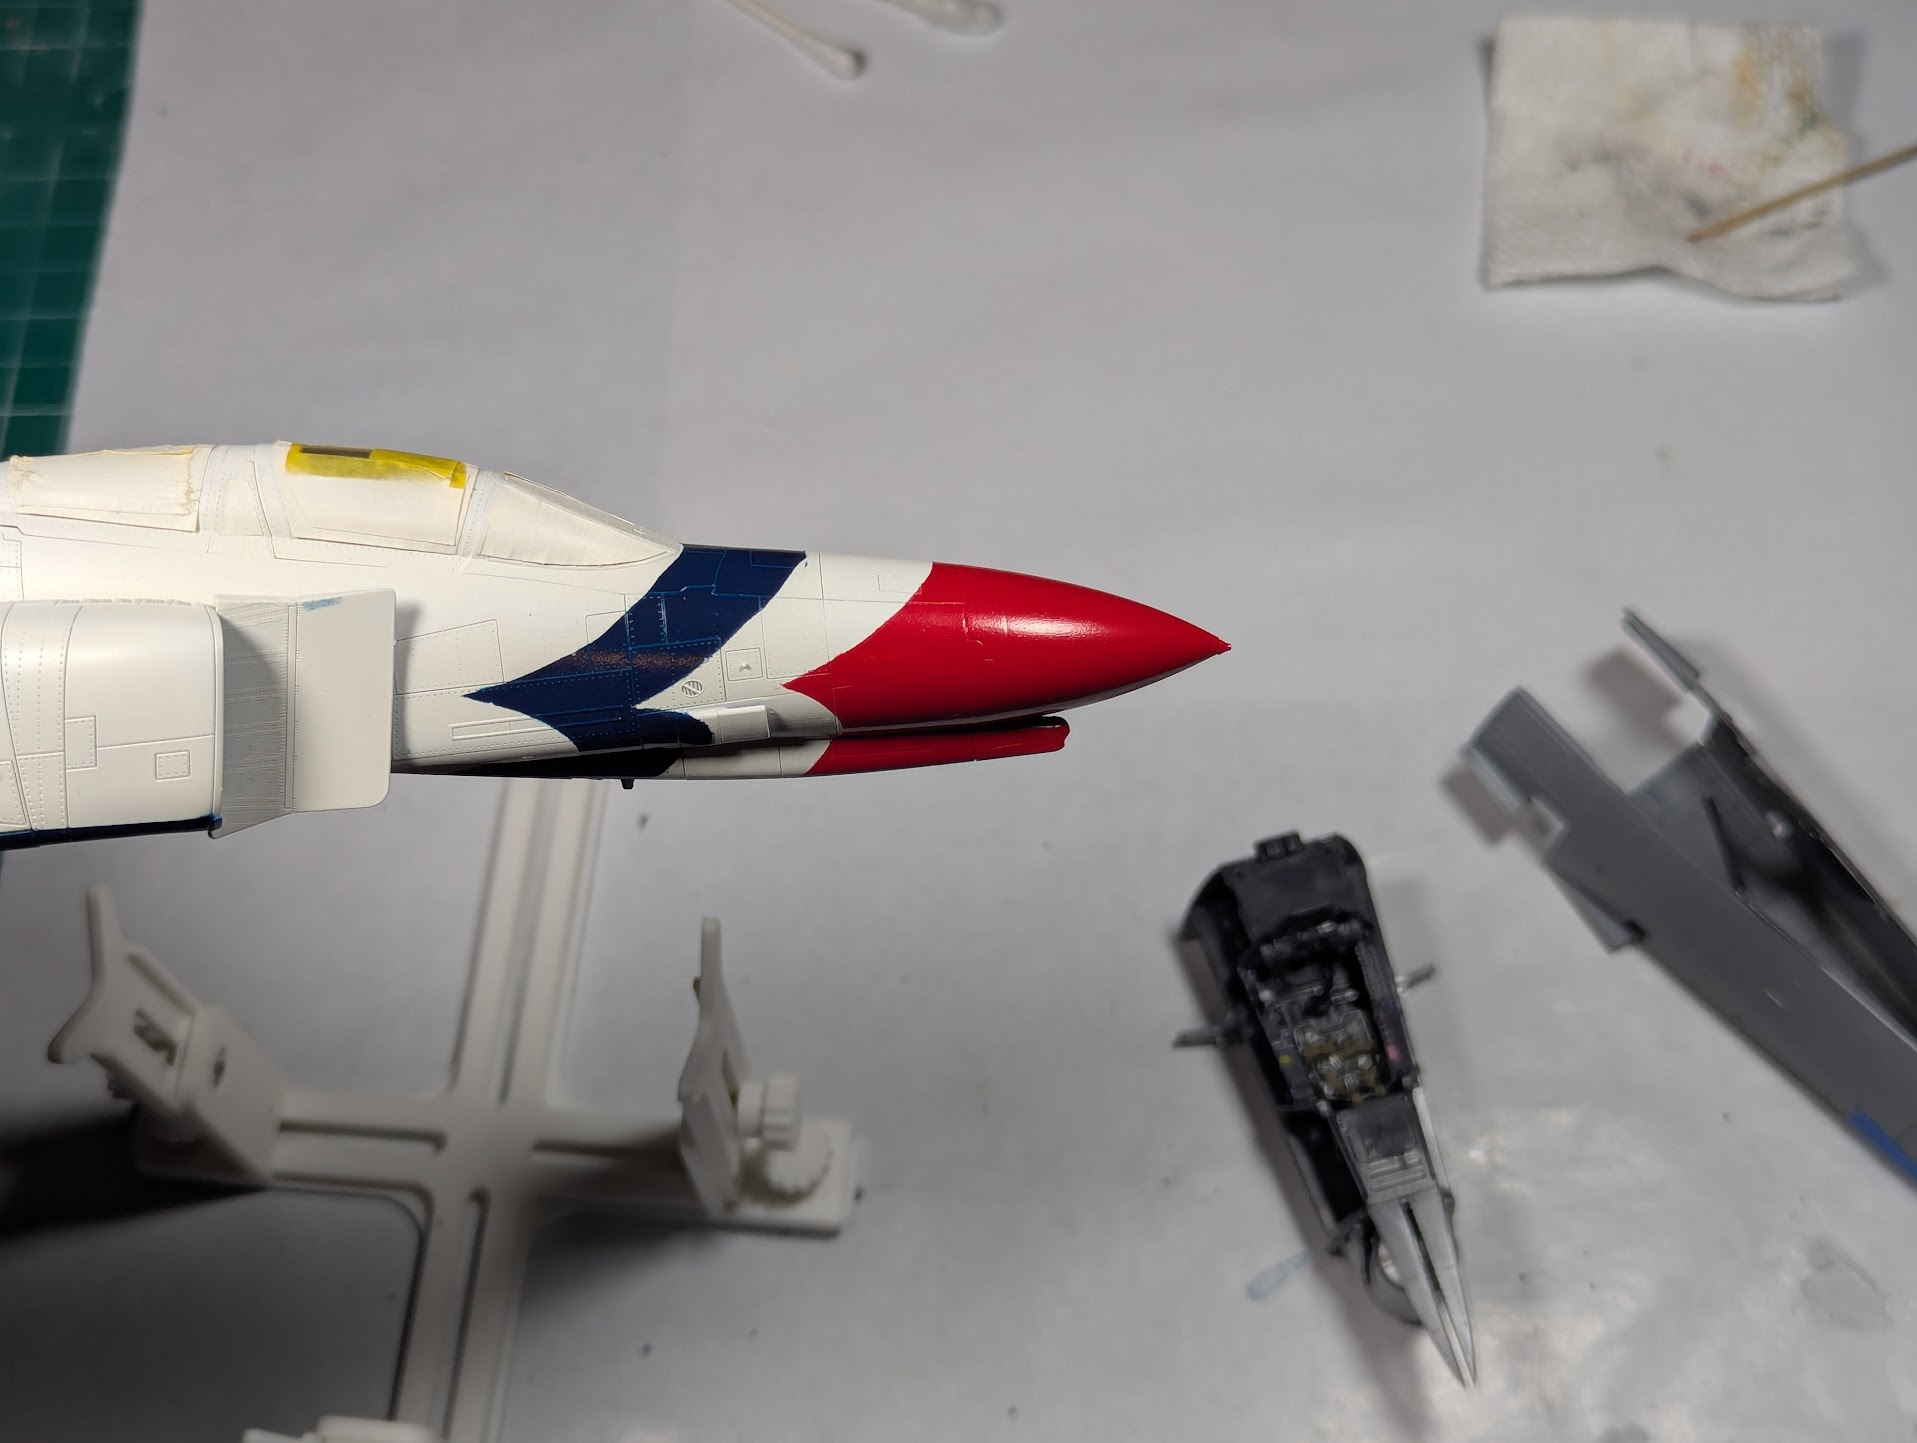
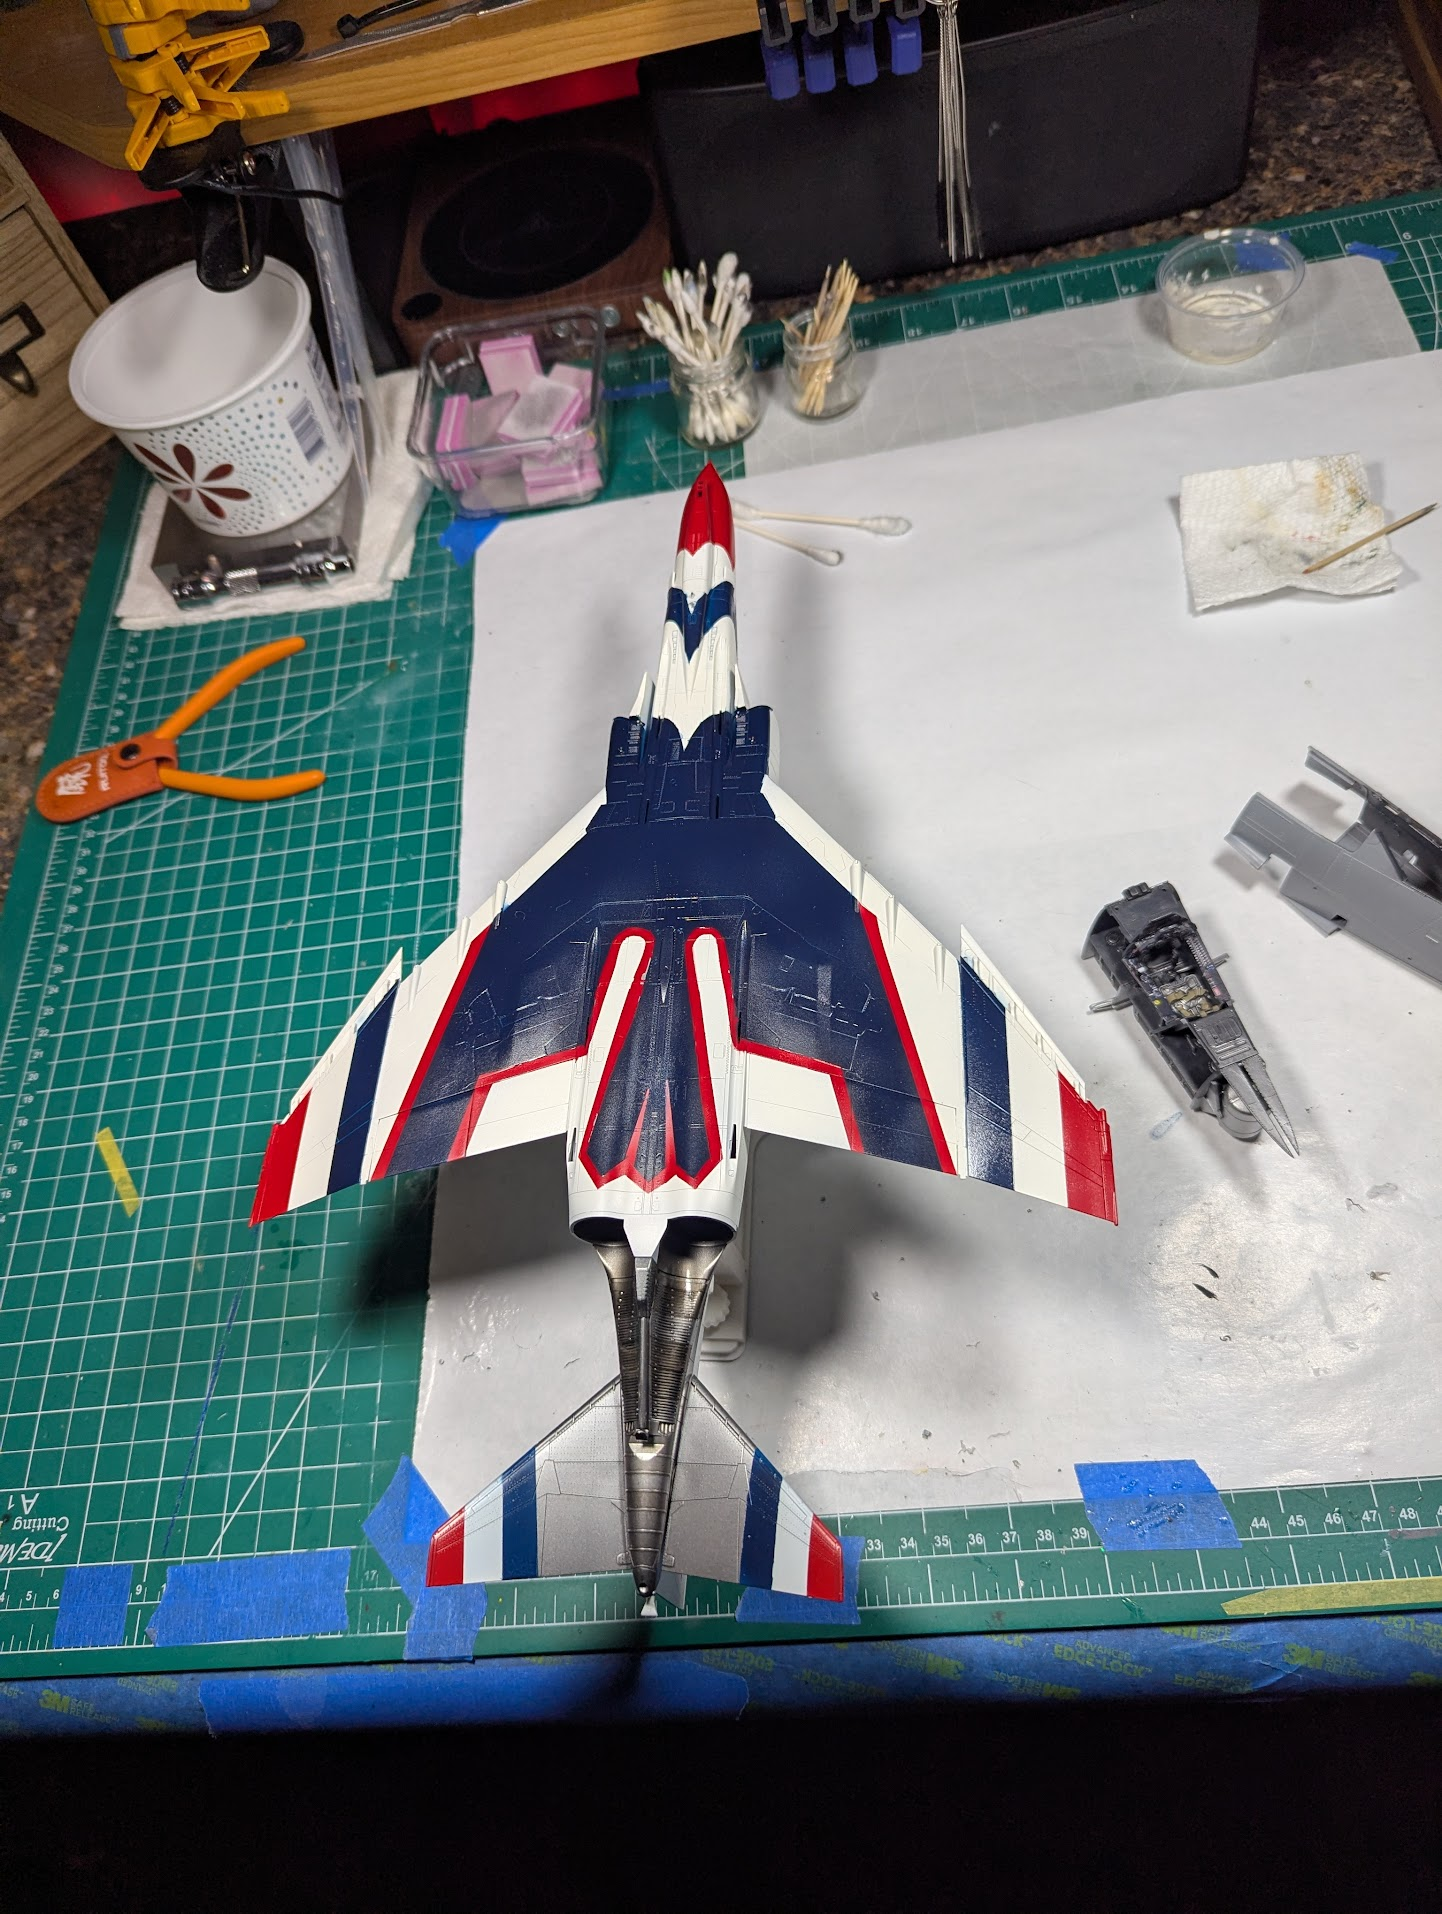
The blue is down! Overall I'd sum it up as "not as good as I'd hoped, but better than I feared."

1774814194616.png


1774814221255.png

Obviously the top side needs the tr-color stripes on the wingtips, and a silver leading edge top and bottom.

1774814233804.png

Here's a glitch, looks like some overspray got through near the starboard intake.

1774814349274.png

This is where I was really worried, overall still happy, lots of little touch-ups needed, but this could have come out much worse. I also noticed only after attaching the tail that my stripes were not straight. They are perfectly spaced and even, just a few degrees off and diagonal. Oh well, 1st world problems right?
 
Last edited:
WHAT they all say yes fanstastic painting looks very good an as for the paint lines not bein straight on the tails if you hadnt said i never have noticed brilliant painting sir
chrisb
 

Latest posts

Back
Top