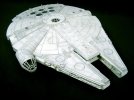
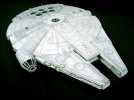
The YT-1300 Project

Splashcoat

New Member
Joined
Oct 9, 2010
Messages
421
I was looking for a quick-and-dirty build so I took the old Etrl/MPC Millennium Falcon kit out of my stash. I've been avoiding building this one because of the mammoth amount of work involved to make it accurate. So I decided not to make it accurate, and instead take some artistic license and build it as a different, as-yet-unnamed Corellian YT-1300 Light Freighter. I'm also going to take the opportunity to try some weathering techniques (namely the hairspray technique) out on this beast before I tackle my FineMolds Falcon.

My first step was to fill in all the open access panels on the ship's hull. There is no cannonical reference as to what an un-modified YT-1300 looks like so I figured my guess was as good as any.
dsc0003ft.jpg

dsc0004vl.jpg

dsc0006qn.jpg

dsc0007wh.jpg

dsc0009wj.jpg


I also replaced the Falcon's sensor dish with a flush-mount sensor array.
dsc0008agb.jpg

dsc0001ol.jpg
 
Will be watching this one. And yes it is a lot of work to make one of these accurate....
 
eh up buddy,lovin ya concept.i to will be keepin an eye on this one mym8.... :)...peza
 
Jaitea said:
Wow, looking forward to this!

The Haynes Manual has some interesting drawings of an unmodified YT-1300
On the Haynes site you can download some images, one of which is an unmodded ship....Here's a link to the Haynes Falcon Manual:

http://www.haynes.co.uk/millenniumfalcon/PDFs/H5096spread4.pdf

screenshot20121213at183.png


J
It's funny you should mention this, Jaitea. It was stumbling across the Haynes Manual in a bookshop that gave me the idea for this model.
 
I'll be watching this one closely as well.

And at least we know that a long time ago, in a place far, far away, Phillips made antenna dishes. The flush mount types at least
 
stretch said:
I'll be watching this one closely as well.

And at least we know that a long time ago, in a place far, far away, Phillips made antenna dishes. The flush mount types at least

You noticed that, eh? ;) It's the trim ring from a broken LED lightbulb. It's pretty sad the way modelers eye-up all the little bits and pieces we come across and squirrel them away to use "some day".
 
Canopy glazing. The fit of the clear insert within the canopy framing is remarkably sloppy. There's at least a 1mm gap between most of the framing and the windows. The clear plastic is also fairly distorted. As stated earlier, I didn't want to spend an awfull lot of time correcting the inaccuracies and flaws of this kit; to fix the gap problem, I flowed-in a few layers of Future to fill the space between the framing and the "glass". This also somewhat improved the distortion problem. I want to avoid spending time building the cockpit so I'm just going to go old school and heavily tint the glazing from within... it's hard to distort something you can't see.
dsc0009qe.jpg
 
Capt_Taggert said:
What's the hairspray technique you mention?

The purpose is to heavily chip and weather a painted surface. As I understand it, the model is painted in a base colour (the colour that is going to be exposed by chipped paint over top of it). Once the base coat has dried, it's sealed with a clear coat. Once that's good and dry, a layer of hairspray is airbrushed over top. Once the hairspray has dried, the final colour coat is applied. Just before this coat has dried (timing is everything) the surface is selectively attacked with brushes and implements and a little bit of water. The principle is that the moistened brushes dissovle the hairspray and break the bond between the top coat and the undercoat.

Here's a tutorial:
http://migjimenez.blogspot.ca/2009/11/hairspray-technique-vol1.html

I've tried this technique on smaller models and the results have been hit or miss. That's why I want to try it out on this build before I let it loose on my Fine Molds Falcon.
 
I'm really liking what you're doing here. The stock YT-1300 is a great idea that I don't think I've seen before. And congrats on leaving off the giant sensor dish. I really like the idea of covering up the access ports. I'm not sure if they would've done that stock, but it does give it a more "newish" and streamlined look. Are you planning to add a small blaster turret to the top?

Best of luck with the hairspray technique. I've tried that several times...usually works nicely. My advice is you can't go too heavy on the hairspray. If it doesn't chip off enough the first round, just try it again. I've even waited an hour before attacking it, and it still worked alright. The AK chipping fluid/worn effects is also a good alternative (better to brush it on, airbrushing just doesn't add enough).

And you've probably read this, but Vallejo paints don't do well with this technique (they come off in large chunks, not small chips). Mig Jimenez suggested in one video to use alcohol instead of water to chip the paint faster...worth a try if this is your test project before the big FM model.

Cheers man.
 

Latest posts

Back
Top