The One I Have Been Waiting for

200w.gif
 
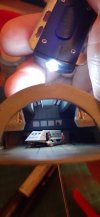
So! Shuttlebay DONE! TECHNICALLY...20210909_180544.jpg

See, there is a tab that broke off when I test fit it before painting anything on the front(rear considering its the butt end of the ship) left side looking at it as in the pic. I thought it was a clean break but when I glued the two parts together I saw a big hole in the wall where the tab broke. And because the upper half being thin PLA, it warped after painting slightly. So while I got the walls now straight ect. There's a gap. So I used Micro Kristal Clear to fill the slight gap and the hole. I will try to find something to set in front of the hole on the floorplate. Then painted the MKC with black paint after it set.

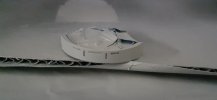
I then took the photoetch fantail part, rolled it and glued it to the clear fantail. It currently has been painted with primer and hull color, and I will scrap the paint off the guidance lights and paint them from behind. I didn't wanna do it that way but when I tried liquid mask... well, a mess is what it was.20210909_184007.jpg

Currently I am back to installing the transparencies to the bridge. I am noticing some REALLY naff edges on the control panels I already glued on. I do not like. But I dunno if I can fix them now.
 
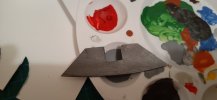
Got a scratchbuilt engine shroud. I decided I didn't wanna wait for three or more weeks for the 3d printed one, so...20210910_194107.jpg
The top piece.20210910_194112.jpg
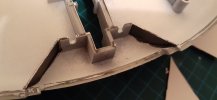
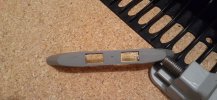
The sides glued in. The top will go on once the LEDS for the engines are in. And speaking of...20210910_194125.jpg
Impulse engine grills in. I WANTED to use the kit part with one of the cooler looking optinal photoetch pieces, but that ended in near disaster as the stupid thing refused to lock into the openings as it should, and the super glue almost set up before I noticed. I lost the part as I had to rip it out, ruining it. This was the best alternative.
 
So my options are these:
Buy a replacement set of fans from PL(since I don't have a reciept for the kit I have to pay for the parts)

Buy two 3d printed replacements from Shapeways. Unfortunately besides being more pricey(cos I have to buy two pieces since the creator didn't offer them as a set), they are also apparently fragile.

I am gonna try to get the order form from PL printed and payday mail it out. I think it'd be easier.
 
Since I'm just along for the ride -
what is the issue ? the post at the center of the Bussard shouldn't be there ?
what is " PL " ?
Can't you get a receipt for the Enterprise kit from where you purchased it ? -- With it you can get free parts ? replacement parts ? or ? ,, very confused .
A different fan kit will fit the Bussard you have or you get a 3D-print Bussard that will work with the PE fan you have ?
The post on the fan that fits onto the motor should be straight; it leans to one side, which means its not gonna spin right and could possibly break while running besides looking stupid since one dome would be normal and this one would not sit level in the engine.

Polar Lights, the kit maker. They will replace parts for free if you have the reciept, otherwise you basically have to buy them. I bought it on Amazon and if the seller put a reciept in the box, I don't remember and the box is long gone anyhow.

The 3d printed parts look better, would be perfectly straight and sit properly in the engines, but I can't buy em as a set, so I'd be spending up to 40 bucks for two, depending on what I had them print them from.

Meanwhile replacements from the Polar Lights would be 6 bucks.
 
i remember this issue with the bussards from when I got my kit eight years ago. As I recall some modellers said they were able to heat the bussard dome using a hair dryer getting it hot enough to soften the plastic and straighten the shaft. Another option would have been to carefully drill several small holes close together around the perimeter of the shaft, drilling from the front of the bussard spinner dome. before using a sharp exacto knife to slice thru the remaining plastic between the holes. Once the shaft was free you could glue it back in after repositioning it. The photoetch includes a round brass piece to fit the recess in the center of the hub on the front of the spinner which would effectively cover up the repair work.
You could try either one of these fixes and if it didn’t work you’re not out anything but your time and effort since you coild still purchase a replacement spinner dome from PL.
I will try one of those ideas. Thanks.
 
I will try one of those ideas. Thanks.
One thing about using the heat method is you need to be careful and not get the part so hot it warps the circumference of the spinner. I could see someone heating it then holding the part too tightly in their fingers as they straightened the shaft only to end up with an oval dome. I myself have a heat gun but I think that would probably get the part too hot, a hairdryer might work bette. Heat it up and move the shaft a little bit, apply more heat then move it a little more. Don’t try to do it all at once and maybe turn the spinner in your hand a tad each time.
 
One thing about using the heat method is you need to be careful and not get the part so hot it warps the circumference of the spinner. I could see someone heating it then holding the part too tightly in their fingers as they straightened the shaft only to end up with an oval dome. I myself have a heat gun but I think that would probably get the part too hot, a hairdryer might work bette. Heat it up and move the shaft a little bit, apply more heat then move it a little more. Don’t try to do it all at once and maybe turn the spinner in your hand a tad each time.
I plan on the second method. No heatgun or hairdryer, and my GF would F.L.I.P. if I used hers.:)
 

Latest posts

Back
Top