The One I Have Been Waiting for

So was looking at my Tamiya AS 29 Grey green...20210804_121833.jpg
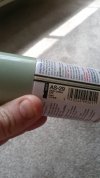
It looks like a pretty close match to the molded color of the model. So maybe I will use that after all despite my dislike of the green tint. Dunno. Just shot some onto that small E I tested the other grey on. If I like it, then I'll just do it.

EDIT: SO... shot the color on the small E.20210804_122848.jpg
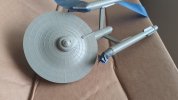
Gonna go with it. The green doesn't offend me as much as what is molded on the kit. So gonna get probably 6 more cans.
 
Last edited:
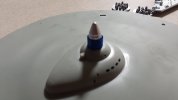
So after numerous sanding and recoating, the deflector is looking pretty fine again.
20210805_102919.jpg

Gonna let it sit till Sunday and do a final light sanding then call it finished.

Last night after work I installed the intercoolers, heat radiators and main part of the trenches to the nacelles.
20210805_103732.jpg20210805_103736.jpg

And I just repainted the endcaps with dark ghost grey. The gunship grey I painted them was too dark. They should be a shade different from the hull color. I know the instructions show them the hull color, but the photos I have as reference show them very slightly darker and more straight grey. So hopefully the dark ghost grey works. And I am gonna repaint the silver on the ball parts, as it was getting rather meh at the base.
20210805_104358.jpg
 
Still think stripping it was the better route :p but I'll wait and see the final result .
 
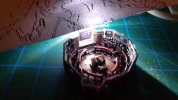
So finally got the bridge transparencies.
20210806_102947.jpg
Now I can finish the bridge, except for a crew of course.

So... Clear parts glue be the best for these I'd assume?
 
Well, last night after work I tried using white glue on the bridge transparencies, and it works well.

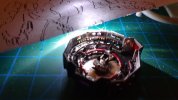
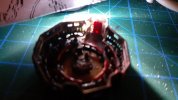
So today while we wait to go hang out with friends I've added more. I think they are supposed to go on the inside of the bridge surfaces, but I am not gonna attempt that except with control panels.
20210807_104316.jpg20210807_104332.jpg20210807_104402.jpg

I am thinking I might wanna add fiber optics to these, at least the smaller screens and the controls.
 
zkl7b2jm1w501.gif
 
Me and Zoe are watching a how to vid by this girl who does woodworking, and she is building a custom dust collection system for her shop. She was making a ply lid for the dust collection drum itself, and drilled a hole in the center of a piece of ply, then used a protractor, and a plastic tube tube with a string tied to it to lay out the disk for the lid. We looked at each other and both knew what the other was thinking: I can do the same for the gridlines on the upper saucer! I just need a tube the same diameter as the hole in the bridge. Then can use the string to lay out both radial and circle lines.

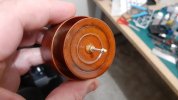
So I found something... the mortar shell from my Masterpiece scale God Bomber Transformer's shoulder cannon. I needed to make it a bit thicker with masking tape, but it now fits with just the slightest bit of loosness so it wil turn. The bottom is flat too so I can set it flat on the bench to make sure my lines are straight.20210807_230101.jpg

There is one downside... i'll need to prime and paint the upper saucer before assembly of the saucer. I will mask off the edge though, so I can fill and sand the seam. But I think this should work out.
 
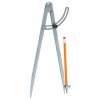
When I did the gridlines on my saucer I just used one of the extra bridge domes. The kit has a black, clear, and translucent white dome to choose from. I drilled a small hole in the center of the black dome and inserted the needle end of the protractor into the hole. Easy-peezy. I did the same on the underside.

9153338285_a18cf5eb03_b.jpg
Harbor Freight 6 inch Compass by Steve J, on Flickr
 
Last edited:
When I did the gridlines on my saucer I just used one of the extra bridle domes. The kit has a black, clear, and translucent white dome to choose from. I drilled a small hole in the center of the black dome and inserted the needle end of the protractor into the hole. Easy-peezy.
Hopefully the new lighting kit comes with those. If so, as you said, easy peezy.

I assume it'll have the extra parts as before but info on the new light kit is very scarce. I still don't even have a firm release date that I have been able to find, which means moneywise I gotta walk on eggshells to make sure I can afford the kit when it finally drops, since its like 50 or more bucks than the model itself was.

Aaahhhh …. I forgot that it was the lighting kit that came with the extra domes. I may still have a couple of the them. I can check if you think you’d want to try my method for the gridlines.
 
Aaahhhh …. I forgot that it was the lighting kit that came with the extra domes. I may still have a couple of the them. I can check if you think you’d want to try my method for the gridlines.
Well, I am not painting the saucer anytime soon, so I will just wait till I get the new lighting kit. And see if it will have those parts. I still have my mortar shell from my Transformer I planned to use if all else fails. Thanks though.
 
Got the first Paragraphix photoetch set. And I didn't realize the set didn't have all the warp engine stuff. So I gotta buy the other set now too.:[

Also didn't know the bridge and shuttlebay are slightly offscale, especially the shuttlebay. Fortunately the 3d printed one is supposed to be proper scale minus the redesigned ceiling. And I will be using the larger and accrurate 1/350 figures from the photoetch, and if it looks off I do not care.
 
Got a notification that the new lighting kit is expected to arrive at CultTvMan.com by the end of next week! I talked to Steve Iverson, who I think is the owner, as I was worried it may drop before payday friday. He said if it does he will hold it for me till I can pay. So that is very cool of him.

Gonna be trying to tag team during the week on trying to finish the Dougram build and finish lightblocking the Enterprise parts.

Oh, and keep forgetting to post this20210815_010007.jpg

After the last two coats of the Testors gloss I let it sit for maybe 5 days. Zoe was looking at it and noticed that it appears the gloss as it hardened also spread, pretty much evening out all the imperfections from the other gloss I used. They are still there, but you basically have to put it right to your eye or use a magnifier to see em. I call that a total success.
 
Last edited:
Clear coat hell
Oh, man... I will not use the first clear coat paint that caused this mess again. It screwed up the windows on that Ertl car kit and then this. Never had problems with any clear coat I ha e ever ised till this stuff. So gonna be stocking up on eirher Tamiya or Testors.
 

Latest posts

Back
Top