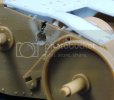
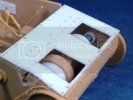
The Italian Job!

TRM

New Member
Joined
Mar 18, 2011
Messages
5,024
Hey there Fellas!!!

Oh, here we go again!!!!! :cool:

It doesn't take very much to just grab a box and run!!!

I am still on the "Quick-n-dirty Highway".....


The target: 1/35 Somovente 75/18 M40 from Italeri
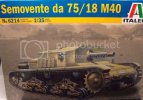
Picture071.jpg

Cost: $1 USD (RAFFLE WIN) ;)

Thought: TO KILL IT!!

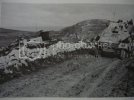
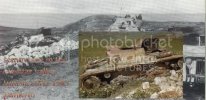
My reference and sort of my plan:

~~~~This photo is for discussion purposes only~~~~
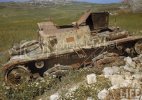
0a3b5893389b2907_large.jpg

Full steam ahead as of just after dinner last night. I can tall you this is an interesting little kit...but still a bit of a dog. Hope to take this puppy for a little walk! ;D

Think this might have a bit of just about everything I can throw at her. Rusting, chipping, cracking, painting, camo, scratch, fading, fire damage, grassy knolls....think the kitchen sink is on the other side too!!

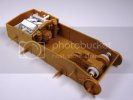
The empty hull:
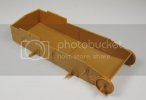
Picture074.jpg

Realized after looking at the picture I will have to have things opened up. Which mean I need to scratch a bunch of stuff, front, middle and rear!!!

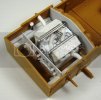
Last night and at morning coffee before work....Fuel tanks, Cooling fans and dressed up the tranny a little.
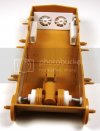
Picture092.jpg

The fans will be barely seen once this is fully installed...
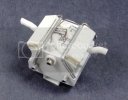
Picture090.jpg

Picture100.jpg

Picture098.jpg

Not bad I suppose for a couple hours and some coffee ;)

I have some strip stock to throw on with some rivets and most of the engine compartment is set. I need to layout the driver's area as well as the whole naked middle...radio, ammo stowage and anything else that pops into mind!! :-X

As always I appreciate the company!!
 
Hey "T" i'll do the "Before" and you can do the "After" ;D
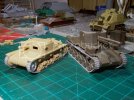
100_0582.jpg

I told you I needed the room,my bench looks like a salvage yard don't it?

You people sure know how to keep a body pumped. 8)
Tony lee
 
Wow your fast, T :eek:

Congratulation on the win!!! will be following this thread!!
 
Thank you ShutterAce, appreciate it!! ;)

That is great Tony!! ;D Wouldn't even have guessed they had tracks for this one!! :eek: As for your bench...Finished or unfinished, it always looks good!!! ;)

Easrock - Thank you buddy!! It might slow a bit while I cut doors open and such, but should move right along. Got your PM. I will respond tomorrow...bit late and I have some work in the morning! ;)

Richard my friend, how are you? Thank you!!! And thank you for the links, Can never have enough information and pics!! Thought it was a great shot showing some really good weathering opportunities!! ;D Glad to have you along....I still have a healthy supply of K4 rusting...plan on digging a little deeper into it real soon!!! 8)

;)

Norm - LOL!!! :eek: Kind of have that effect on people some times...has nothing to do with the modeling though ::). Can never go wrong for a buck!! ;) Thanks for the kind words!!
 
A great little project T ,and very nice scratchings ;) Interesting the way the green camo is blistering off in the ref pic ! are you going to create that ?.....that would be sweet :)

Chris.
 
looks really cool, and i hope this will be as epic as the panther,

K4 awsome that you found that pic
 
Thanks Fells! Thinking and a little dreaming about the finish...yes Chris, going for the blistering in the shot I think!! Must have been some nice heat from the blast..just enough though not to take off the white, just the green. Different type of paint?? I direct your attention to the front right end. I can surmise that one, if not "the", kill shot was in there some where. Bent up fender, dislodged hatches...nice stuff!! Not to mention the motor, looks to have been toasted a bit too!! ;D

Back to a little more scratch tonight. I hammered out the rear decks this morning while having coffee! Next up the front deck and then some pics!! ;)
 
Dark colors draw heat ;D

"Always use white chalk when you write on a jet engine."

A bit of useless info for you fellows.
Tony lee
 
Hey Tony!! good point!! I Might still go with the heat from the fire....flame evidence mid hull back tells me there was a party going on down there ::) LOL...Either way, It looks like I need to be making green camo with some crackle to it ;) Now there's a party!! :p

Where she stands tonight!!

Picture109.jpg

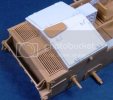
Front and read decks complete with doors (not seen). Just need to figure out how to make new hinges and I will be running again. Getting close to start wrecking stuff!!! ;D

Thanks for dropping in!! ;)
 
are those front and back plates scratch? if so why not use what came with the kit? oh and did you cut all them bolt heads from the original if so your flamin mad!
 
Spud....answers for you: (1)Yes.....(2)I didn't wanna...(3)Yes....and (4) Some say so!! ;D

Seriously now, The damage I will be trying to get, requires me to have some open hatches fore and aft. The kit supplied pieces were molded on. By the time I would have been done playing "Mr. Careful" and salvaging them I knew I could rip out a couple. As for the rivets...why the heck not ;) They were there!! ;D

The hinges might give way to some stress but it might be worth it!!

Got some more interior framing and such done this morning, again with coffee! ;D Real good shape for the lower hull...on to the upper section and beginning some damage control....I guess uncontrolled!! ::)
 
Yep, your on the right track bro.

As for the burnt area, good eye there bro. If you look at the lower hull and rear suspension you'll see it had burned...the burnt off rubber is a give away. It's been sitting there a long time so there isn't much of the blackened soot on her anymore. You can also see the charred paint on the side...the white areas.


Keep at it bro.... me likes a lot. I should have the blown up KV I wrapped up today...and ready for paint. Update at the other place later today. Might give you a call this afternoon bro.
 
great scratch work. i really like this vehicle. i have both the old tamiya and this kit in my stash. i will be watching.
 
Thanks for hanging around Rob!! Been just starring at the pics, seeing new things. BTW, Kick A$$ work to the KV Buddy!!! :eek:

Thank you noc5659!! LOL, was just looking at the Tamiya kit this afternoon! You will have to let us know how it builds compared to this kit! ;)


My little Sunday update: Hope you like pics...

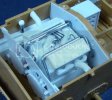
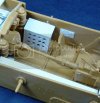
Added more rivets and some details to the engine compartment

Picture004.jpg

Picture019.jpg

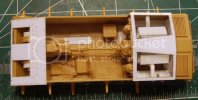
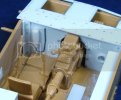
Slapped together an ammo cab, working on a radio right now...

Picture006.jpg

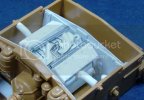
Added a firewall to the tranny compartment...

Picture008.jpg

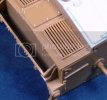
Rear deck doors, hinges kind of started....

Picture001.jpg

Picture002.jpg

And the beginning to some damage...

Picture011.jpg

Picture013.jpg

Back to the radio work soon and playing around with those hinges.

Thanks for having a LQQY!!! ;D
 

Latest posts

Back
Top