The adversaries face off....

Love your technique with the Aves. Shows its versatility really well.
Sucks that the tail keeps coming off like it does.
 
Outstanding work on the build and working out the seams to blend them into the details, Big G is coming alive...
 
Grendels

To stop the tail from breaking off zilla put a strip of styrene on all around the inside use lots Tamiya thin or hotter to weld the plastic strip well into inner surface let dry and then apply glue to the new locating tab you made and assemble tail.

Then take your Aves and go around that seam shape etc. It should take a lot of handling now.

Its not fool proof ,it is the plastic when I heard the snap I could tell its a inferior plastic even the way it sounds when you handle the model.It looks like a brittle plastic.

The best solution on projects like this is to pack the model with expoy putty the feet legs everything and then pin all the parts with brass rod it becomes virtually indestructible.Add brass or threaded rod for mounting pins in the feet/legs.

Hope it helps XXXNITRO
 
I always had trouble with metal miniatures breaking apart until I discovered pinning. I agree with XXXINTRO, the epoxy and pinning might be the best option.

The big G is getting there and you certainly appear to have the seam filling mastered.

Good Job!
 
Grendal - you got the patience of a saint, first the 747/shuttle build now this one - I think you need to find a kit that have few problems with joins and requires less worth to build up, just so you get a brake.

Love your work mate, keep it up.
 
Quaralane said:
Love your technique with the Aves. Shows its versatility really well.
Sucks that the tail keeps coming off like it does.

Thanks Patrick, I avoided Aves for a very long time. I guess I was afraid of it. But now, it is head first and I am using it all the time. I have far more control over it than I do other fillers, and it will allow you to sculpt it. It just took me a few tries to get the above technique down.

Tanker52 said:
Outstanding work on the build and working out the seams to blend them into the details, Big G is coming alive...

Thank you, wait until the next update....should be on Monday.

XXNITRO and Haggistom: I will pin the tail if I have to. I made a mistake when I glued it on the second time. The Ambroid pro weld leaves a residue behind, and I didn't clean that off. I sanded it off tonight and I am going to try Tamiya regular cement on it when I am done with the seams on the tail and the body. I will also give your styrene trick a try. Build up the registry pins a bit. If that doesn't hold, then fill the tail, the body, and then pin it together.

The plastic isn't that brittle, I don't think I got it glued up correctly the first time.

Cobraleader: This is NOTHING like that 747. I knew the joints would be bad, but this isn't fill and smooth so you can't see the joint. That is what I had to do on that 747, not to mention, fix bad alignments. For Godzilla, I just have to cover up the joint with a texture. Much easier to do. In the next video I show you a lucky accident on it. One that saved me a whole lot of time! The arms, legs and tail are now done. I am working on the body seam tonight. If all goes well, first coat of paint next weekend.

King gidrah is ready for me to start on his seams. I will have that video up later in the week.
 
Your attention to the details doesn't stop to fascinate me. Keep on this excellent work, Grendels!
 
Thank you Solander, and you also have great attention to detail!! That shuttle build is outstanding!

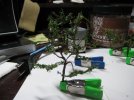
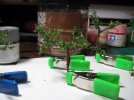
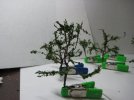
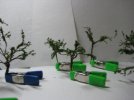
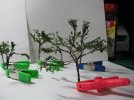
I took a detour from the Big G this weekend and made a few trees. Tell me what you think and be brutally honest. This is my first attempt at making trees for a Diorama. I will have a how to video for the trees up later this week or next.....

You can see the plug in this photo for reference on scale....

20110424_2.jpg
20110424_3.jpg
20110424_4.jpg
20110424_5.jpg
20110424_6.jpg

In the last photo you can see my secret recipe......
 
Awesome! Will be looking out for the SBS...have some to make myself. The wife gonna kill me I keep taking stuff out the cabinets!! ::) (secret ingredient) ;D
 
Thank you everyone! But to me the trees look a bit sparse, but then again, you are your own worst critic......
 
I think they look great, but if your worried move them closer to the tree line or on a slightly more barron patch as they tend to be less green tree's.

Torv.
 
just my 2 cents

make the branch a bit more solid... especially the main branch, but not bad for the first time.
 
Thanks mutually, Grendels :)
Concerning the tries: i think those look great! I've been watching Your post at work in the very end of the dinner break, and didn't have time to read the description, so my first impression till this moment was that You've bought them already complete (read: they really look cool).
The only thing I would have done on Your place would be adding a little bit more leaves on the lower brunches of the tree from the first photo. Again, that's just me.
 
Well to be brutally honest ,I think your trees are first class :)very well made I must say ;D

Chris.


Write your reply...
Back
Top