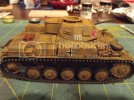
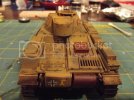
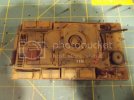
Tamiya's 1/35 Pz.II F/G

Spud, thanks buddy. That gives me a starting point. I think I will use a bit of each color to give it a good over all look of a piece of armor that has spent some time in North Africa. I did some more oil today so I will let it dry till Friday then flat coat it for the pigments.
 
no worrys man this was teh first vid i saw on the subjet and its really helpfull. then i came across Ken abrams yt channle and he had some good stuff but not no more. ;(
 
I sprayed a flat coat using Alclad II Lacquer Klear Kote Flat ALC 314. Great stuff. You spray it straight out of the bottle at 10-20 psi.

I realized that I may have missed something. Is it too late to add some paint chipping?
 
ROY ,

It's never too late to add th Chips ! Although ... you may want to consider this though . after adding th remaining chips , instead of shooting a flat coat, shoot a Semi-Gloss coat ( Vallejo Satin or similar) That way it'll give th washes etc. something to run on. Meaning - on a flat surface, the surface is rough & washes tend not to want to run around the details , a Gloss coat is really smooth ( that's why it's very shiny , slick to reflect the light) this allows the washes to run almost totally off of th model , a satin finish is somewhere in between , it allows th washes to flow & get into th details of the model.

Now I really didn't pay too much attention to this until MIG suggested it when talking to him about His AK fx , etc. So, I tried it & lemme tell ya' I was really impressed that it really helped & I could see th washes running around & doing Their job. after which I went about dusting up the model .& the Satin wasn't really a glaring issue. Besides , after looking at some examples that MIG showed - Tanks aren't really Flat , they have a touch of a sheen to them. After I applied th pigments I didn't even seal up the model.

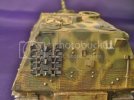
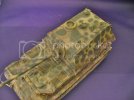
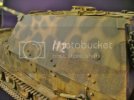
Here's an example. This is an Elephant that I did for the Spring contest & followed th process as I mentioned above.
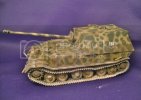
DSC08217.jpg

DSC08211.jpg

DSC08216.jpg

DSC08218.jpg
AS you can see there's no real sheen . This is what worked for Me -
1) After painting the Elephant , I shot a gloss where th decals were to go , then did some chipping & dry brushing
2) Sealed it up with 2 misted coats of Vallejo Satin ( it'll cloud a touch , but once it's dry that "haze" disappears)
3) Went back & added a few more chips & dusted with pigments - th light dusting, I think brought everything together and still left th model interesting & Authentic .

I'm not saying this is the absolute/ correct way , it worked for me & allowed th wases to flow. I used the AK Interactive Grime for Dark Yellow Vehicles, thinned to a wash ( I used Turpenoid , but would recommend Their Mineral sprits , as it dries faster). I also used th same to streak th Elephant , which gave Me a Big canvas to work & I was really happy with th results.

Just My $.02 (USD)

so , just a little food for thought.
 
another one of my fav tanks of teh war, is that the dragon kit Erik?
 
SPUD,

Yes , this is th Dragon Elephant with molded on Zimm. Th kit went together like a Dream, which is rare for Dragon. I was even able to make th suspension workable !!
 
lol i never seem to have a problem with a dragon kit except for a wrong part number.

i want one of them so ill be getting one this year at some point
 
Spud, thanks mate.

panzerace, That's a good idea. I think I may even have some MM semi-gloss. So far I love the way it's turning out. Plus I want to get this one finished so I can finish up the Sheridan.
 
I did some paint chips use panzer gray applied with a very small sponge. My thinking was that they were painted gray and over painted with the desert color. I'll go back and add a bit of red brown to a few to show where the chips went to the primer. I'll post pics tonight. So far it's look the Bee's knees ;D
 
Yea I beleve they were panzer grey and then panted the sand color
 
Thanks Spud, as promised here's the update.

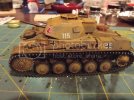
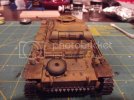
Here's my attempt at paint chipping. I used panzer gray and a sponge. My thinking that the base coat would have been gray and then painted with DAK colors later. I will go back and hit a few with red brown to simulate primer and rust.

Thanks for looking. Questions and comments are welcomed.

PzIIchips001.jpg

PzIIchips002.jpg

PzIIchips003.jpg

PzIIchips004.jpg

PzIIchips005.jpg
 
Yep looking good. But I would put a bit more chipping around the hatches but that's up to you if you like heavy wear and tear
 
Panzerace, thanks, love the video clips you attach 8)

Spud, Thank you. I may add a few more like you said.
 
OK nub question time....why did you use a lacquer varnish and not an enamel/acrlyic one?

Looks great by the way, keep up the fab work mate.

TTFN Matt
 
Matt, I used the Alclad sealer because I can spray it right out of the bottle ;D Plus I love the look of the stuff. You should give it a try.

Thanks Tanker.

I think I'm finished here. Not sure what to do next. Part of me says it's done leave well enough alone :D The other side says do more but I have no idea what to do next, does that make sense?
 
I think I'm finished here. Not sure what to do next. Part of me says it's done leave well enough alone :D The other side says do more but I have no idea what to do next, does that make sense?
[/quote]

Know the feeling. I usually just set the kit aside and move on to the next project. You can always go back later and add more. I have always heard the saying "less is more". My suggestion is to dry brush silver to highlight the guide teeth on the tracks and on top of the tracks where they are visible in the front.
 

Latest posts

Back
Top