Tamiya 1/12 Suzuki GSX1300R Hayabusa

Ian

Member
Joined
Aug 29, 2012
Messages
910
My first bike, and kit at 1/12 scale.

10548285504_bbcd738a77_b.jpg
10548248596_340ccc0c18_b.jpg

Working on the engine first. Glue up was easy peasy, and I love how big it is.

10548477673_c212dd5804_b.jpg

Main engine parts primed with Alclad Grey Lacquer Primer. Sprays beautifully and no need to wash the plastic beforehand.

10548288774_3859fe49f5_b.jpg
10548252356_ab70fe244c_b.jpg
10548480913_6acacda64e_b.jpg
10548481993_da7c1083ee_b.jpg
10548248555_af63d7da97_b.jpg

Then a few hours latter I added some color; X-18 and XF-16.

10548249385_d449c1d026_b.jpg
10548295284_0f4cacc920_b.jpg
10548486153_0673e4c366_b.jpg
 
Had that kit at one point. When we made the move from our mini-home to here, it got lost somewhere. And by lost, I mean it grew legs and walked away. Only kit unaccounted for from the move 5yrs ago, but still bugs me.

Shame as it looked like a great kit! So far so good on yours!
 
Hopefully getting back to this tonight, after I watch A Nightmare on Elm Street Part 2: Freddy's Revenge and A Nightmare on Elm Street 3: Dream Warriors.
 
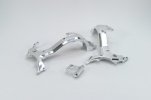
Here's a shot of the plated engine mounts.

10631233474_a70c6a7164_b.jpg

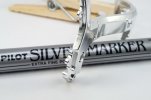
After trimming from the sprue I was left with black plastic spots. After looking ahead in the instructions, I discovered that some of these would be seen. Instead of attempting a match with paint, I decided I'd try a silver marker, which worked remarkably well.

10631486423_60a3fc7233_b.jpg
 
I also finished the painting and gluing up of the engine itself. All parts were attached with CA to prevent paint damage.

10631221615_0fa29f166b_b.jpg
10631222745_83a029d849_b.jpg
10631241104_5723ba45d8_b.jpg
10631490163_e2f4e062fd_b.jpg
10631238214_55ae7a0674_b.jpg
10631216195_6511027165_b.jpg
 
Individual part assembly and priming continues.

10684058855_5e5f74bfc5_b.jpg

Got the wheels together.

10684302933_6c437fda59_b.jpg

And the chassis.

10684107226_afebdeb109_b.jpg
10684113744_50344e4310_b.jpg

Test fit with the engine.

10684307963_1cec11e0fc_b.jpg
10684110866_9e6693d52d_b.jpg
 
Looking great so far Ian, nice touch with the silver marker it covers up those annoying black patches really well, i will have to try it out ;D Can't wait for the next update. Jay ;)
 
Had my first experience with Alclad's line of 'high shine' finishes today when I sprayed up this part with ALC-119 Airframe Aluminium.

10736998023_b51153f5ed_b.jpg
10736782296_e7844da18c_b.jpg
10736782866_6c42f13008_b.jpg

The finish is pretty incredible, and I'm now thinking that I might do the whole bike shell like this.

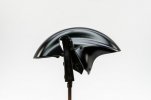
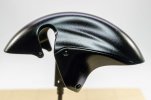
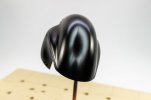
Here's the front wheel fender primed with Alclad Gloss Black Base.

10736694375_a3b4479ccb_b.jpg
10736784316_835d70637c_b.jpg

Even with careful glueing, heavy sanding and polishing, it STILL revealed the darn seam line.

10736695935_b616184ea2_b.jpg
 
I've built a few Tamiya bikes and have had the same experience with the front fender. I think its so difficult to remove the seam because the plastic is so thin.
 

Latest posts

Back
Top