Shuttle Tydirium MPC build with modification's (WIP with Pic's)

builder101

New Member
Joined
Nov 12, 2012
Messages
131
Hello again, I'm back with another build I started this a while ago and needed a break.. Just the wing work alone was very time consuming. So, while watching paint dry on another project I decided it was time to get back at this ship..

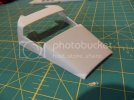
Well, here is some pic's lot's of work to do I will slowly keep at this. But thought, if I started a thread I may stay more adamant on getting more done. I plan to redo most of the detail, I have started on a new cockpit and hope to light the whole thing up.

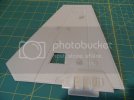
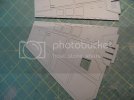
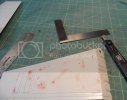
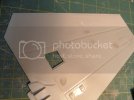
So far I have worked on the wing's completely removed all the detail and rescribed with my Tamiya scriber mostly and a metal ruler. The line's were raised as a MPC kit. The styrene detail came came out looking good after a primer coat.

Here is the picture's before and after feel free to comment..


Mike
SAM_1301.jpg

SAM_1300.jpg

One wing stripped and one as it came from the kit.
SAM_1297.jpg

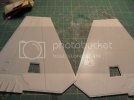
After some work on the wing's they came out looking like this. I removed the detail and used styrene to run up each side of the wing I used small bit's cut. I have had a hard time getting a clear picture of that detail.
SAM_1450_zps112d3971.jpg

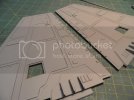
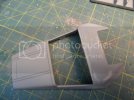
Still need to work on the top of this I have done it a few time's been never get it where I am happy.
SAM_1299.jpg

SAM_1451_zps7f12e33f.jpg

SAM_1449_zps961e148e.jpg
 
Very cool so far I had forgotten how cool that ship is I guess I will have to get one again.
 
The panel lines are extremely well done! Very impressive.
 
I have this kit sitting on my shelf awaiting its turn in the queue. I look forward to following your work to provide inspiration and ideas when I tackle this. The detail work you've done thus far is absolutely amazing. Keep up the fantastic work
 
Sweet! Always wanted one of these babies. Can't wait to see more.
 
Thank's for all the kind words and support. I put sometime in last night and but nothing picture worthy.. I have a few more wing's to scrape/scribe and hope to get some more updates soon. Weekends have been spent remodeling part of my basement which will also create some nice space for some models to display. More updates to come and thank's yet again..

Mike
 
Great work so far from what I've seen... question... why did you cut out the squares in the middle of the wings?
 
Posted by: LrdSatyr8
« on: Today at 05:05 PM » Insert Quote

Great work so far from what I've seen... question... why did you cut out the squares in the middle of the wings?

Thank's! That is how the kit came I am sure there are two parts to fill those gaps. Not sure why MPC I believe in 1983 made the kit that way.

Mike
 
builder101 said:
Posted by: LrdSatyr8
« on: Today at 05:05 PM » Insert Quote

Great work so far from what I've seen... question... why did you cut out the squares in the middle of the wings?

Thank's! That is how the kit came I am sure there are two parts to fill those gaps. Not sure why MPC I believe in 1983 made the kit that way.

Mike

Don't remember that in my kit... may have to take it out and see for myself... been awhile since I built this baby! I look forward to your progress.
 
Awesome.
I started one of these years ago and lost in a move at some point while on a break from the hobby.
Managed to track down another and now im inspired to let it see light of day.
Ill deffinatley be following this build.
 
Thank's everyone.. I managed to do some modeling for the better part of the day today but progress is slow alot of scraping, sanding, measuring and scribing. I managed to get another wing just about complete I will need to sand out a few scratches find some small tubing for the top of the wing. Another thing that has been tough with this mod is finding the right tool to make all the square hole's.. I have tried heating brass, small computer repair screw drivers and using the dremel and a small bit.. I will figure something out.

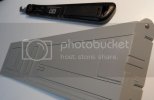
Here is what I got down today and still need's minor details.

SAM_1461_zpsc08038f7.jpg

I scraped off a lot of the raised detail the bottom large part was tough with lots of sanding. I then cut more styrene I am using size 15 and 30 thickness for the deail that I have replaced. For anybody that plan's on builing this in the future.

SAM_1462_zps2315241e.jpg
 
Cool stuff.
I got one on the shelf that I'm planning on modding too.
I'll keep a close eye on your wip!

Cheers!
 

Latest posts

Back
Top