Shuttle Tydirium MPC build with modification's (WIP with Pic's)

Thanks for all that has been said and the support on this shuttle it has been a lot of work.

Red Draggon, looks like you are off to a great start.. I have seen this kit built well with out any lights and look great. I will be checking your progress.

Some of the work I find myself doing twice like I'm about to do with the front guns. I want to redo the one's I made and make them reflect the studio scale model, not exactly but closer than what I accomplished last weekend and it will definitely be more work.

My guns I made.. I hope to make a trip to the LHS this weekend for more styrene rods and brass. Problem is, it just is not that local.

shutgun_zps9c6147a2.jpg

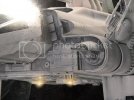
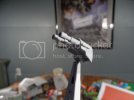
I want them to resemble more like this photo I took out of my, Sculpting a Galaxy book. So I will revisit the guns again I hope to get to over this coming weekend, need more materials..

More like this!! or closer ;D

bookshut_zpsc79f58f5.jpg

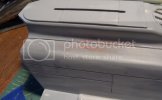
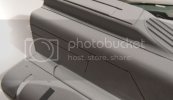
Next thing I noticed is my scribing is far from finished, well I have gone this far on the wings..I just can't stop now. So I started to look at the hull removed a lot of the detail and the raised panel lines. Then started to scribe more lines, the one thing I noticed is that small strip on the hull that had funky detail really stood out to me. Even if it is accurate I had to get rid if it I will add some subtle styrene that I hope looks cleaner and even the detail. I removed other raised parts from the kit on the hull and will work on making it look clean.

sidehulldetail_zpsf795e73f.jpg


Scribing this part is a little rough..

hull4_zps7768daec.jpg

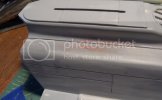
sanding and scraping.

hull4_zps7768daec.jpg


Thanks, for again for checking out how this is coming along, always!!

builder/Mike

Grendals/John

If you happen to read this and I know you have been checking this thread out and I thank you.. I do have a lighting question for you and rather than message you going to put it right in this thread. A lot of people that build this will want this type of light in the back and have the same question. Can I wire a cold cathode to a 12v power supply to plug into the wall? I am a hardware PC consultant/tech by trade and could jumper a PS by using a paper clip (one end in green one end in black) and jumper a used power supply but I don't want a PS sitting next to my model display base. I saw your video a while back on the comparison of lights it was really informative. Any knowledge on getting a 4" cold cathode to plug into a wall out let?
 
builder101 said:
Red Dragon, looks like you are off to a great start.. I have seen this kit built well with out any lights and look great. I will be checking your progress.

I'm taking this one slow brother. So many great ideas to dress this girl up. Keep up the great work and I'll be watching how you tackle those guns
 
Grendals/John

If you happen to read this and I know you have been checking this thread out and I thank you.. I do have a lighting question for you and rather than message you going to put it right in this thread. A lot of people that build this will want this type of light in the back and have the same question. Can I wire a cold cathode to a 12v power supply to plug into the wall? I am a hardware PC consultant/tech by trade and could jumper a PS by using a paper clip (one end in green one end in black) and jumper a used power supply but I don't want a PS sitting next to my model display base. I saw your video a while back on the comparison of lights it was really informative. Any knowledge on getting a 4" cold cathode to plug into a wall out let?

You can do this with a 12 volt wall wart. I have done it with a bench power supply and I have seen kits to convert the Cold Cathode over to a wall wart.

One thing to think about is the heat that comes out of a cold cathode. They generate a fair amount of heat. LED's generate less heat for the same voltage and light output.

I know that a cold cathode will output a smoother light output with no dark spots. But if you work at some of the LED tapes that are out there, you can them dark spot free at the same voltage, and lower heat output.

If you do go with the cold cathode, I would monitor the heat output when you first put the model together to see how long you can leave it on before it gets too hot.
 
Thanks!!! And Grendels once again thanks for the info I will watch the heat and still have time to think the back lighting through.

Small update, but it's those little parts sometimes that you start working on and suddenly time goes right by so involved.. So I think I made what will house the front guns just need to dress them up a bit with more styrene and detail. The tubing/brass I hope will fit or I can accommodate with what the hobby shop has.

Here is the start of the new guns this way I can spend less time on them this weekend.

Just a tip, cause I have fought with bending styrene/card in the past and gluing it down.. what I did was glue one side of the rounded edge and held then glued the other side. I leaned this method from another modeler.. and it worked good. After letting go the styrene was glued on. I then sanded and cleaned up the seems.

Small update, but yet some work.

gun1_zpsc1f91998.jpg

gun2_zpsc7579efd.jpg

Keep on it..

Builder/Mike
 
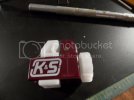
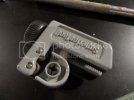
So I made to the LHS last weekend picked up a new cutter that seems to be getting the job done on smaller tubing. The small pipe cutter I got at the box store was not cutting real small tube.

This cutter has been working out good.

ks_zps6cfe0da7.jpg

This one not on the small stuff..

cuttertool_zpsb882d09f.jpg

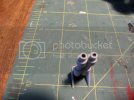
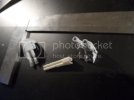
Small update on the front guns. The kit ones not so good, and my last attempt on scratching out some, the cannons and design just was not working. The new one's I made from aluminum rather than brass I think turned out better this time around. I added a little detail and will finish cleaning them up, made from 4 parts tube and plastic card.

frontguns2_zps43aec1a7.jpg

gunsfront_zpse1420243.jpg

hope to get some more updates up real soon.
 
Thanks Scott!!

NICE! I posted pics of mine but they are not as good as these! LOL

RedDragon,

Your model is looking good, nice detailing. It's always pretty cool to modify a kit the out come is always different.. The work including the guns you have modified or scratch made look great!

Thanks,

Builder
 
Thank you builder.

I get alot of ideas from builders like yourself and the encouragement is what helps along this path.
 
Looking amazing!

Thanks Ozzman, I appreciate the comment and always enjoy viewing your build threads..

Spent most of the day working around the house hanging drywall but managed to get a little time to model.

So a little more progress. The hull needs a little clean up but I got a lot of scribing/patching competed and primed. I still need to revisit this part to clean up and add detail.

hull1_zps110ee9d1.jpg

Next, I worked on the back of the shuttle. I scraped off almost all of the detail to add my own. I basically stuck to the same scheme of things and adding detail that I hope in the end will make the back pop a little bit more than what the kit details offered.

Scraped clean I was left with this to work with..

tyback_zps12aa61bd.jpg

After detailing....and still need scratch out a top cover for the wires to run up and into.

backdetail_zps9dddf831.jpg


Always thanks for checking in..

Builder
 
The extra detail is coming along nicely . I've the Revell version sat waiting for some attention and what you're doing here is giving me plenty of food for thought ! Can't wait to see it come together . ;)
 

Latest posts

Back
Top