Shuttle Tydirium MPC build with modification's (WIP with Pic's)

All the kind words help's keep the encouragement going, thanks.. I took a break from the scribing wing's today and cut out the floor for the cockpit and the back wall was scratchbuilt. I always remember the blue lights shining through the triangular shaped design in the back. I hope some of it is visible after I spray the cockpit glass a dark tint.. the glass right now in covered from dust after being dipped in future. I plan to run fiber to the cockpit and light behind the wall I built. Either styrene tube or brass run up along each side should light up the controls.

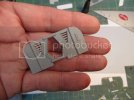
Here is some pic's of the start of scratching out the cockpit.

Thank's for for viewing.

Once again I scribed the top and once again it did not turn out.. Back to sanding.

Floor is cut to fit the bottom half.

SAM_1469_zpsfd4acc2e.jpg

Primed back wall

SAM_1470_zps47684184.jpg
 
Great work so far!

If you need some ideas or references you might check out this crazily detailed build
http://dorobou.blog.so-net.ne.jp/archive/c35378003-1

You can download a PDF of the full build
http://yumen.chicappa.jp/ModelersBible/dlcount.php?fname=ShuttleTydirium.pdf

Blake, hey thank's so much that is the best reference that I have seen and you are right they did a crazy overhaul that basically touched on all aspects of the build.. Is that a working ramp? Wow..

Thank's I have been using the, "sculpting a galaxy book for the exterior but both links will work great thank's again.

Mike
 
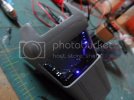
Thanks!!.. Small update, I cut out the floor and the remade a simple cockpit. I don't know how much effort I will put into the details yet as I doubt it will really be very visible. I hope that some of the lights (LED's) shine through. I ran fiber from under the front to the controls I built from styrene. I used two Led's.. Next I will focus on new seats and a correct back wall. Running fiber I always run into problems and it was no diferent this weekend doing this work. Take a look let me know what you think, I really need to find a safe glue other than white elmers glue that will set up quicker.

I also began scribing yet another wing only two more to go after this one..

Thanks for looking and commenting!!!

Mike

cockpit_zpsf38f25cd.jpg

anotherwing_zps6f17732a.jpg
 
builder101 said:
I really need to find a safe glue other than white elmers glue that will set up quicker.

Hey Mike,
I use 2 part epoxy to set my fiber in place. It's not instant but it's much faster then aylmer's glue and it dries rock solid within 5-6 minutes. You can even glue 1mm-1.5mm fibers in funky shapes and it will hold.
I actually use 2 part epoxy anywhere I need a extra solid bond. Check you local dollar store, they usually sell a tube for 2$ instead of 5-6$ at the hardware store.

And oh, btw, LOVE the lighting of the cockpit.

Cheers!
 
that cockpit is looking awesome!

Thanks man!!

Yes, that cockpit looks really good!

Thanks for checking it out again Mike!!

I use 2 part epoxy to set my fiber in place

Thank's Frank,, so I thought something like JB weld would get hot.. Also I didn't think something of that nature would dry clear?? I will look into it and thanks for the advise.

I hope to get time to scratch out some seats and a center console. I painted a little bit more and went over some of the control button's with paint again after snapping the pic I posted.

I used styrene tube, Aves Apoxy, foil, two led's to mount and hold every thing along with the fiber.. I used mostly really fine stuff but if you notice in the cockpit the two larger looking lights is a bigger optic. I just used two it has been so long ago since I ordered the fiber I forget the size of both. After making the holes with my pin vise I used white glue cause it will not melt all the fiber. Since I scratched the entire pit its sometimes hard to run the fiber through the holes use white glue and then super glue the styrene panels down where they belong with out having some of the SGlue touch some of the micro strands of fiber. Glad that part is pretty much over with. Again hope to wrap up the seats and all this week and post more updates soon!!
 
Cockpit looks great, and I second Jurasikfrank on the epoxy. I have used it many times to hold down fibers and circuits to the model. Works pretty good, but it can be a sticky mess if you are not careful. Standard 5 minute epoxy does dry clear.
 
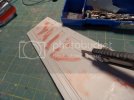
Had a chance to do a few things in the evening this week. Small minor details but they need completed and I keep moving along. First off, I had to fill in some of my work from my last visit on the wing some of the lines did not turn out that great. I sanded down the bondo spot putty that I applied and began adding the detail after some re-scribing.

Here is some work as I go,, sort of speak..
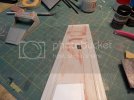
SAM_1476_zpseb4b25b2.jpg

I also finally got the top scribed as good as it is going to get. The line's look really deep in the pic but after priming it should come out. I have scribed the top, filled, repeated on and on some many times that this is going to have to be how it is. I guess it's hard because it flexes gives and it's hard to hold the ruler down and make the line. I found that having a dish towel in the center (rolled up as padding) helps keep things stable and the plastic does not give as much when scribing the roof.
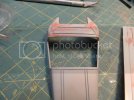
SAM_1477_zps5b4e7089.jpg

A coat of primer makes everything look better...
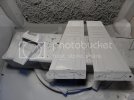
SAM_1478_zps27be4230.jpg

I still need to do some detail on the completed wings of the ship.. The first one I did pretty much is complete. Lot's of tube and fine styrene cut to help get all the little detail complete.
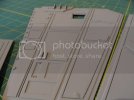
SAM_1482_zpsb8ffab53.jpg

I have two wings left and can't wait to get over that hump!!
Here is a pic of one of the two that needs completed and what I have finished.. beside's minor details.
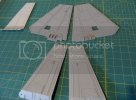
wings_zps56c918e3.jpg

I also at some point scratched out some little seat's I did not go crazy with the detail and I'm not sure if I will use the kit pilots or not. The cockpit needed a little work I made a center console and gave the ship a nice navigation screen. The fiber also needed cut off closer to the holes each was pushed through. This seemed to brighten things up a bit. I painted the console screen yellow and then clear Tamiya green on top. Seem's to glow a little bit or stand out as much as fit. I need to make two back seats yet..

Another pic -- Cockpit more completed lit up!!
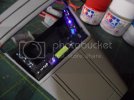
thepit3_zpsaeef05d8.jpg

Sorry, can't seem to get the dark with light photo's down tonight. I took about 5 and none are that great but here is a pic with most of the light's in the room out to see more lighting..
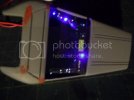
thepit4_zps9530a8e5.jpg

Thank's for looking my buddy and I plan to get ready to finish the tile work and get ready to stone the wall's in my basement this weekend but I hope a get a few hours to continue, it's been a lot of fun taking on this kit and taking time doing it.

Hey, thanks for looking!

Mike
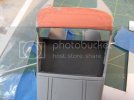
 
It's looking really good!
I thought the top of the shuttle looked pretty rough a few days ago, but now looks terrific!
:)
 

Latest posts

Back
Top