You are using an out of date browser. It may not display this or other websites correctly.
You should upgrade or use an alternative browser.
You should upgrade or use an alternative browser.
Revell 50th Anniversary 1/144 Saturn V Rocket (Complete)
- Thread starter rastanz
- Start date
- Joined
- Jan 27, 2011
- Messages
- 192
- Joined
- Jan 27, 2011
- Messages
- 192
On the home run with this build, just had to order in some transparent decal sheet as I only had white backing, plus the usual stages of paint drying times and gloss coats are time consuming.
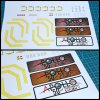
My inkjet settings were all over the place and I wasted a sheet during a trial print run, oh well, I got my settings sorted for the second print and I like how they turned out.
I printed extras just in case and I also did three versions of the main label in dark metal, gold and clear backing, I'm kind of leaning towards the gold one as I like how it shines. It's hard to see it under the lighting and my photo's don't do it any justice, however, the dark metal looks good too as the colours blend in with the base really well.
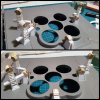
I got a bit adventurous with the platform and masked some random grid lines and shaded them in, I used some tamiya smoke for shading although the camera isn't picking it up very well it is there, I'll take some daytime natural light pics as the room light doesn't help with clear photo's of glossy paint work.
Painted and glued the towers in place.
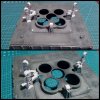
Nearly done with this build.
Thanks for looking.
My inkjet settings were all over the place and I wasted a sheet during a trial print run, oh well, I got my settings sorted for the second print and I like how they turned out.
I printed extras just in case and I also did three versions of the main label in dark metal, gold and clear backing, I'm kind of leaning towards the gold one as I like how it shines. It's hard to see it under the lighting and my photo's don't do it any justice, however, the dark metal looks good too as the colours blend in with the base really well.

I got a bit adventurous with the platform and masked some random grid lines and shaded them in, I used some tamiya smoke for shading although the camera isn't picking it up very well it is there, I'll take some daytime natural light pics as the room light doesn't help with clear photo's of glossy paint work.
Painted and glued the towers in place.

Nearly done with this build.
Thanks for looking.
Quaralane
Well-Known Member
- Joined
- May 22, 2009
- Messages
- 11,263
Very very nice
- Joined
- Jan 27, 2011
- Messages
- 192
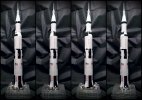
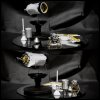
Calling this complete, stoked how the mods and details turned out, also pleased with the extra effort I put into the platform as it looked kind of bare and boring with just the three tiny figures that come with the kit, I think the addition of the towers help give the rocket a good sense of scale.
I thought I may have overdone the weathering on the platform as it started out a lighter shade of grey but I like the grungy dirty looking result it ended up as.
I chose not to follow the paint scheme in the kit instructions but preferred to follow reference photo's that I had gathered from the web.
It's been an exciting project with it's own set of challenges which were easily fixed, excuse the photo's, they're taken under warm lighting and with my mobile phone.
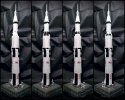
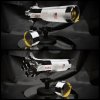
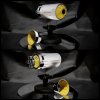
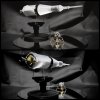
Thanks for following and commenting during it's progress.
Cheers
I thought I may have overdone the weathering on the platform as it started out a lighter shade of grey but I like the grungy dirty looking result it ended up as.
I chose not to follow the paint scheme in the kit instructions but preferred to follow reference photo's that I had gathered from the web.
It's been an exciting project with it's own set of challenges which were easily fixed, excuse the photo's, they're taken under warm lighting and with my mobile phone.


Thanks for following and commenting during it's progress.
Cheers
urumomo
Well-Known Member
- Joined
- Mar 18, 2013
- Messages
- 6,228

Quaralane
Well-Known Member
- Joined
- May 22, 2009
- Messages
- 11,263
The work you put in on this definitely shows
blakeh1
Well-Known Member
- Joined
- Oct 26, 2011
- Messages
- 804
Amazing!
Wolf Star
Man of mayhem
- Joined
- Dec 10, 2014
- Messages
- 395
All of the extra detailing and work you've done helps to make the scale seem a lot bigger than it actually is.
Similar threads
- Replies
- 27
- Views
- 981

