Patlabor Maintenance Facility

Tonight's update, a milestone is reached.
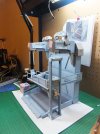
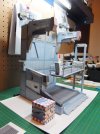
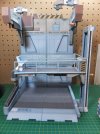
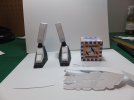
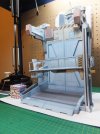
Baring a few added details that will be added later, the maintenance station is complete.
When installing the gantry, I found that the lower support beam to the back wall was about 2mm too long and had to cut it back. The upper support beam was ok though.
The gantry is in need of a little more support. I may mount this to a base, which when glued down will strengthen the gantry.

So here is the completed maintenance station.

MaintenanceStation1_zps0dd30dba.jpg

MaintenanceStation2_zps773d64f4.jpg

MaintenanceStation3_zpsf4f8c946.jpg

Now on to the second half of this build. The construction of an Ingram.

Thank you for watching.

Jim
 
Coming very nicely. :)
The handrails would use some support though, are you planning anything for the bending?

Luis
 
Hi Luis.
I'm toying around a couple of ideas. I was thinking about that tonight.
I may have a solution. ;D

Jim
 
That Looks Fantastic!
Excellent work, ad real craftsmanship, after I saw what you did in your video. A nice steady hand is needed for cutting the pieces apart.
;D
 
Thank you Glorfindel, Mike and Grendels.

I sort of developed a steady hand for small things after years working with micro electronics.

Jim
 
Good Morning.
I had a problem with droop on the platform. It was flexing too much, and more support was needed.
This was driving me up the wall, I had to find a solution.
What I did was to tie the railing , which is securely fastened to the bed of the platform, to the lift mechanism.
From the hand rail pattern, constructed 2 extensions and glued them to the top rail and back to the lift. The result is a straighter and more stable platform. A fairly easy fix and it does not detract from the model design.

DroopFixed_zps882c4438.jpg

Now that's done on to the mecha and couple of other additions we'll discuss later.

Have a good day and use the added time we were given to wisely complete our contest builds.

Jim
 
Well started the construction of the Ingram today.
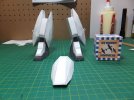
The feet have been assembled. They may not look like much, but each foot consists of 5 assemblies.

Feet1_zpsebc73db0.jpg

Start on the ankle tomorrow, maybe the lower leg.
Questions and comments are always welcome.
Have a good evening.

Jim
 
Hello.
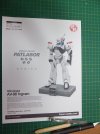
I guess I should give you an image of what it is I am building. Especially for those that may be unfamiliar with Patlabor.

Patlabor1_zps7136a726.jpg

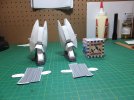
Did not get much done today. It was way too humid to work with card today. Only succeeded in having the ankles and the beginnings of the lower legs installed. It's not suppose to be as humid tomorrow.

Feet2_zpsabd77259.jpg

Have a good evening.

Jim
 
Your work with these always amazes me, papermodder. They look very challenging to do, especially the curved surfaces on that labor. So delicate, do you wear gloves while doing this? I can't imagine having greasy, sweaty hands ruining the precise folds on this.

Always awesome to see you make this look so easy!
 
Thank you Cave Dweller.
No I do not wear gloves, but you do make sure your hands are clean. The biggest problem is keeping glue off your fingers. Always have a paper towel close by to constantly clean glue off the fingers.
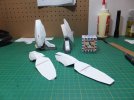
The round parts are not that difficult. Mostly card shaping and complex folds. It's all a big puzzle. What looks daunting in the beginning becomes easier with experience. You have to be able to visualize in your head when looking at that flat paper cutout of the part what it is to look like. That unassembled piece in the pic is one of the lower leg side panels and will have a somewhat rounded outside shape.

Jim
 
Haha, that little dude on the model looks pretty cool. Does it come with the model? :p

Can't wait to see this finished!

Luis
 
Hi Luis, and Thank you for the support.
Yes there is a small block figure of Noa that comes with it.

Jim
 
Good Evening All.
I thought it was time for another update.
Still working on the lower legs. Been assembling the armor panels.
These are a slow part to assemble. They have a few complex folds, that one can only partially glue, let dry then continue. When complete, can be attached to the leg core.

LowerLeg1_zps5eb6a245.jpg

LowerLeg2_zps4af5275c.jpg

The ankle guards have also been installed.
There are still more panels to construct yet for the lower legs, but the next part to install are the knees.

So This is where I am at tonight.

LowerLeg3_zps6f784076.jpg

Thank you for watching.

Jim
 
WOW... that looks awesome my friend... I've been considering doing some papercraft for awhile now, but have been hesitant to jump into it. I have a question for you. What kind of glue do you recommend for this type of work? I noticed in an earlier post that a ship was built and then adorned with some putty details... I never thought of that. I understand however that there are alot of loyal papercrafters that would frown on that because it didn't use paper 100% in the build, but for me, if it looks that good I wouldn't care what anyone else thought! I just saw your vids and you showed me that it isn't as hard as it looks or you are just that good! :)
 
Thank you LrdSatyr8.

You can use any kind of white PVA tacky glue. Myself I use Aleene's clear tacky glue.

I also belong to a paper modelers board and the build you are talking about is the one I showed by Doris. To most of us she is a master craftsman, whom we all can only dream to emulate.
To most paper modelers have no problem with mixed media. Sometimes it is the best solution. There are a few purists out there and rivet counters, but they are not the majority, and you cannot say her sculpted decorations are not a thing of beauty.

Jim
 

Latest posts

Back
Top