"Pappy's Bird"
- Thread starter Quaralane
- Start date
Quaralane
Well-Known Member
- Joined
- May 22, 2009
- Messages
- 11,263
Thanks, Solander.
And have some more coffee
Construction on Pappy's bird continues:
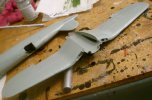
Got the grills and cannon installed into the leading edge of the wings. Flaps will come later.
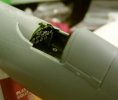
Fuselage is buttoned up with the cockpit fully assembled.
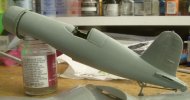
Wings and tail wings are in place on the fuselage, and the flaps have been installed in the trailing edge of the wing.
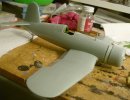
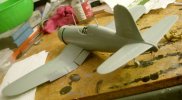
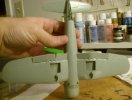
Decided, while waiting for the flaps to set up and fully cure, to assemble the figure I'm using for "Pappy"
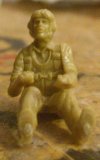
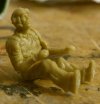
Youtube link:
Pappy's Bird-SMA Build-Part 3
And have some more coffee
Construction on Pappy's bird continues:
Got the grills and cannon installed into the leading edge of the wings. Flaps will come later.

Fuselage is buttoned up with the cockpit fully assembled.


Wings and tail wings are in place on the fuselage, and the flaps have been installed in the trailing edge of the wing.


Decided, while waiting for the flaps to set up and fully cure, to assemble the figure I'm using for "Pappy"


Youtube link:
Pappy's Bird-SMA Build-Part 3
panzerace007
New Member
- Joined
- Dec 17, 2010
- Messages
- 2,118
Q ,
You're rolling this one out like you used to be a Plane Mechanic or something !!! Lookin' Good !! The Cockpit is lookin' Great !!
You're rolling this one out like you used to be a Plane Mechanic or something !!! Lookin' Good !! The Cockpit is lookin' Great !!
Carsenault
Member
- Joined
- May 7, 2009
- Messages
- 846
Nice going, looks like you didnt have the same issues with the flap fit like I did.
Quaralane
Well-Known Member
- Joined
- May 22, 2009
- Messages
- 11,263
@Carsenault,
I avoided the worst by putting in the outer flaps first, then the inner. I saved the middle flaps for last.
They're not perfect, but they're doing all right.
@Myke,
Thanks. And I might try for 4. Just might.
And now....
Got a bit of work done on the Corsair today. Most of that is in the video.
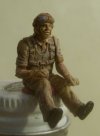
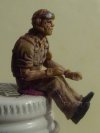
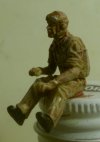
Also got "Pappy" ready to go into his bird.
Gave the whole figure a wash of brown ink, then painted in the sections of his arms and head that needed flesh tone.
Drybrushed his suit with white to get the light tan look I was seeking.
Gave his skin a second wash of the brown ink.
The last bits I did were to pain his shoes in flat black, and pic out the lenses of his goggles in metallic light blue
Youtube link:
Pappy's Bird-SMA Build-Part 4
I avoided the worst by putting in the outer flaps first, then the inner. I saved the middle flaps for last.
They're not perfect, but they're doing all right.
@Myke,
Thanks. And I might try for 4. Just might.
And now....
Got a bit of work done on the Corsair today. Most of that is in the video.
Also got "Pappy" ready to go into his bird.
Gave the whole figure a wash of brown ink, then painted in the sections of his arms and head that needed flesh tone.
Drybrushed his suit with white to get the light tan look I was seeking.
Gave his skin a second wash of the brown ink.
The last bits I did were to pain his shoes in flat black, and pic out the lenses of his goggles in metallic light blue


Youtube link:
Pappy's Bird-SMA Build-Part 4
B
Black Sheep 1
Guest
Looking good!
When using that electrical tape for masking, do you get any adhesive residue left on the plastic?
If so, what do you use to clean it off without damaging the finish on the canopy?
When using that electrical tape for masking, do you get any adhesive residue left on the plastic?
If so, what do you use to clean it off without damaging the finish on the canopy?
Quaralane
Well-Known Member
- Joined
- May 22, 2009
- Messages
- 11,263
@hilld,
I trim the tape while it's on the canopy. Takes a sharp blade to do right, though.
Started using it because it seems to conform to things better.
@BlackSheep1,
Never had a problem with residue. I also tend to get less paint seepage this way
I trim the tape while it's on the canopy. Takes a sharp blade to do right, though.
Started using it because it seems to conform to things better.
@BlackSheep1,
Never had a problem with residue. I also tend to get less paint seepage this way
Quaralane
Well-Known Member
- Joined
- May 22, 2009
- Messages
- 11,263
All right, got some serious painting done.
Likely still need to do some more to fix what I have so far.
Top done in blue using Vallejo's "Royal Blue"
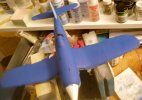
Showing the white and light blue portions on the fuselage
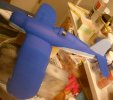
And a look underneath
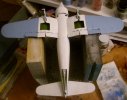
Youtube link:
Pappy's Bird-SMA Build-Part 5
Likely still need to do some more to fix what I have so far.
Top done in blue using Vallejo's "Royal Blue"

Showing the white and light blue portions on the fuselage

And a look underneath

Youtube link:
Pappy's Bird-SMA Build-Part 5
