Omega 7 Columbia Helicarrier MkIV
- Thread starter Quaralane
- Start date
cargoman5126
Anything in scale I'm into it...
- Joined
- Nov 7, 2012
- Messages
- 829
Great progress.... Looks incredible... Can't wait for more....
Quaralane
Well-Known Member
- Joined
- May 22, 2009
- Messages
- 11,263
Thanks, Chaos
Time for a quick update on this:
Using 1mm styrene, I cut and placed the detail strips for the hoverfan mounts
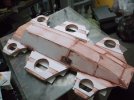
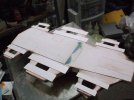
Once I'd trimmed those and cleared the openings again, I installed the fan mounts themselves
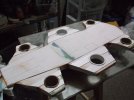
Again with 1mm sheet styrene, I built up the "CIC" section for the lower hull.
(Think of this as being like Fury's "command center" from the Avengers version)

Using balsa to set the spacing, I attached the main engines to the back of the lower hull
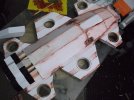
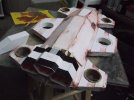
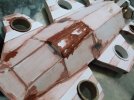
While I figure out how I want to fill the main engine section, I used Bondo on the seams for the CIC section
Using five thicknesses of balsa, I created the core for what will become the island on the flight deck
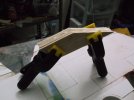
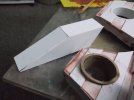
I then skinned that with 1mm styrene sheet.
The seams on this will be filled and sanded before I go in and add the first of the details
Youtube link:
http://www.youtube.com/watch?v=uacGV29f6Tc
Time for a quick update on this:
Using 1mm styrene, I cut and placed the detail strips for the hoverfan mounts


Once I'd trimmed those and cleared the openings again, I installed the fan mounts themselves

Again with 1mm sheet styrene, I built up the "CIC" section for the lower hull.
(Think of this as being like Fury's "command center" from the Avengers version)

Using balsa to set the spacing, I attached the main engines to the back of the lower hull


While I figure out how I want to fill the main engine section, I used Bondo on the seams for the CIC section

Using five thicknesses of balsa, I created the core for what will become the island on the flight deck

I then skinned that with 1mm styrene sheet.
The seams on this will be filled and sanded before I go in and add the first of the details

Youtube link:
http://www.youtube.com/watch?v=uacGV29f6Tc
Papermodder
Modeller in both Plastic and Paper Card
- Joined
- Jan 2, 2013
- Messages
- 1,224
I love seeing something come from nothing.
This is coming along nicely Patrick.
I'm following.
Jim
This is coming along nicely Patrick.
I'm following.
Jim
JohnSimmons
For Spud: I was once Merseajohn
- Joined
- Jan 4, 2011
- Messages
- 5,645
Great stuff Q this is really interesting stuff mate.
Quaralane
Well-Known Member
- Joined
- May 22, 2009
- Messages
- 11,263
It's definitely a different way to go at things, Unreality.
Sometimes, though, it's the only way to get what you want.
Time for a LONG overdue update on my progress with the Helicarrier build.
The flow here in the written version will be a LOT better than the "all over the place" from the video
Picking up with the deck island, I marked out the levels and locations for the viewing levels in pencil, and then glued a piece of Evergreen "L" channel into place to hold the top plates in place.
These were then angle cut to accomodate the filler pieces
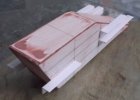
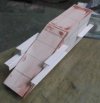
Using 1mm styrene, I cut the filler pieces to fill the angle I was looking for
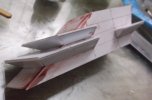
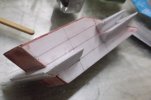
With those cut and sanded to the proper shapes, I filled the seams with Squadron green putty and sanded the assembly
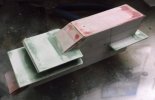
Using strips of electrical tape cut to the proper width, I placed the viewing area windows.
WIth those in place, I used a sharp blade to cut the window frames into the strips.
I also cut smaller pieces of tape to stand in for the man hatches at the base
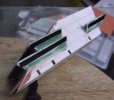
I cut the circular disks for the hover fans. Then, based on my original plan, I drilled out the centers for the eventual motor mounts.

There was a change of plan as I figured out how I wanted to work the mounts.
Starting with some strips of balsa, I created a basic form for what I was now looking to do.
The center is formed from the end of a syringe, and the details were filled in with clay.
The plan is to cut them down to the right diameter for the insides of the particular fans
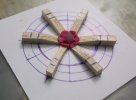
With the master built, I made a silicone mold to use in casting the necessary mounts for the ship
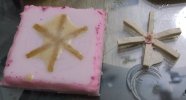
Now, in a MAJOR retrofit from what I'd done previously, I decided that the previous build of the main engines was WAY too big for what I was going for.
So, I cut the previous engines from the back of the ship and started over.
Using the centers from the old engines, I made new mounts from 1mm styrene. The caps were epoxied to the back plates, while I used Tamiya extra thin cement to glue the other piece into place
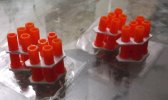
After cutting rear plates for these new assemblies from balsa, I then skinned them with 1mm styrene
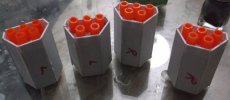
Seams were filled with Bondo
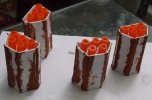
The new assembly was put together along with some balsa cut for the center supports.
I figured I'd leave them long to act as a bit of added detail to the back
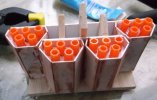
This new assembly was then glued into place on the back of the ship, and the back plate was trimmed to shape
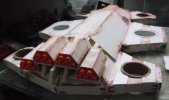
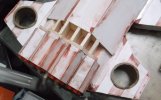
The rather large gap was then filled with balsa scrap to give it structure while saving the weight that filling with Aves would have created
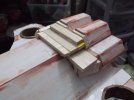
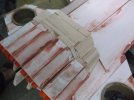
This was then shaped in roughly with the drum sander in my Dremel
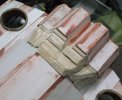
That was then filled with Bondo and sanded, followed by a second treatment using Squadron green putty
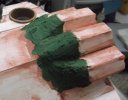
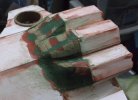
This was then sanded down, and the exposed wood was treated with Testors tube cement to seal the wood
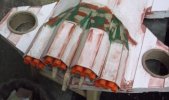
Youtube link:
http://www.youtube.com/watch?v=H87yXM7oc2Q
Sometimes, though, it's the only way to get what you want.
Time for a LONG overdue update on my progress with the Helicarrier build.
The flow here in the written version will be a LOT better than the "all over the place" from the video
Picking up with the deck island, I marked out the levels and locations for the viewing levels in pencil, and then glued a piece of Evergreen "L" channel into place to hold the top plates in place.
These were then angle cut to accomodate the filler pieces


Using 1mm styrene, I cut the filler pieces to fill the angle I was looking for


With those cut and sanded to the proper shapes, I filled the seams with Squadron green putty and sanded the assembly

Using strips of electrical tape cut to the proper width, I placed the viewing area windows.
WIth those in place, I used a sharp blade to cut the window frames into the strips.
I also cut smaller pieces of tape to stand in for the man hatches at the base

I cut the circular disks for the hover fans. Then, based on my original plan, I drilled out the centers for the eventual motor mounts.

There was a change of plan as I figured out how I wanted to work the mounts.
Starting with some strips of balsa, I created a basic form for what I was now looking to do.
The center is formed from the end of a syringe, and the details were filled in with clay.
The plan is to cut them down to the right diameter for the insides of the particular fans

With the master built, I made a silicone mold to use in casting the necessary mounts for the ship

Now, in a MAJOR retrofit from what I'd done previously, I decided that the previous build of the main engines was WAY too big for what I was going for.
So, I cut the previous engines from the back of the ship and started over.
Using the centers from the old engines, I made new mounts from 1mm styrene. The caps were epoxied to the back plates, while I used Tamiya extra thin cement to glue the other piece into place

After cutting rear plates for these new assemblies from balsa, I then skinned them with 1mm styrene

Seams were filled with Bondo

The new assembly was put together along with some balsa cut for the center supports.
I figured I'd leave them long to act as a bit of added detail to the back

This new assembly was then glued into place on the back of the ship, and the back plate was trimmed to shape


The rather large gap was then filled with balsa scrap to give it structure while saving the weight that filling with Aves would have created


This was then shaped in roughly with the drum sander in my Dremel

That was then filled with Bondo and sanded, followed by a second treatment using Squadron green putty

This was then sanded down, and the exposed wood was treated with Testors tube cement to seal the wood


Youtube link:
http://www.youtube.com/watch?v=H87yXM7oc2Q
Papermodder
Modeller in both Plastic and Paper Card
- Joined
- Jan 2, 2013
- Messages
- 1,224
I like how it's coming, Patrick.
Jim
Jim
