You are using an out of date browser. It may not display this or other websites correctly.
You should upgrade or use an alternative browser.
You should upgrade or use an alternative browser.
Old male armour
- Thread starter Pantherman
- Start date
GaryG64
Well-Known Member
- Joined
- Sep 8, 2022
- Messages
- 1,766
The weathering is subtle, I like that.These are pretty easy to build IMO. I have the Meng version of the Whippet. It's tempting to build that one next. I'm on a WW1 armor binge now. I managed to collect 19 WW1 armor kits. Most are armored cars, but had to get one of each of the main tanks I saw.
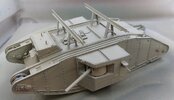
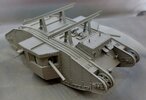
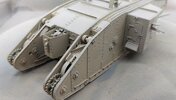
I did my interpretation of weathering for the Sania desert. Obviously haven't done the tracks yet, it's so cool how you can snap these on and off. Here's how it turned out, I'll list the steps I did at the bottom, I did not get real carried away on it. I'm going to use my old method on the tracks tonight but I'll try GEG64 method on the next tank. Wouldn't expect to see much rust color in the desert.
View attachment 113644
View attachment 113645
View attachment 113646
View attachment 113647
So I used the following to do the weathering. I'm a lazy weatherer, so I typically do all of my weathering over Testors dull coat so that is what I did here. The dull coat gives the paint some tooth. Of course panel liner and washes don't flow over it well, but I didn't use either of those strategies.
First - I did the sponge chipping method with some Vallejo camo Brown. Mostly on the edge of the very front and sponsons. This was used as a training tank before heading to the desert so I wanted it to show some wear but not a ton.
Second - I basically brush painted the entire vehicle with Vallejo dark Brown was. This serves as a panel liner and streaks and darkens the paint everywhere all at once and only takes about 20 minutes.
Third - Without any real drying time between I applied Vallejo Deset Dust Pigment to almost the entire model.
I also did some miscellaneous dark brow / black pigment where the ends of shafts mounts and on the track tensioner etc.
Really a pretty simple weathering job that I'm pretty happy with. I welcome and comments don't worry me getting upset, it just wont happen. I like trying different methods so my models look different.
I tend to go overboard at times with weathering.
Great job, this is a really nice build!
MystRacing
Active Member
- Joined
- Nov 7, 2023
- Messages
- 43
GEG64 thanks for the compliment. I've been trying to pull back on the weathering myself. I've had thast tendancy to go way overboard in the past as well. Heavy weathering looks neat but IMO there probably weren't that many vehicles that got totally beat to peices before they were retired or destroyed. WW1 only lasted a few years. This tank was probably in the Sania for less than a year.
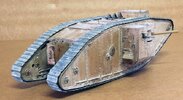
At any rate I did the track weathering with my old method. The tracks were painted Tamiya Nato Black in the previous photos. I dry brushed the tracks with Valleyo aluminum to highlight the grousers and rivets, did a wash with the Vallejo Dark Brown Wash and while still wet used Desert Sand pigment to dirt up the tracks. After everything dried I spent about 20 minutes with a stiff dry brush removing about 60% of the pigments and brushing acccross the grousers.
Here Is what I'm going to call finished on this one.
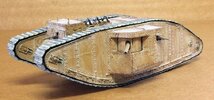
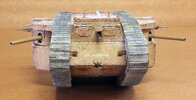
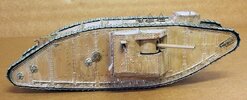
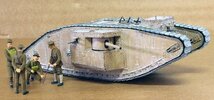
And a Picture with some crew. There really wasn't much room inside these when you think about having 8 people in there. Seeing the figures by it really emphasises that point.
I really wanted to build the tail wheel assembly and do one of the the wild Somme Camo paint jobs, but I also wanted to do this desert theme. So I think I'm going to build the Mark 1 Female I have in the Battle of Somme colors now. I did this one in the desert theme because I don't have a desert decal set for the female.
At any rate I did the track weathering with my old method. The tracks were painted Tamiya Nato Black in the previous photos. I dry brushed the tracks with Valleyo aluminum to highlight the grousers and rivets, did a wash with the Vallejo Dark Brown Wash and while still wet used Desert Sand pigment to dirt up the tracks. After everything dried I spent about 20 minutes with a stiff dry brush removing about 60% of the pigments and brushing acccross the grousers.
Here Is what I'm going to call finished on this one.


And a Picture with some crew. There really wasn't much room inside these when you think about having 8 people in there. Seeing the figures by it really emphasises that point.

I really wanted to build the tail wheel assembly and do one of the the wild Somme Camo paint jobs, but I also wanted to do this desert theme. So I think I'm going to build the Mark 1 Female I have in the Battle of Somme colors now. I did this one in the desert theme because I don't have a desert decal set for the female.
Pantherman
Well-Known Member
- Joined
- Feb 10, 2022
- Messages
- 2,420
Excellent work, I love it. PanthermanGEG64 thanks for the compliment. I've been trying to pull back on the weathering myself. I've had thast tendancy to go way overboard in the past as well. Heavy weathering looks neat but IMO there probably weren't that many vehicles that got totally beat to peices before they were retired or destroyed. WW1 only lasted a few years. This tank was probably in the Sania for less than a year.
At any rate I did the track weathering with my old method. The tracks were painted Tamiya Nato Black in the previous photos. I dry brushed the tracks with Valleyo aluminum to highlight the grousers and rivets, did a wash with the Vallejo Dark Brown Wash and while still wet used Desert Sand pigment to dirt up the tracks. After everything dried I spent about 20 minutes with a stiff dry brush removing about 60% of the pigments and brushing acccross the grousers.
Here Is what I'm going to call finished on this one.
View attachment 113689
View attachment 113690
View attachment 113691
View attachment 113692
And a Picture with some crew. There really wasn't much room inside these when you think about having 8 people in there. Seeing the figures by it really emphasises that point.
View attachment 113693
I really wanted to build the tail wheel assembly and do one of the the wild Somme Camo paint jobs, but I also wanted to do this desert theme. So I think I'm going to build the Mark 1 Female I have in the Battle of Somme colors now. I did this one in the desert theme because I don't have a desert decal set for the female.
GaryG64
Well-Known Member
- Joined
- Sep 8, 2022
- Messages
- 1,766
Really nice work! Love the figures, they put it into perspective.GEG64 thanks for the compliment. I've been trying to pull back on the weathering myself. I've had thast tendancy to go way overboard in the past as well. Heavy weathering looks neat but IMO there probably weren't that many vehicles that got totally beat to peices before they were retired or destroyed. WW1 only lasted a few years. This tank was probably in the Sania for less than a year.
At any rate I did the track weathering with my old method. The tracks were painted Tamiya Nato Black in the previous photos. I dry brushed the tracks with Valleyo aluminum to highlight the grousers and rivets, did a wash with the Vallejo Dark Brown Wash and while still wet used Desert Sand pigment to dirt up the tracks. After everything dried I spent about 20 minutes with a stiff dry brush removing about 60% of the pigments and brushing acccross the grousers.
Here Is what I'm going to call finished on this one.
View attachment 113689
View attachment 113690
View attachment 113691
View attachment 113692
And a Picture with some crew. There really wasn't much room inside these when you think about having 8 people in there. Seeing the figures by it really emphasises that point.
View attachment 113693
I really wanted to build the tail wheel assembly and do one of the the wild Somme Camo paint jobs, but I also wanted to do this desert theme. So I think I'm going to build the Mark 1 Female I have in the Battle of Somme colors now. I did this one in the desert theme because I don't have a desert decal set for the female.
GaryG64
Well-Known Member
- Joined
- Sep 8, 2022
- Messages
- 1,766
Pantherman
Well-Known Member
- Joined
- Feb 10, 2022
- Messages
- 2,420
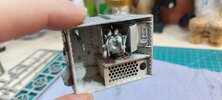
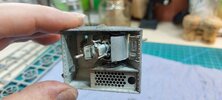
So I have finished the interior of the gun turrets and have decided just to fit them. I know that they are painted, that's the main thing. PanthermanI have made up the other side pod and decided to paint the interior of one of them just to say that I did it.
I have been trying to find a way to fit the painted pod so that I can remove it in the future but it's fixed to the hull by a tiny recessed rim. Anything I add to make a flange all the way around the pod so that it slides in will ruin the interior.
Might just have to give up on the idea. Pantherman
View attachment 113414
View attachment 113415
View attachment 113416
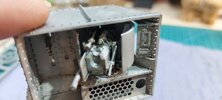
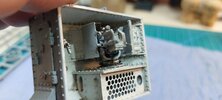
Pantherman
Well-Known Member
- Joined
- Feb 10, 2022
- Messages
- 2,420
Going to crack on now. I think I will go for the desert camo as well. I have been inspired by mystracing's fantastic build.So I have finished the interior of the gun turrets and have decided just to fit them. I know that they are painted, that's the main thing. Pantherman
View attachment 113724View attachment 113725View attachment 113726View attachment 113727
Pantherman
MystRacing
Active Member
- Joined
- Nov 7, 2023
- Messages
- 43
Thanks for the compliments guys. I'm really impressed with the Takom kits, but if I had one suggestion for them it would definately be that they not do so many flat sheets that all have to be fit together If they even molded two ar three todether it would be a lot easier to keep things aligned. Of course that would complicate the molds.
The interior of the sponsons looks super nice PM. At least theres a few people that know it. I just can't bring myself to do that work.
I did decide to build the female, already working on the wheels.
The interior of the sponsons looks super nice PM. At least theres a few people that know it. I just can't bring myself to do that work.
I did decide to build the female, already working on the wheels.
Pantherman
Well-Known Member
- Joined
- Feb 10, 2022
- Messages
- 2,420
GaryG64
Well-Known Member
- Joined
- Sep 8, 2022
- Messages
- 1,766
Very nice detail!So I have finished the interior of the gun turrets and have decided just to fit them. I know that they are painted, that's the main thing. Pantherman
View attachment 113724View attachment 113725View attachment 113726View attachment 113727
GaryG64
Well-Known Member
- Joined
- Sep 8, 2022
- Messages
- 1,766
Yes. Too many peices to assemble and then the peices sometimes lean one way or another making for a poor fit or to redo them. I understand that is model building and it is fun bun I feel it is unnecessary steps.Thanks for the compliments guys. I'm really impressed with the Takom kits, but if I had one suggestion for them it would definately be that they not do so many flat sheets that all have to be fit together If they even molded two ar three todether it would be a lot easier to keep things aligned. Of course that would complicate the molds.
The interior of the sponsons looks super nice PM. At least theres a few people that know it. I just can't bring myself to do that work.
I did decide to build the female, already working on the wheels.
TimM63
Well-Known Member
- Joined
- Mar 6, 2023
- Messages
- 949
So are you an empty nester now Mike?I am poking along. My stepson has also been moving out so I've been giving him a hand getting out faster.... I mean helping him organize his things....lol
View attachment 113516
Bear43
Well-Known Member
- Joined
- May 19, 2023
- Messages
- 492
GaryG64
Well-Known Member
- Joined
- Sep 8, 2022
- Messages
- 1,766
I remember our time as empty nesters it was very nice and quite.... For TWO Weeks!
Our sweet "independent daughter decided being independent sucks, anf wanted mama. And to think She was so set to go to a school 8hr away‽
 lol
lol
It's good that our nest has a revolving door policy. "use it, and use it often."
Our sweet "independent daughter decided being independent sucks, anf wanted mama. And to think She was so set to go to a school 8hr away‽
It's good that our nest has a revolving door policy. "use it, and use it often."
Pantherman
Well-Known Member
- Joined
- Feb 10, 2022
- Messages
- 2,420
Been there.....PanthermanYep, just me and the wife now. A lot quieter around here...lol
Tonight I got one side done. Lining up all those wheels made me say bad words...lol
View attachment 113776
Pantherman
Well-Known Member
- Joined
- Feb 10, 2022
- Messages
- 2,420
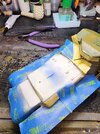
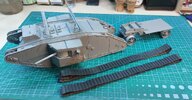
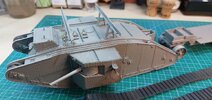
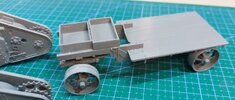
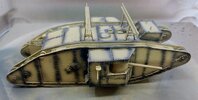
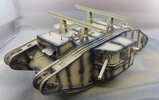
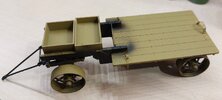
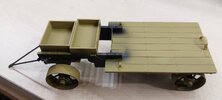
Got the priming done and a bit of shadow work. Finished the cart. All ready for the first top coat now. PanthermanGot a fair bit done now, just got to finish the lifting gear and cart. Then it's primer time. View attachment 113732View attachment 113733View attachment 113734
View attachment
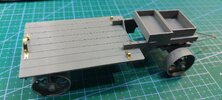
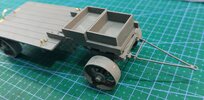
Pantherman
Well-Known Member
- Joined
- Feb 10, 2022
- Messages
- 2,420
Top coat done so will leave it for a few days to dry out and set. Then the weathering.Got the priming done and a bit of shadow work. Finished the cart. All ready for the first top coat now. Pantherman
View attachment 113792View attachment 113793View attachment 113794View attachment 113795View attachment 113796View attachment 113797View attachment 113798
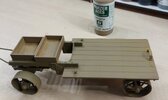
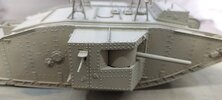
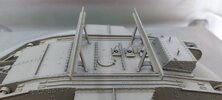
Thought I would use some Vallejo "old wood" for the cart base but it's almost the same colour as the khaki brown I used for the top coats. Might have to rethink this one or weather it down alot so it's different to the metal work. Pantherman
Pantherman
Well-Known Member
- Joined
- Feb 10, 2022
- Messages
- 2,420
Well I have a hell of alot of spare part's unless I missed something with this kit. Anyone else doing this one have the same?Hoping to get a group build going on a WW1 mk1 male tank. It doesn't have to be the make attached, in fact the more makes the better as we can comment on the pros and cons. Anyone interested?
Pantherman
View attachment 108231
Pantherman
GaryG64
Well-Known Member
- Joined
- Sep 8, 2022
- Messages
- 1,766
Looks goodGot the priming done and a bit of shadow work. Finished the cart. All ready for the first top coat now. Pantherman
View attachment 113792View attachment 113793View attachment 113794View attachment 113795View attachment 113796View attachment 113797View attachment 113798
Similar threads
Latest posts
-
-
-
I need to add texture to paint.
- Latest: BlackSheepTwoOneFour
-
-
-
-
-

