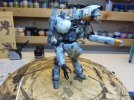
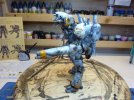
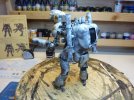
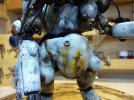
Ma. K Groberhund

Unfortunately, I have NO experience with an airbrush, so I can't help you there.
I still haven't used the salt technique either but am hoping to soon. :)
You are doing a bang up job.... maybe you could try mixing some other brand of paint and get a similar shade of grey, and see if that flows better? Maybe there is just something weird with that batch of paint.
 
What PSI are you shooting at?

When thinning Tamiya paints with their X20-A, I'm having success with a 1:1 ratio of paint to thinner. That seems to give me a great consistency.
 
I use the same 50/50, and I have the patriot. Great airbrush for base coats and primer but I mainly use it for Vallejo paints as there on the thick side, if I shoot tamiya through it though it comes out too 'fast' and I get droplets and splatters like you have. Try mixing the grey at a thicker consistency and turn the pressure up. Sometimes I don't thin tamiya paints at all, but then again I am a crazy rad dude that always walks on the wild side. ::)
 
I've been using it at about 10-15 PSI, sometimes lower as I'm trying to make a mottled camo scheme, with some precision. I don't want to blast it with paint hehe. ;)

I'm still learning the ins and outs of this brush and so far it's been pretty damn awesome, can't believe I didn't buy one sooner.

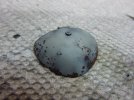
I just laid down some more of the Tamiya Med. grey and it turned out allright, still having the droplets though.

I then followed up with Vallejo Air sky grey, which seemed to work a little better. With it too there are droplets, although not as bad as with the Tamiya. I really like these paints and I'll definitely be favoring them.

It does dry fast though! I've been keeping a toothbrush handy to scrape off the dried paint that accumulates on the needle constantly. Will post some pics later today. I think tonight it might be ready to have the salt scraped off! ;D
 
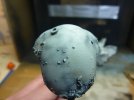
Well, what a day its been! I've been working hard on this monster all day, and have made some serious progress. Done with the airbrushing. Couldn't work out the kinks with paint spattering, but I'm still fairly pleased with the results.

I'm now applying decals and letting the solvaset work its magic on them. Next phase will be some AK washes and grime. Follow that up with some oil filters and bleaching and I think I'll call this guy done.

Of course, there is still a dioramic base to construct, but I wanted to finish up the main build before the BSC starts.

On gluing clear parts, will white glue work ok for those? I know CA will cloud them and ruin them...

Anyway, some pics!


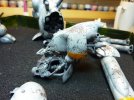
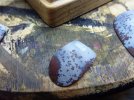
This is where I ended up with several layers of highlighting:

8501308497_3c21c3f3d1_b.jpg

Next I removed the salt, mainly with my fingers and a hobby knife

8502422944_381f4ef445_b.jpg

This turned out real nice:

8501319527_23fae2ef63_b.jpg

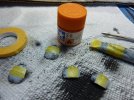
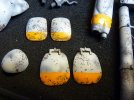
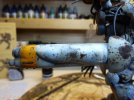
Next I taped off some pieces to add in some glossy Tamiya orange:

8501318745_065bd555ea_b.jpg

Think they turned out real nice:

8501317285_4e40dc9a45_b.jpg

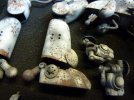
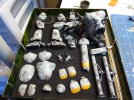
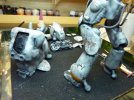
All of the parts cleaned of salt:

8502424394_b9367b4520_b.jpg

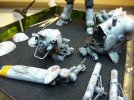
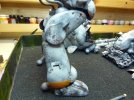
Putting stuff together:

8502421704_5efb6e4c85_b.jpg

8501313727_0e1e6b9500_b.jpg

8502420850_a680b35ce4_b.jpg

8501313059_fd601680de_b.jpg

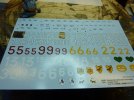
The excellent decal sheet, some really nice stuff here:

8502418708_4e569e185e_b.jpg

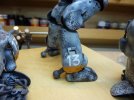
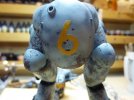
13 is the unit number, and 6 the squadron:

8501311543_bc28424e34_b.jpg

I plan on chipping these decals after they've set:

8502417116_b00e8df1b8_b.jpg

Still need more solvaset though

8502415574_2bf5517b80_b.jpg

8502416390_91586e10cd_b.jpg
 
Thanks guys, I'm pretty pleased with how it's turning out. I decided to go ahead and assemble it all together. Thing sure is ungainly and I've already dropped it a number of times. I hope that doesn't cause any real paint chips. ;D

Speaking of chips, the solvaset worked a little too well overnight, and I couldn't easily tear up the decals. Ended up slicing into the plastic a bit, but I can cover that up I think.

Next step is some AK track rust wash, which I really like. Then some AK rust pigment.

For the clear plastic bits, will backing colors show up very well underneath? I was thinking a menacing red eye is definitely in order here. What about transparent Tamiya over the clear plastic? Will that totally ruin it? I've very little experience with clear parts...
 
Yup I painted my eye red with Tammy Clear, paint the inside rather than the outside. ;)
 
JohnSimmons said:
Yup I painted my eye red with Tammy Clear, paint the inside rather than the outside. ;)

Ahh man, good idea. I already glued em on though.

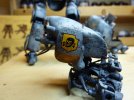
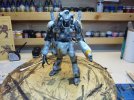
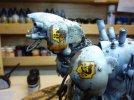
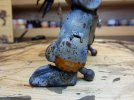
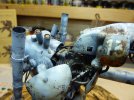
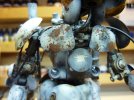
Here is is, did some AK washes and stuff. What a weekend!

8505712426_f3c37eeb38_b.jpg

8505713420_ed5181c1aa_b.jpg

8504602467_725854bdd4_b.jpg

8505710098_bebc651fa5_b.jpg

8504598953_0fc45592af_b.jpg

8505709026_65f03e8d27_b.jpg

8505706822_2228bafffd_b.jpg

8505704774_8b3ac8e3fb_b.jpg

8505705686_6cf2ac4604_b.jpg

8504605367_03a41e1c66_b.jpg

Gonna follow up with some more grime and oil type details. Maybe some exposed gunmetal type stuff. Trying to move beyond the methods I use with painting wargaming minis, with simply drybrushing some silver paint on stuff. I think I like rust more, anyway. :p

And I definitely want more Ma.K, I love it all!
 
That came out really great, despite your airbrush issues. I don't know about airbrushing at higher elevations, we're around 360' above sea level here. But it occurred to me that Badger's website might have some info about how to adjust for atmo at higher elevations.

Your chipping technique worked really well. Kosher salt is the way to go. As for painting exposed and weathered metal, you're right that in this scale, silver will be too bright. I had the same instinct, coming from model airplanes. I like to use a medium gray for that kind of color on MaK's. It came to me after noticing a hand rail made of steel tube, that had chipped paint, and I noticed that the exposed metal had turned a grayish color.
 
Thanks guys, I had a lot of fun with this kit. Still plan on a dio for it, but may have to put that on the back burner in order to focus on the BSC.

I think you may be right about the metal, Baron. Plus if you really want to be a purist, the box even details this robot is made of some kind of futuristic composite ceramic armor, which probably wouldn't oxidize. :p

But IMO more visually appealing to rust the thing heavily.
 
Cave_Dweller said:
Thanks guys, I had a lot of fun with this kit. Still plan on a dio for it, but may have to put that on the back burner in order to focus on the BSC.

I think you may be right about the metal, Baron. Plus if you really want to be a purist, the box even details this robot is made of some kind of futuristic composite ceramic armor, which probably wouldn't oxidize. :p

But IMO more visually appealing to rust the thing heavily.

Yep, ceramic and metal composites. I've seen others use a black primer, and then camo acrylic over it, then scuff the top colors with a Scotch Brite pad. If you've never been over there, check out Krueger's Maschinen Krieger forum, http://www.maschinenkrueger.com/forum
 

Latest posts

Back
Top