Ma. K Groberhund

Cave_Dweller

New Member
Joined
Mar 18, 2011
Messages
812
Well, I was totally stoked to see this bad boy on the shelves at my local hobby shop, and bought it immediately. It's been in the stash for a while and now that I've got an airbrush, I decided it was time to build it.

This is a very detailed kit, with a large number of very well made (and delicate!) parts. Definitely not for beginners or those lacking in patience. It also has a lot of mold lines on extremely tiny and fragile parts, not easy to clean up.

It came with a large sheet of excellent decals, rubber hoses and fairly thorough instructions. Overall this is one of the highest quality models I've ever attempted.

So, I've slowly been assembling it. Lots of sub-assemblies and I can see now if I want to get the best paint job on it, everything has to be carefully painted in phases, as there are so many little crevices and recessed areas that would be impossible to paint if you just put it all together.

Here's some pics of where I'm at so far. I'm running into some challenges with the mold lines on this one, and I think I need a better putty/filler for the seams. I'm using Citadel liquid greenstuff, but it isn't that easy to work with and despite hours of sanding I can see the seams still aren't properly filled. Any suggestions for a better filler?

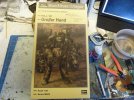
Top notch quality on this, even the box is awesome!
8461590677_c201cdef53_b.jpg

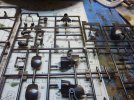
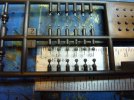
The sprues:

8462690802_3d59b3c7e9_b.jpg

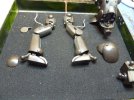
Legs:

8461573981_80622826bd_b.jpg

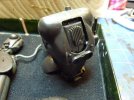
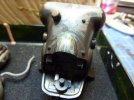
Body:

8462693706_de89028100_b.jpg

8461572297_c02d892122_b.jpg

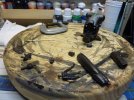
Hands and arms, had a moment of panic when I thought I lost the sprue! Turns out the sprues were just so complex I couldn't locate the bits. Maybe not the best idea to work on a model like this after a few beers ;D
8462677240_6a4430c629_b.jpg

Quite detailed sub-assemblies here...these are just the elbows and there was about 8-10 pieces per elbow! :eek:
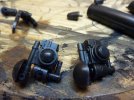
8461589167_b36d466b4b_b.jpg

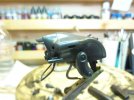
Here's the head, which again is ridiculously complex and detailed. It even comes with two choices for the back part:
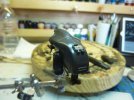
8461582327_aae7f9e263_b.jpg

8461583359_1834f55b6b_b.jpg

The instructions even specify this back part is for "late model" Groberhunds! How cool to have such details.
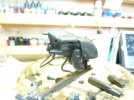
8462678138_7021884e0d_b.jpg

8462679472_6df03fc1d3_b.jpg

That's all I have for now. I'm perhaps 60% done with the assembly so far, but there is a lot of seam-filling to do, and many little bits to add on.

Also if anyone can give me any tips on how to shave mold lines off the rubber hoses I'd be grateful. Even with my sharpest knife, the hoses bent to easily to slice the tiny little mold lines off effectively. Scraping the knife over them kind of does the trick, but sort of tears them up as well.
 
Well... this is the first time I have personally seen such an in depth out of box review.
It will be great to see one of these bad boys come together.. I have only seen the final results.
 
Great start. I used Vallejo Plastic Putty on mine, the mold lines on the rubber hoses are a pain but I carefully used a sharp new blade (still didnt get rid of them all). Keep up the good work!
 
JohnSimmons said:
Great start. I used Vallejo Plastic Putty on mine, the mold lines on the rubber hoses are a pain but I carefully used a sharp new blade (still didnt get rid of them all). Keep up the good work!

Thanks I'll have to give that I try. I made a bit more progress today and nearly ready to prime it. Just need to add a few more bolts.

Oh yeah, the bolts on this kit. Very cool, but also a complete nightmare. This kit comes with sprues of hexagonal bolts, in two sizes, one about...literally 1.5mm and a 2mm size. They're so tiny and incredibly detailed. I've had more than a few go flying to some corner of my room surely to never be found again in the process of removing them from sprue and cleaning. ;D I guess that's why they give ya 2 sprues of the little buggers.
 
Thank you for the nice post and review. Sorry I can't help with the hoses, the only suggestion I came up with JohnSimmons already posted.
 
Great start! The Grosser Hund ("Big Dog") is a really cool piece of machinery.

You mentioned the kit hoses--if I may offer a tip, if you're finding the hoses a pain to work with (and they will be--they're like the soft plastic of Airfix's 1/72 and 1/32 figures, paint will flake off), you might consider using wire to replace them. That mod is very popular among MaK builders. You take a piece of wire, or solder, for the core, and wrap fine wire around it, to replicate the shape. Wire will hold its shape better, and hold the paint better, too. Same goes for the springs on the suspension parts, some guys replace those, too, although the kit parts are pretty good on their own.

Looking forward to your progress!
 
Another little trick is to use bungee cord. Snip it off at the end paint it with some Vallejo Matt Black and bobs your uncle. Mortor bike builders use it to replicate throttle cables etc.
 
Hmm interesting, and good tip on the paint chipping off the rubber hoses, Baron. I might want to remove them. They're glued on, but it wouldn't be impossible and there's only a few of them. I've also got a lot of guitar string around, which would be a decent substitute.

Gonna have to take a look at this tonight
 
I'm so glad one of these is being made. I've been checking some of these out along with some of the Warhammer and Dust kits and I think sooner rather then later I'll be jumping in to one of these. Looking forward to it.
 
The Dust kits are really nice, I wish I'd bought one when I had the chance. I reckon they're gonna become scarce now.

All done with assembly and seam filling, did some priming today! Windy as hell too.

Here's those bolts I was mentioning. I really have to hand it to Hasegawa for such precision details. But these are not very forgiving to those of us with big, clumsy fingers...

8483788402_a369edd3c2_b.jpg

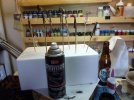
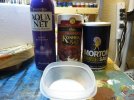
Here's what I'm using as primer. I've had good results with it, even though it's an off-brand. I'm going to be doing salt weathering here and so far I've found this to be an excellent primer for that, with a good oxide color.

8482695171_8f8f0251b3_b.jpg

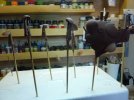
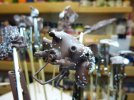
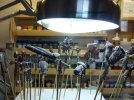
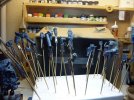
I made some holder thingys, after reading many postings in this forum. They're invaluable, and I've got 8 so far and just bought more alligator clips and dowelling to make 32 now!

8482693819_cfd09833c6_b.jpg

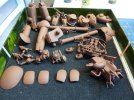
Most of the parts primed:

8483784622_2326cc1d8a_b.jpg

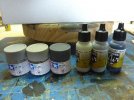
And the colors I'll be using. I like tamiya a lot, but it seems like it's hard to avoid wasting paint with their colors as you transfer it from the pot to your airbrush. I'm just getting into the pre-thinned vallejo line, and so far it's been awesome.

I'm going for a grey-white-black camo scheme, and likely a wintery diorama to put this monster in

8482691359_ac170a0941_b.jpg

That's it for now! :)
 
Nice progress! It's always great when the colors start to go on.

Cave_Dweller said:
...I like tamiya a lot, but it seems like it's hard to avoid wasting paint with their colors as you transfer it from the pot to your airbrush...

I hear ya! I always get some drips on the jar and on the paint cup. I also seem to run through a cupful pretty quickly. What's your ratio of paint to thinner? I've been using roughly 50/50, for a basic color coat.
 
Looking forward to that winter camo. Cant' wait to see it.
 
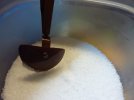
Uhg. Relentless work week for me, just no energy to work on this late at night. I managed to hairspray a few pieces and dip them in salt, for the paint chipping and oxidation to come.

I will say there is something satisfying about seeing what was a ridiculously complex pile of parts on sprue, now emptied sprue in my trash can!
 
Cave_Dweller said:
...emptied sprue in my trash can!

AUGH!!

You threw out your sprues?! My Dutchy senses are tingling!

Seriously, though, I have a box of sprues for scratchbuilding use. I do recognize that we accumulate far more than we can use, though, and I save most of my sprue for a modeler at Agape, captfue is his handle, he uses styrene sprue as raw material for sculpting large-scale figures. He heats it to melting, then forms blanks that he sculpts. It's really amazing, and it satisfies my sense of not wasting anything (that's the Dutchy sense, PA Dutch, that is)
 
I've saved it before and used it for miscellaneous stuff, but I gotta draw the line somewhere, as I already have bins overflowing with all kinds of junk that may or may not be useful someday, lol. Trying to not be a total hoarder!
 
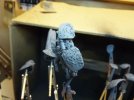
Well, today I did a lot of salting and airbrushing. Things were mostly going great.

Salting went well, and the basecoat of Tamiya grey looked awesome, and airbrushed well. In fact I used up the whole jar of paint. I followed that up with some undercoating of Vallejo Air black, to create the depths of the snow-grey camo scheme I'm going for.

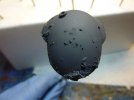
But ran into some major problems with the Tamiya medium gray I chased that up with. I just could not get this effing paint to flow decently. In fact it did nothing but spatter droplets of paint all over the place, creating a real mess.

I live at 8500ft and I've noticed there are obstacles to laying down paint at this altitude. Paint dries fast. I've primarily been a brush painter up to this point, and I've dealt with it.

Since getting an airbrush, a Badger Patriot 105, I've had mixed results. Sometimes I get great results, with perfect, even layers of paint.

Other times it spatters, bubbles and makes a crummy mess.

I disassembled and cleaned the brush thoroughly prior to this painting session.

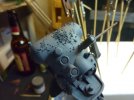
Here's some pics, showing those mixed results I've mentioned.

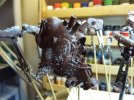
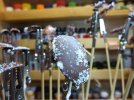
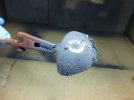
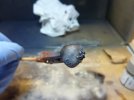
First off, here's the salted sub-assemblies:

My process:

8499770290_1387354f98_b.jpg

8498666049_039412d02e_b.jpg

8498668281_2e4a62041b_b.jpg

8498667681_21cedaf7c1_b.jpg

8498667127_a1029c195b_b.jpg

8499771410_710dddec15_b.jpg

And after airbrushing Tamiya Grey:

8499775282_64435f2a12_b.jpg

8498670821_c917fbaacd_b.jpg

8498671375_b5bb0b1d6b_b.jpg

8499776772_50429f7066_b.jpg

Great texture here:

8499777668_db9e8aabd0_b.jpg

Here comes the Vallejo Air Black:

8498673175_05267e1a90_b.jpg

Some paint spattering issues here, but since this is still a basecoat, I can cover it up with more layers.

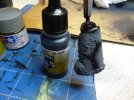
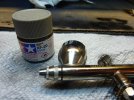
After this, I used this paint:

8498674923_ccaa8a0e2c_b.jpg

And then things took a turn south.

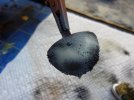
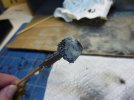
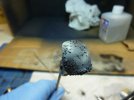
No matter how much I thinned this paint, and I tried to get it to ~2% milk consistency, I ended up with results like this:

8498664465_1c40132d44_b.jpg

8499769744_3031ddac7f_b.jpg

8499781000_71bfbdc76a_b.jpg

8499780496_4cfe1d4d32_b.jpg

At this point in time I've stopped. Maybe I need to disassemble and clean my airbrush again, but damn, this is awful. I've had great results with Tamiya paint in general, and I'm using X20-A thinner, to ~2% milk consistency. But this is very discouraging to say the least.
 
Hang in there she'll come together. Try soaking the tip only in lacquer thinner. The seasoning looks great.
 

Latest posts

Back
Top