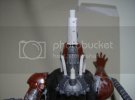
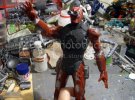
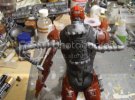
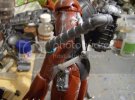
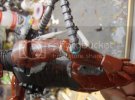
IRON CLAD a.k.a. Iron Man !

Hello again,
I have done some more work on Iron Clad this afternoon/evening.
Kind of going in starts and spurts. Mostly because I am greebling stuff now, and that involves me picking out pieces or making pieces, trying them out, and then moving on.
The majority of him is together.
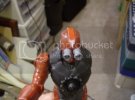
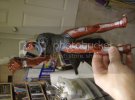
I put a band on his head...

HEAD-1.jpg

HEAD-2.jpg

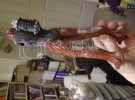
And got his legs glued on and together.

LEGS-1.jpg

LEGS-2.jpg

I think I have hit the wall for today... Running out of motivation. Will attempt again tomorrow!
 
lol...That thing looks friggen sweet! I wonder if there is a way to get a small model railroad smoke generator to fit inside to occasionally blow off some steam?

;D
 
HobbyguyTim said:
lol...That thing looks friggen sweet! I wonder if there is a way to get a small model railroad smoke generator to fit inside to occasionally blow off some steam?

;D
You know, I have thought about that, but with this being my first shot at wiring for lighting, I thought that would be complicated enough. :)
Maybe next time! ;)
 
Sorry about the pix being so blurry, but it was late at night, and I had a full day...
I kinda hit the wall again last night, and today I am beat from work. Hopefully I will get back to work on him soon!
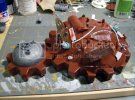
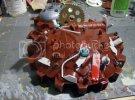
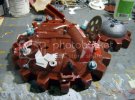
I started adding detail to the base. I wasn't impressed with the "afterthought" look to the base. The details are very poor. I think there it's supposed to look like metal plates...and some other things, but it doesn't come off too well.
Hopefully I can improve it some. :)
 
Thanx, Glorfindel.
I thought about giving him wings and some sort of propulsion, but that seemed a bit more "Diesel Punk", or maybe "Jet-Age"...So, who knows maybe another version?
I have a few more of these kits laying around!

;D ;D ;D ;D
 
Thanx Igard!
I have made some more progress.
It has been kinda slow going. Since a lot of him is getting scratched and greebled, I do some trial and error, and sometimes I make pieces that don't turn out to work, or to not work well enough for me. The other night I spent some time trying to make hydraulic types of mechanisms for his arms, and after messing with it for a while they broke. :(
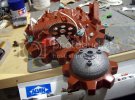
The parts were too thin. So, yesterday, after work I went to a hobby shop, and bought some styrene tubes. Today I made the hydraulic cylinders/pistons and they turned out great! They took a while....OH, and the Power conduits that go from the Steam Compactor to the forearms.... WHAT a pain that was. The one on the left arm was more so because I had to match the same basic number of joints as the right arm....
OH......and the base!!!!! ;)

BASE1.jpg

BASE2.jpg

BASE3.jpg

BASE4.jpg

BASE5.jpg

HYDRAULIC1.jpg

HYDRAULIC2.jpg

POWERCONDUIT1.jpg

POWERCONDUIT2.jpg

POWERCONDUIT3.jpg

POWERCONDUIT4.jpg

POWERCONDUIT5.jpg

POWERCONDUIT6.jpg

So, there you have the latest, BUT now I am off to bed, for I am sorely tired. Enjoy. ;D
 
That's so cool Mike. 8)

And Grendels, I wouldn't use a femanine pro-noun to describe this guy, he looks pretty mean to me! ;D
 
I don't know my wife looks like that sometimes. lol Nice work so far Mike.

Terry ;D
 
Igard said:
That's so cool Mike. 8)

And Grendels, I wouldn't use a femanine pro-noun to describe this guy, he looks pretty mean to me! ;D

Opps, my bad. I am just use to calling things like cars, and ships she. If this was a she, it is a very butch she.
 
Thanx for the compliments. I got quite a bit more done on it this weekend.
I will try to post some more pix this evening. :)
 
Sooo.....
Even though I am tired and ready for bed, I am going to share some pix I have just taken of the Iron Clad! Most of this work was done Sunday and yesterday, I did a little bit more tonight.
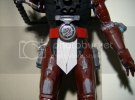
Here's a pic showing what he looks like now. I added a two layered groin skirt, and belt, and a doohickey attached to the top of that and his chest. It looks simple but I put a lot of work into it, the buckle has a sheet of styrene cut out, glued to the back of it, and then sanded down to match the edge. the doohickey, had to be bent to fit the chest, and then I cut out a little piece of sheet, and glued it to the back of that...etc. etc. I just had to say that because it takes so long, and then I look at the pix, and think, "Is that it"?
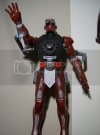
052912-1.jpg
A close-up
052912-2.jpg
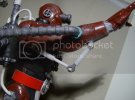
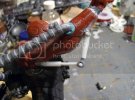
Here's a close-up of the hydraulic cylinder assembly for his right arm.
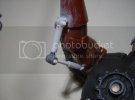
052912-3.jpg

052912-4.jpg

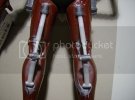
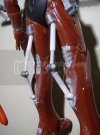
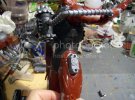
Here are the leg hydraulics.

052912-5.jpg

052912-6.jpg

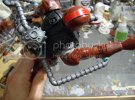
Now here's an example of a lot of work for little to no result. I spent quite a bit of time cutting, heating, bending styrene tubes trying to get them to fit from the Steam Compactor (tm), and to the leg Power converters. I finally got a couple to where I liked 'em, and then when I applied liquid cement to one of the pieces it snapped. So, I will probably just go to Michael's and get some thick Copper wire to use instead.
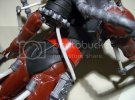
052912-7.jpg

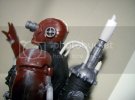
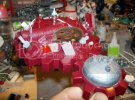
Here's a side shot of his head, now he has some sound amplifiers attached, and you can see more detail on the Steam Compactor(tm).
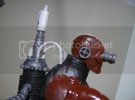
052912-8.jpg
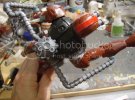
The tube bending worked out very well this time. No copper needed. Also, I scratch built the muffler for the "Stack" on the top of the S.C.(tm) I took a bit of sheet styrene, and wrapped it into a basic cylindrical shape, glued a thin strip of styrene on the back of that, and then glued on some bolts/rivets. There is a piece of styrene rod at the center of that, with a bevel to the rear.
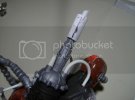
052912-9.jpg

052912-10.jpg

052912-11.jpg
SOOOO.... That's it for tonight! Oh yeah, I did a bit of welding on the joints between his boots and his knee armor.
I hope you guys like this stuff. :)
 
Love this stuff!

Great update Mike. You mention all the hard work and not much result, but I think it all adds up and makes a huge difference. It's clear how much work has gone into it.

The Steam Compactor (tm) has so many bits and bobs, and nice work with all the hoses and those little rivets at the top.

The hydralics look awesome too.

Excellent work buddy. :)
 
Thanx!
Even though it can be a little frustrating. It is all fun.
Every once in a while I bring it out and show the little woman, and the step-son...
They say it's cool, but I think he probably likes it more. :)
After all it is kind of a guy thing. ;D ;D ;D
 
This is coming along very, very nicely sir. ;D

When you are designing and scratch build as you go, progress can be frustratingly slow at times and you do often feel that you accomplish very little for conciderable time and effort.
If you have a breakage or you are not happy with your design it is very easy to give up or start a new project rather than start the piece again or have a re-think.

But when the design "works" and everything has that elusive flow and character you were after, it realy is a great feeling and is well worth all the effort in the end.

Also the first layer of primer is usually a real "Bazinga" moment ;D

For you Mike to attempt this scratch build, in a contest, is an outstanding achievement. Sir, you have my admiration

Now lets finish this thing buddy, were all rootin for ya ;D

Gag
 

Latest posts

Back
Top