Into Darkness Enterprise NCC-1701

Been a bit of a hectic week around here, but we have the beginnings of progress on the Enterprise.

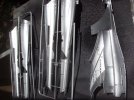
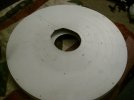
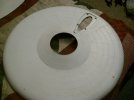
Started with some light blocking on the major components.
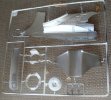
First, they were sprayed with flat black, then, the parts were hit with a coat of silver metallic that I've used with pretty good success.
revell-1701-500-09.jpg
revell-1701-500-10.jpg
revell-1701-500-11.jpg

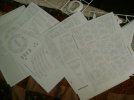
While waiting for the paint to cure, I got to printing up the aztecs I plan on using on her.
These are from the USS Reliant set by Carlos Zangrando, aka Arthur Pendragon, and are available for download from Starship Modeler's website.
I also used the larger 'spare' sections that Carlos provided on his Enterprise B sheets.
I realize that these aren't 'screen accurate,' but I'm on a bit of a budget, and I believe they will look just fine on the model
revell-1701-500-12.jpg

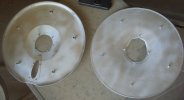
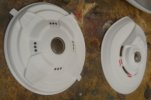
Finally, I got started with drilling holes for some of the lights I'll be installing in teh saucer halves.
I had to look at references for the bottom of the saucer, ecause Revell didn't pro0vide the lights there
revell-1701-500-13.jpg
revell-1701-500-14.jpg

Youtube link:
Revell 1 500 Enterprise Part Three
 
Great to see some progress on the old (now relatevely new thx to JJ) lady, Q!
Can't wait to see her in Aztecs :)
Btw, a small tip, which You might be familiar with, but still just in advance. I would highly recommend You to give the inside of the ship an additional layer of white paint over the silver one You've applied for the lightblocking. With the lights installed, it would improve the effect of the lit windows greatly. Saw this tipseveral years ago, and first used it on my old Venator proj. just to give it a try. Using it now ever since, 'cause it realy feels the difference.
 
I have heard that white paint is better for light reflective. While I am not sure about that, I do know that the white paint will reflect the color of the LED's better.

Off to a good start Q!
 
I had pretty decent luck with the Odysseus build I lit this way.
I'll see how things look in testing when I get there
 
I know that when I made my "SteamPunkin" I sprayed the interior with met. silver, and it really didn't do anything for enhancing or reflecting light...As a matter of fact it rather toned it down. My friend told me that white, and probably gloss white would work best....
 
For something like the saucer and secodary hull, I think toned down might actually be a better look.
Too often, I see lit models that, if you were inside, the sun would be dim by comparison.

Trying to make this one lit, but not a source of light. It's a tricky balance to scale lights right
 
Quaralane said:
For something like the saucer and secodary hull, I think toned down might actually be a better look.
Too often, I see lit models that, if you were inside, the sun would be dim by comparison.

Trying to make this one lit, but not a source of light. It's a tricky balance to scale lights right

And that is the truth! It was a bit of a challenge with my last one.
 
Yes, I have seen some Starships that looked like they were Christmas trees, and light Blasting out of every porthole! a.k.a. window. ;)
 
Okay, after spending much of Saturday cleaning off my work bench, Sunday saw me actually get some minor construction done on the Enterprise.

Went in with a red Sharpie, and marked the locations for each of the rim window pieces.
With that done, I used Micro Krystal Klear to glue them into place.

From inside the hull:
revell-1701-500-15.jpg

Outside on the rim:
revell-1701-500-16.jpg

Also assembled the lower dome and bridge deck assemblies
revell-1701-500-17.jpg

Youtube link:
Revell 1/500 Enterprise Part Four
 
Don't worry I will. My plan is to save a few dollars here and there until Nov. then I can get it.
 
2 things q. First, orbital drydock makes a great mask system that it easier to apply and faster too. Also, trek works had some good pointers on assembly of the bridge.
 
I appreciate the tips, but none of the masks actually do what I'm looking for, biomedchad. They all do the aztecs as a two-tone. It's more than that. The pattern has a lot more going on than the mask sets.
I'd hoped for Thomas Models to come up with a good set, but he's still developing his aztecs

As to the bridge, I'm still figuring things out there.
 
Quaralane said:
I appreciate the tips, but none of the masks actually do what I'm looking for, biomedchad. They all do the aztecs as a two-tone. It's more than that. The pattern has a lot more going on than the mask sets.
I'd hoped for Thomas Models to come up with a good set, but he's still developing his aztecs

As to the bridge, I'm still figuring things out there.
Yes, that sounds like exactly what I was talking about earlier..... I think the purpose of the "Aztec-ing" should NOT to be to produce just a step and repeat two-tone pattern because that is NOT how a ship would be realistically constructed. In S.T. T.M.P. You really see a LOT of varied colors and tones. I know it would be very difficult for a manufacturer of masks to make something that complex, and have it be affordable... I am thinking that we would just have to put a lot more work into it to make it look realistic. :/ The Trekworks guy on youtube has gotten a very nice affect on his "Into Darkness" E.
 
Right on the head, Mike.
Part of why I'm going the decal route with the aztecs.
The other part being that I don't want to spend weeks working on masking
 
Not much to update right now, but here's where I'm sitting.

Added a coat of white to the inside surfaces of what I'd done before.
I also did a light block coat on the rest of the pieces that would need it.

Decided to avoid having to mask the windows by taking out the window pieces for now. I'll fill the windows with Micro Krystal Klear after I get her built and painted.

Started working on the lights themselves, and ran into a bit of a problem in that a 9-volt battery's not going to give me enough power to drive the circuits

The video explains this all better
Revell 1/500 Enterprise Part Five
 
Hi Pat.
Your electrical problem, you cannot drive that no. of Leds in series off of 9v. The leds should each be connected in parallel to the power source with probably a 360 ohm resister in series with each led. This will give you 2.5v across the led with a 20ma drive current each.
If you need more help PM me.

Jim
 

Latest posts

Back
Top