Ian McQue Inspired Flying Rig

Andrew, Your miniature building looks great. I bet that will be a lot of fun to paint and weather. Do you know the work of David Hourigan? He’s a Melbourne based model maker who does a lot of miniature buildings of various Melbourne landmarks. His blog is here:
http://www.davesmodelworkshop.com/
I follow him on YouTube. Never visited the blog though. Just looking through some of his recent posts. Wow. All I have to say. Great work he does.
 
He‘s going to be showing his miniature buildings at the Long Space Gallery, 419 Melbourne Road, Newport. The opening is March 13, 6-8pm.
 
He‘s going to be showing his miniature buildings at the Long Space Gallery, 419 Melbourne Road, Newport. The opening is March 13, 6-8pm.
Thanks Photon. Being a shift worker I'm working until 9pm that week. Not going to be able to make it unfortunately. Hopefully it will be on for a little while. May get to see it later in the month if it is on.
 
As I mentioned earlier in this thread, I love to use solder for wiring conduit and wiring runs. Easy to form, bend and glue with ACC. Here is a load I've been mucking around with for a pressure vessel load for an HO scale freight car for a while. Simple evergreen shapes cut and glued to a couple of joined plastic domes (from kids toys out of the machines at shopping centres and supermarkets from when my kids were little).
Grrebly_Pressure_Vessel-1-87-HO-Scale.jpg
The two halves were glued, a plasticard band added around the centre, circles, squares and oblongs glued on randomly. Some bolt heads punched out using my Hex set, and then I joined them together using small and large diameter solder. I've begun adding surface texture using Mr Surfacer (first time) and this is still a work in progress. Wanted the lines to have that spacecraft look of being sunk into the insulation.
 
Last edited:
Looks good, I’ll have to give it a try. I would have thought it would be almost too fragile. I’ve got loads of solder around here.
I hope you’re able to see the show. I’m definitely going to miss it. If you drew a line from my house through the center of the earth, it would come out about 800 miles off the coast of Perth. :oops:
 
Last edited:
hey buddy, your build is so timely I can't tell you how great that is...! I've been struggling to get something, ANYTHING started on the bench and actually finish it. I keep starting a kit and pushing it aside and starting another. THEN...I saw this thread and I had a "THAT'S IT'...!!! moment... I love the Industria Mechanica stuff as well as Machinen Kreiger kits, and have quite a few of each. Your idea has shoved me on to the workbench with new enthusiasm for an otherworldly build using parts from the 600+ kits in the stash...MAN...this is gonna be fun...THANK YOU, THANK YOU, THANK YOU...all is not lost...
 
Hey, that's great! I'm so happy that you're going for it. I had been wanting to get back into model building for a couple of years, but wasn't really feeling excited enough by commercial offerings to actually buy a kit and get started. I finally decided to scratch build something and I'm so glad I did.
I'm looking forward to seeing what you come up with. :D
 
What a fun scratch build! I think you're doing a fine job of bringing the concept to life. Great work!
 
Alright.

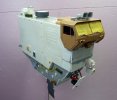
I finally got some bench time squeezed in on this guy.

First up are the twin loudspeaker horns on the top. I 3D printed them in polystyrene. They looked really deformed and needed a ton of sanding and filling. They still look a bit catawampus, but I figure if I paint enough rust on them, everything will be okay (modelers mantra). The're glued to a rack made from some kit parts. I'm thinking of adding a couple of revolving beacons on either side.


spOQYII.jpg

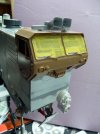
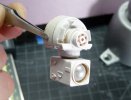
The front end of the craft was looking pretty barren. I thought it needed a bit of sci-fi tech to smarten it up. This is supposed to be some kind of infra red camera (I guess?). It came together fairly quickly from an assortment of kit parts. A bit of white primer to make sure everything's cohesive. The lens is from a bag of polystyrene half domes sold as fake pearls. A bag of 500 in 3, 4, 5, 6, 7, 8, 10, & 12mm sizes was only $4. They glue readily with Tamiya cement. Expect to see them encrusting everything I build, moving forward.
2zlOXkJ.jpg

Some more bolt heads (Meng brand) were glued on the lower side. These things are really tiny. I typically lose two for every one that I manage to get attached.
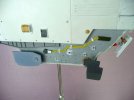
4Eq2Kaq.jpg

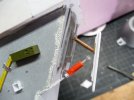
Next up is the front stabilizer. Sheet styrene, more Meng bolt heads, and some kit parts.
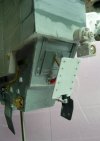
YuSBM7X.jpg

I had wanted this to be removable (like the other stabilizers) for easier painting. However, due to the weird angles and the fragility of the parts, it wound up being easier to build it in place (ie. it's glued on). Some really dubious mechanics going on there...don’t look too close.

1q2pE6E.jpg


XcKnydR.jpg

So we are getting near the homestretch. I think I have what I need to paint and weather this as planned. At least I hope I do, as all the local shops are closed indefinitely.

Thanks for checking in. I hope everyone is well and braving these rather surreal times.
 
Last edited:
.
" Expect to see them encrusting everything I build, moving forward. "

tenor.gif
 
Photon,
Loving the build and looking forward to more as you go. This looks great and you've given me some really neat ideas for my own build.
 

Latest posts

Back
Top