Honda RC166 (1/12 Tamiya )

Thanks Guys ,really appreciate the comments :) Should have a little more here very soon ;)

Chris.
 
Hi guys :)

Better blow the dust of this one :-[ Sorry I havent updated here for a while ,Im just up to my eyeballs with lots of other stuff at the minute . Apologies for the late reply ...How rude of me ::) Thanks for all the comments ,glad to know you're enjoying it ...so am I ;D

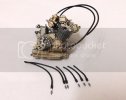
Anyhoo , The engine was assembled and painted ,Last job on it for now was fitting the sparkplugs (six off ) and the leads (six off ) ;D Also at this point the throttle cables were fitted to the carbs .
DSCF1109.jpg

The engine was then left to the side and I turned again to the frame ,which by now is well dry ;D ;D .
A few little things need done before the engine goes in .

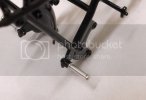
First up ,the footpegs are attached ,these are nicely turned alloy parts that simply fix to the frame using a tiny screw and look great once in place .
DSCF1112.jpg

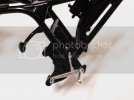
The rear brake lever is fitted at the same time ....
DSCF1111.jpg

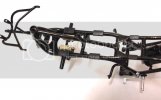
Then the three 'Twin coils' go in ,two on the inside of the top rails and one on the front of the frame .You can also notice there are six rubber pads fixed to the top frame rails ,these are for the tank and seat unit to rest on ,they come as rubber parts in the kit so there is no need to paint them .
DSCF1110.jpg

With the frame ready and the engine ready I can now put the two together ;D The engine pops into the frame really easy ...made to fit ;D and is held in place with a few tiny screws ,Its then just a matter of plugging the leads onto the coils ...Job done . Wish it was that easy on the real ones !!
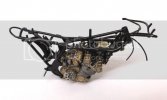
DSCF1122.jpg

Thats it for now ,next up i will be making and fitting the rear end assembly ...ie wheel,shocks ,swing arm ,chain & sprockets etc :)

Thanks for looking .

Chris.
 
LOL...I still have to laugh....I keep looking at this like it is 1:1..... :eek: :eek: :eek: :eek: Marvelous Work!!!
 
Thanks T ;D ;D

For a third time ....Ken ... lol :p I'd better get the finger out huh :eek: :eek: :eek:

Chris.
 
Great to see you back on this Chris, the finish so far on what you have done is simply stunning. :eek: :eek:. can't wait for the next update.
Jay
 
Chris, I got a bike in the stash now. Don't be suprised if it shows up at your door with a big note on it that says "Please Build For Adam" Haha

Seriously, this is turning out very very well. Glad to see your back at it.
 
John .....No ...you Da man ;D ...cheers mate ;)

Jay ,thanks ,hopefully you'll not wait too long .

Adam ,thanks mate . No problem ,but you'll have to join the waiting list ,might get round to it in 2015 /20 ;D

Q , Thank you very much ;)
 
Seems like I need to Pop the super bike I had in stash, seeing your work Chris makes me drool,
lol

ER
 
Chris S said:
Adam ,thanks mate . No problem ,but you'll have to join the waiting list ,might get round to it in 2015 /20 ;D

Chris, if I send the kit now can I skip the front of the line??? hahaha
 
CHRIS ,

Glad to see that you're back on this one. Looks Hot Boi ! Awesome job on th Engine, Love th weathering !
 
Adam, Luigi ,Erik ....Thanks very much guys ,sorry for the late response . Glad you're liking the build tho :)

Moving on a bit more :)

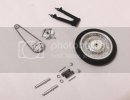
I got the rear assembly all done , there isnt a lot too it really, Consisting of the rear wheel/tyre ,swing arm ,brake, shocks and sprockets/chain.

DSCF1116.jpg

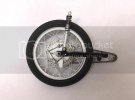
These parts all come together quite quickly to produce a neat looking rear end ;D . Both the shocks and the wheel are held in place using tiny screws .

DSCF1126.jpg

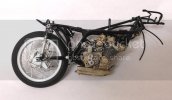
Then the assembly is fixed to the frame ,again using the screws to attach the top of the shocks and the pivot point of the swing arm .

DSCF1129.jpg

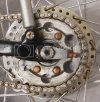
I should mention the chain adjusters ,these are etch parts which simply fold up and slip over the end of the swing arm on both sides ,nice touch by Tamiya tho . I just thought they were worth a mention .

DSCF1131.jpg


More soon :)

Thanks for looking .

Chris.
 
LOL...kept looking at that sprocket......still think it's 1:1 Outstanding!!! ;)
 

Latest posts

Back
Top