Grendel's Falcon

That was a great review video.
I don't see the links to the products but I went to the site on the card you showed on video....it's all in German and couldn't find the falcon stuff.
 
Black Sheep 1 said:
That was a great review video.
I don't see the links to the products but I went to the site on the card you showed on video....it's all in German and couldn't find the falcon stuff.

There is a link to the site in the reference section of the group but here is a direct link:

http://www.triliance.de/gun_turret/gun_turret.html

Glorfindel: The blue moon kit is nice. The only part I thought was bad was the replacement parts on the rear deck. The details went a bit soft there. Otherwise a very nice kit. It will make the falcon look so much better!
 
Grendels said:
Black Sheep 1 said:
That was a great review video.
I don't see the links to the products but I went to the site on the card you showed on video....it's all in German and couldn't find the falcon stuff.
There is a link to the site in the reference section of the group but here is a direct link:

http://www.triliance.de/gun_turret/gun_turret.html

Glorfindel: The blue moon kit is nice. The only part I thought was bad was the replacement parts on the rear deck. The details went a bit soft there. Otherwise a very nice kit. It will make the falcon look so much better!

Awesome!
Thanks for the link Grendels.
 
Great video review.

However after seeing the sidewalls from the Blue Moon set I find the Falcon Kit set might be a little more accurate to the movie. I find the front (outside) sidewalls of the Blue Moon set are a bit too repetitive. I've attached comparisons.

I have a Falcon Kit set and they are pretty clean as far as casting goes. I still might pick up the Blue Moon set later down the road, so I can get a few of the other details part that go on the engine deck.

Thanks for sharing Grendels.

[attachment deleted by admin]
 
Great reviews!!!!

I was so inspired, I picked up the blue moon kit!!!!


Now...to actually finish my fine molds falcon before embarking down the MPC road....
 
Grendels, very nice review on the aftermarket details as well as showing the kit parts verses the am parts. Also, the piping detail you scratched built looks very nice. Glad my tip helped you out. I am learning much from watching your build. Looking forward to the next update.
 
Btw guys, I just tried to order the gunwell and quad cannon upgrades and it looks like the stock is depleted. I may have gotten the last quad canon left! (pity I couldn't get two)
 
astroboy said:
Btw guys, I just tried to order the gunwell and quad cannon upgrades and it looks like the stock is depleted. I may have gotten the last quad canon left! (pity I couldn't get two)

He was only going to make so many of them, and they were only for this group build at that. It is a nice little kit, I am putting mine in the soaker to get rid of the mold release tonight. Getting close to working on it.
 
He mentioned on his site that you can't really use two gunwells with the blue moon upgrade. How are you going to get around that?

(Or are you going to only use the gunwell on top?
 
I am only going to use one gun well. I am probably going to use the lower gun well as the mounting point for the stand. Not sure about that yet....
 
Instead of one mounting point,... why not multiple points, like the studio scale models. Cut small sections out and use them as "caps" to hide the points that aren't used. This way you don't have to sacrifice one detail area. Just an idea.
 
I am thinking of building only one mount point and making it removable. I am also thinking bout making the landing gear removable so I can pull her off the stand and then sit her down so that she is landed. I have a couple of weeks to decide before I have to commit.

Scratchy: It is a good idea, and I will keep it in mind. If I decide to build her only in flight mode, I will do something like that.

Also, I did order those tools and I can't wait to give them a try.
 
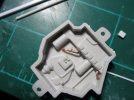
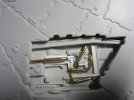
A short update. I cleaned up the insert with the brass:

IMG_0576.jpg

I think it looks a lot better. Also if you take a close look you can see that I notched out the sides of the hull where these inserts go. I have done all of those for the entire ship.

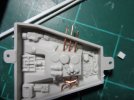
And two more parts got copper:

IMG_0577.jpgIMG_0578.jpg
 
Plumbing looks good G much better than it did before. You've set yourself quite a challenge!
 
Thanks Merseajohn! Right now I am waiting for the tools that scratchy recommended so I can get to the surface pipes.

I know I am not doing this one up cannon, but I am having fun! That is what matters to me.
 
Grendels, great video on the piping detail. Suggestion for you for removing the piping from the surface of the ship, try the dynamo tape laying two strips along the length of the pipe. This will act as buffer and if you get to close the tape will give you a warning you’re getting to close. This will hopefully protect the surface. Then you can take some 3M blue painting tape ( or any low tack tape ) and put along the pipe and then sand the remaining flush. Another suggestion for the inside thick pipes, use a sharp blade and score a line the length of the pipe as best as you can. Drill a series of holes along the top and use the blade to carefully slice the plastic away working from the outside towards the holes. Then you can use sprue cutter to remove the remaining plastic. The last bit of plastic can be shaved with a blade. Hope this makes sense.
 

Latest posts

Back
Top