Grendel's Falcon

Thank you for the tip! I will give it a try tonight and yes I did understand everything you suggested.

To make it easier, the tools that scratchy suggested came in today, so I am all ready for those pipes.
 
Hi John,
Can you tell me what you're soaking parts in? I scrubbed mine with warm water and a little detergent and they seem fine, got one gun well built and painted including putting an LED behind the chair. I must get back to it... Been sooooo busy and now I'm sick :-\ Oh well, going to fall short of the finish date but I will keep going.... :) :) :)
 
I usually scrub them with cleanser like Ajax, or comet. But these parts are too delicate for that treatment. So I am going to give them a soak in super clean. It is a de-greaser. And the mold release is oil based. Should take it right off.

Others have told me that they just soak the parts in dish soap. I tried that with the brakiri, but I haven't glued the parts on yet. I am doing that tonight. Should work though, the Brakiri parts don't feel oily at all.
 
as an aside, my blue moon sidewalls came yesterday. I had to tell my wife that they were custom parts for a model that I MIGHT build some day....

That was a sad moment
 
Grendels said:
Tonight's pipework:

IMAG0255.jpg
Just having a look through this thread with my 4yo daughter and she tells me "daddy, you need to put pipes on yours or it won't look right!"
you have "our" approval John, just awesome work!!!
 
Thanks everyone!

This work is not fast, so I probably will not replace every pipe on the ship. That would take me a month all by itself. I am just going to replace the larger pipes and the ones that run into the cutouts. I did some scribing work on the piping I plan on leaving on the ship. They look a lot better. That will be in a future video.
 
Wow the pipe stretching across the hull like that looks great. I always wondered what that would look like. Your doing some fantastic work there Grends.
 
Grendels, the new piping looks fantastic!!! This detail is very eye-catching and makes the ship dynamics look 3D. 8) 8) 8) The existing piping that was removed left a very clean smooth surface. How did you achieve your results? Is this going to be covered in your future video?
 
Tanker52 said:
Grendels, the new piping looks fantastic!!! This detail is very eye-catching and makes the ship dynamics look 3D. 8) 8) 8) The existing piping that was removed left a very clean smooth surface. How did you achieve your results? Is this going to be covered in your future video?

It will be covered in a future video. I am still working on the technique a bit. So I haven't taped it yet. But I will get her on video very soon. The next time I sit down and work with her.

But basically I am very carefully shaving off the pipes with my exacto knife. I leave just a little bit of the pipe there. Then I take a scraper and scrape down the remaining pipe. If you are careful, you won't leave much of a mark. A tiny bit of sanding and you have a nice smooth surface. Any little gouges that are left behind are covered up by the new pipes.

The bad part is that when I look at this and then the rear deck, I get all disappointed with that rear deck. I remember reading somewhere on this forum that it looked like someone just stuck random aircraft parts on it. And that is what it looks like. I might play with it a bit and see what I can do. I am NOT going for accuracy. This model kit is no where near accurate. Just something that looks good and not like an after thought. So right now my plan is to add more pipes on the back and do something about the air craft wheels that are there. Maybe shave them off and replace them with tank parts.
 
Yes.
Coming along nicely.
I haven't even started mine. :(
Woke up thinking about it though.
I am definitely NOT building a Falcon out of it.
I will be building something from my own Universe.
As soon as I get something going with it...I will share with you'all.
:)
 
Thanks Quaralane!

ModelMakerMike said:
Yes.
Coming along nicely.
I haven't even started mine. :(
Woke up thinking about it though.
I am definitely NOT building a Falcon out of it.
I will be building something from my own Universe.
As soon as I get something going with it...I will share with you'all.
:)

I am interested in seeing what you make of her!
 
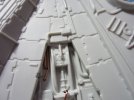
Here is tonight's work, and I am going to give a short explanation of what I am doing. To start with this is the section I am going to remove:
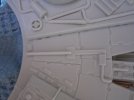
IMG_0586.jpg

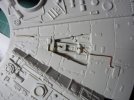
And another shot of it:

IMG_0587.jpg

First thing, I bend the brass to the desired shape. Now brass at 1mm is very hard to bend to small tight bends. So I am probably going to replace this segment with copper as soon as I get to my big box hobby shop to pick up the right size. Copper is much easier to bend. The lower half of this was done in copper and you will see that in a bit.
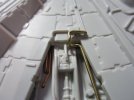
IMG_0588.jpg

I then take my exacto knife and start carving away the details. This knife has a no. 11 blade on her:
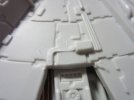
IMG_0589.jpg

In the above picture I have removed all I felt comfortable with. I am working in a pretty tight space.

Then I take a scraper and scrape off the rest:
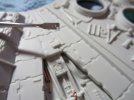
IMG_0590.jpg

The photo shows the scraper, it is one of the tools that Scratcy recommended earlier in this thread. It works very well, but you need to practice with it a bit to get the feel of the tool.

Once the scraping is done, I take a sanding stick and sand out any scratches the tool left. I got the sanding sticks at Hobby Lobby for pretty cheap. When the end wears out like in the photo, I just nip off that end and now I have a fresh part to sand with. Extends out the life of those sticks quite a bit.
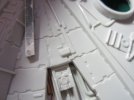
IMG_0591.jpg

Then I drill out some holes the size of the brass with my Tamiya handy drill:
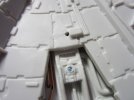
IMG_0592.jpg

Glue the brass down with CA and I am done! (Note this part was not glued down, because I want to try it with copper due to the complex tight bends.)
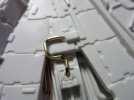
IMG_0593.jpg

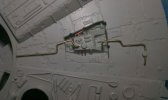
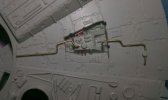
And the finished work from tonight:

IMG_0596.jpg

As you can see the copper looks much better than the brass does with those tight bends.
 

Latest posts

Back
Top