F-16 "Aggressor"

Scale Model Addict - Model Tips, Guides, Tools & Tech, Tutorials, and Community

Help Support Scale Model Addict:

Edbert

Well-Known Member
Joined
May 16, 2024
Messages
3,123
I've decided to build my first "modern" aircraft since about 1979. Assuming you consider an airframe designed in the late 1960s to be "modern".

Looking back, I think I've fallen victim to my love of WWII era camoflage, at least when it came to choosing a kit.

The F-15 was my 1st love, I bought a PC in 1988 to play "Microprose F-15 Strike Eagle", I think it was version II (old school for 2.0) but might have been III. Anyway, after being the quintessential fan of "Red Baron" I settled on "Falcon" as my favorite offline combat simulator, owning every edition every published. In the end, for my toy airplane, I had to choose from many favorites, Starfighter, Phantom, Tomcat, Falcon, damn?

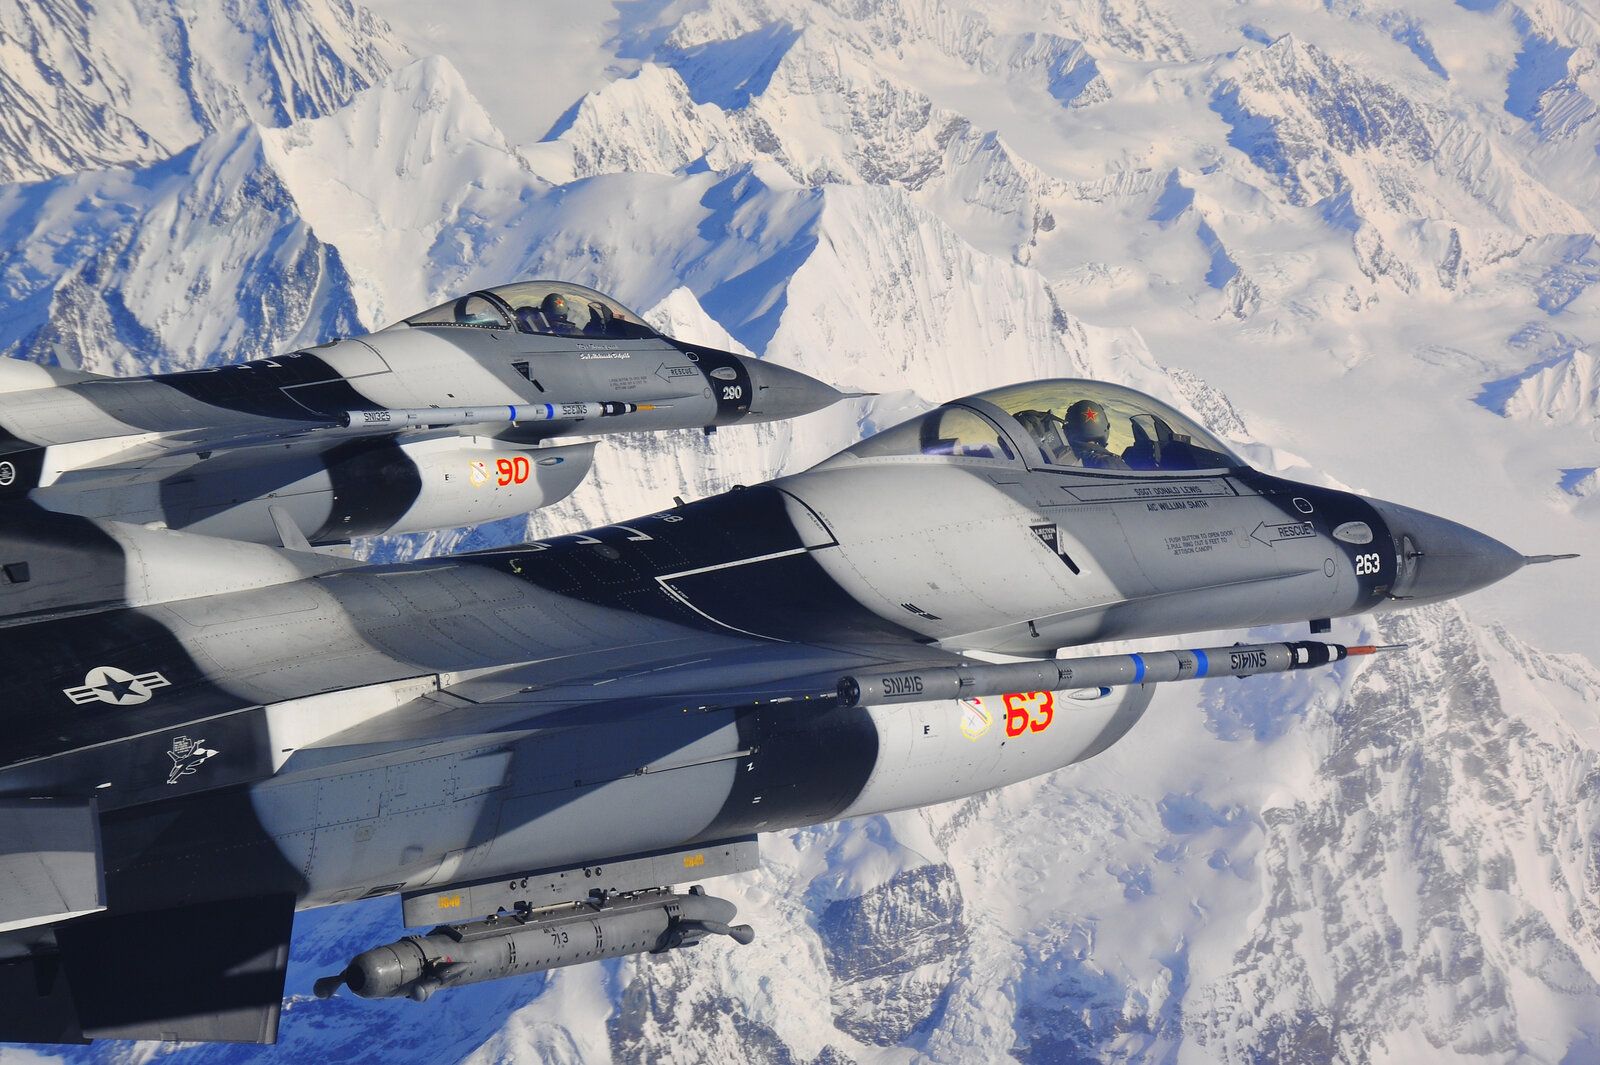
I think my decision was made for me when I saw the paint schemes. I'M A VICTIM!
1721092528198.jpeg


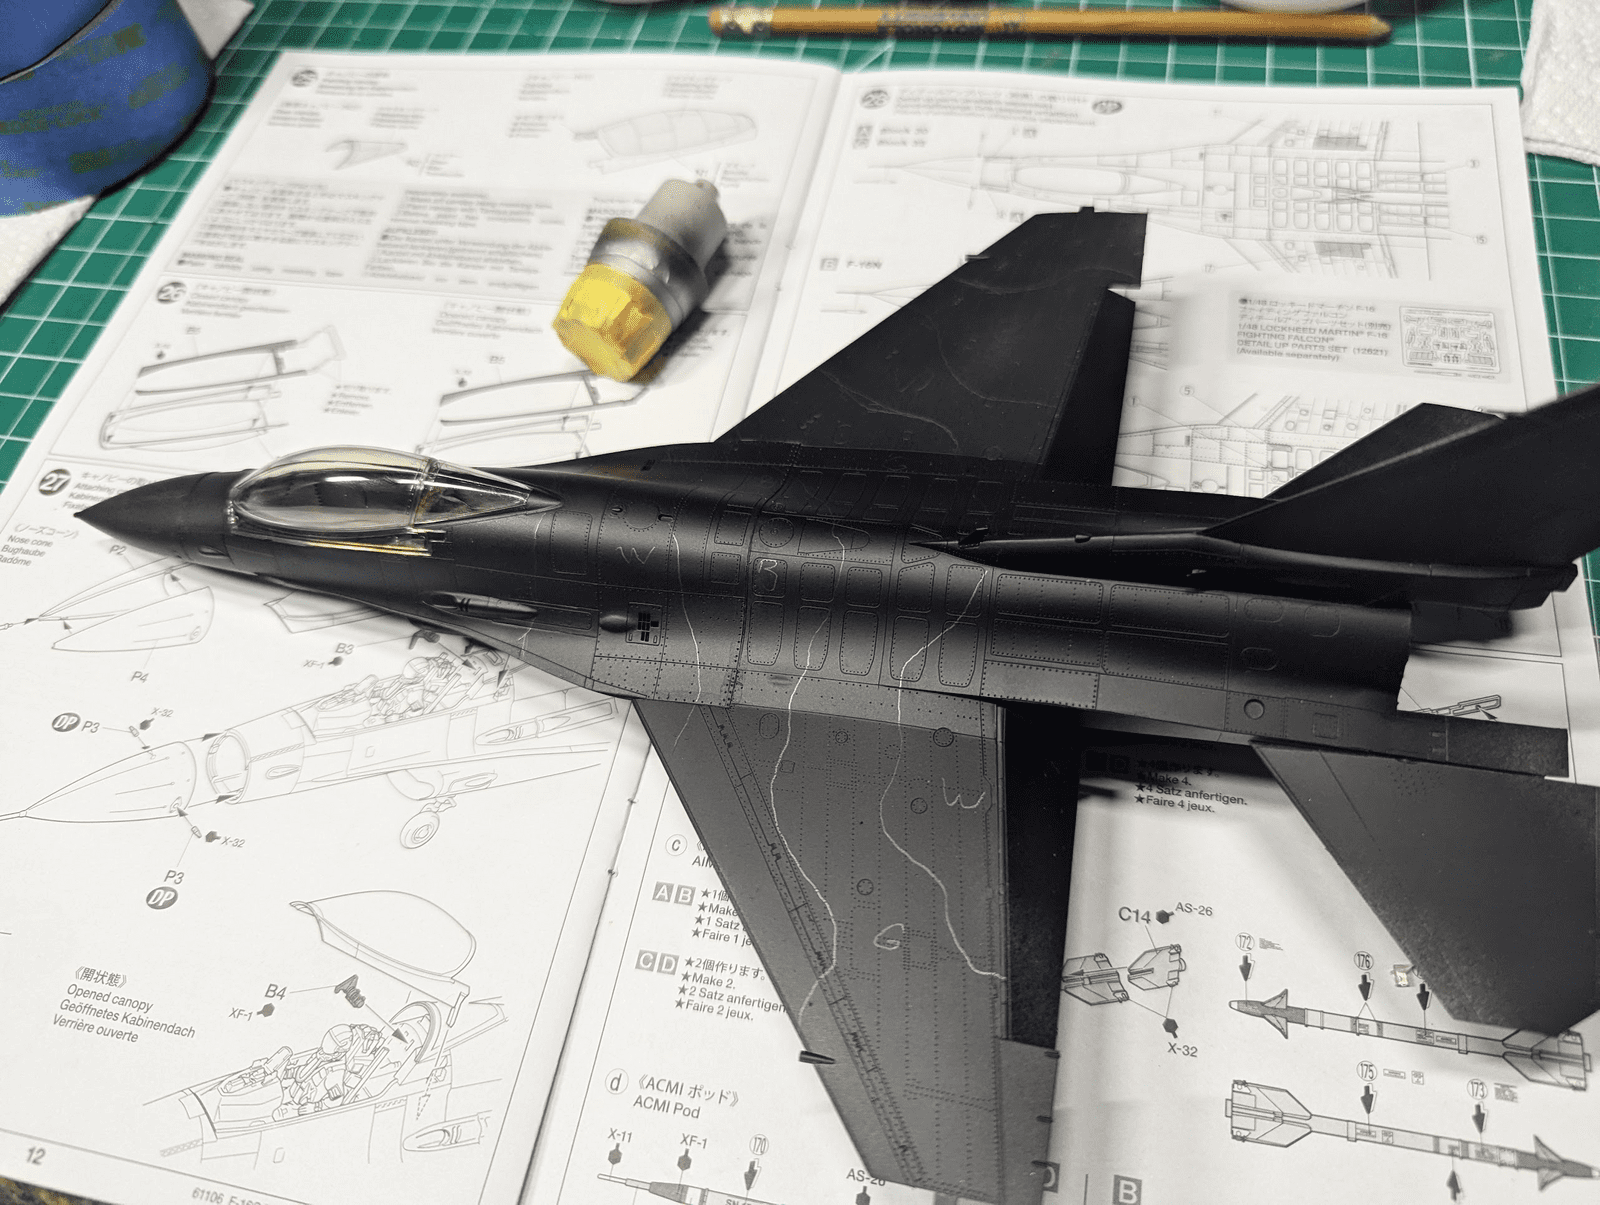
So it begins...

1721092474187.png
 
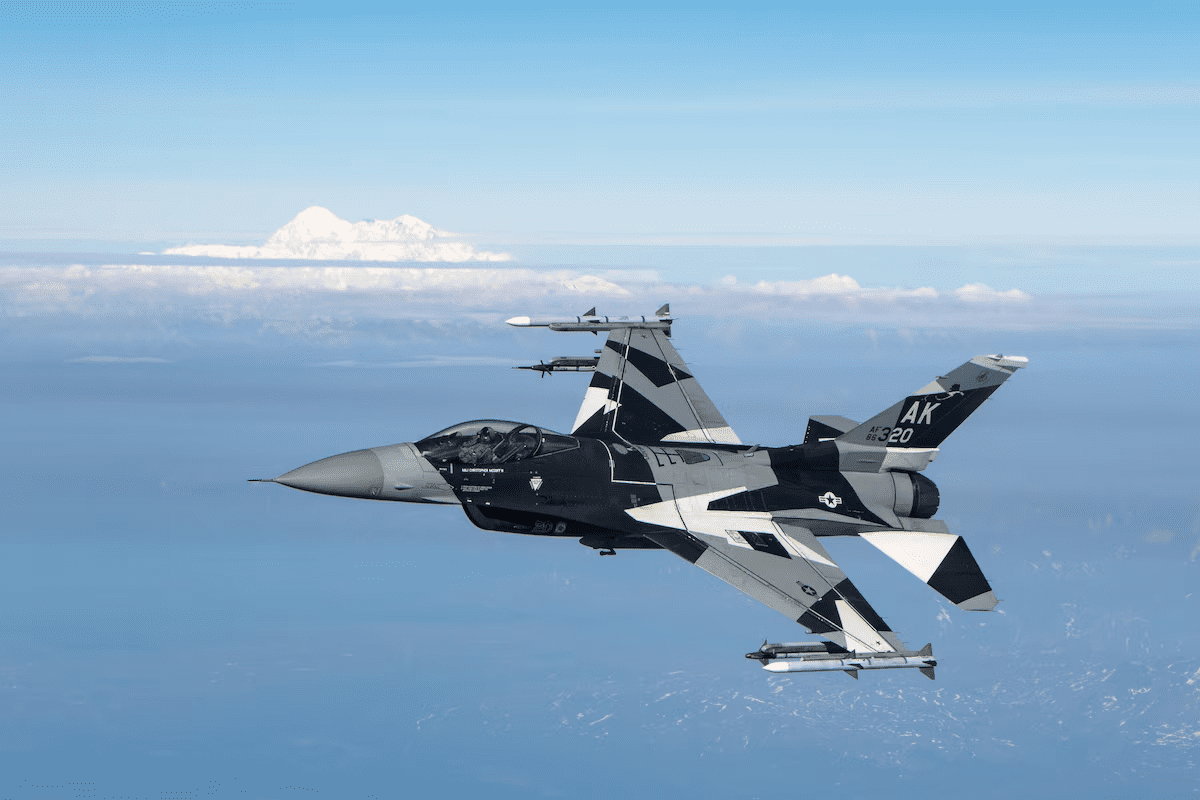
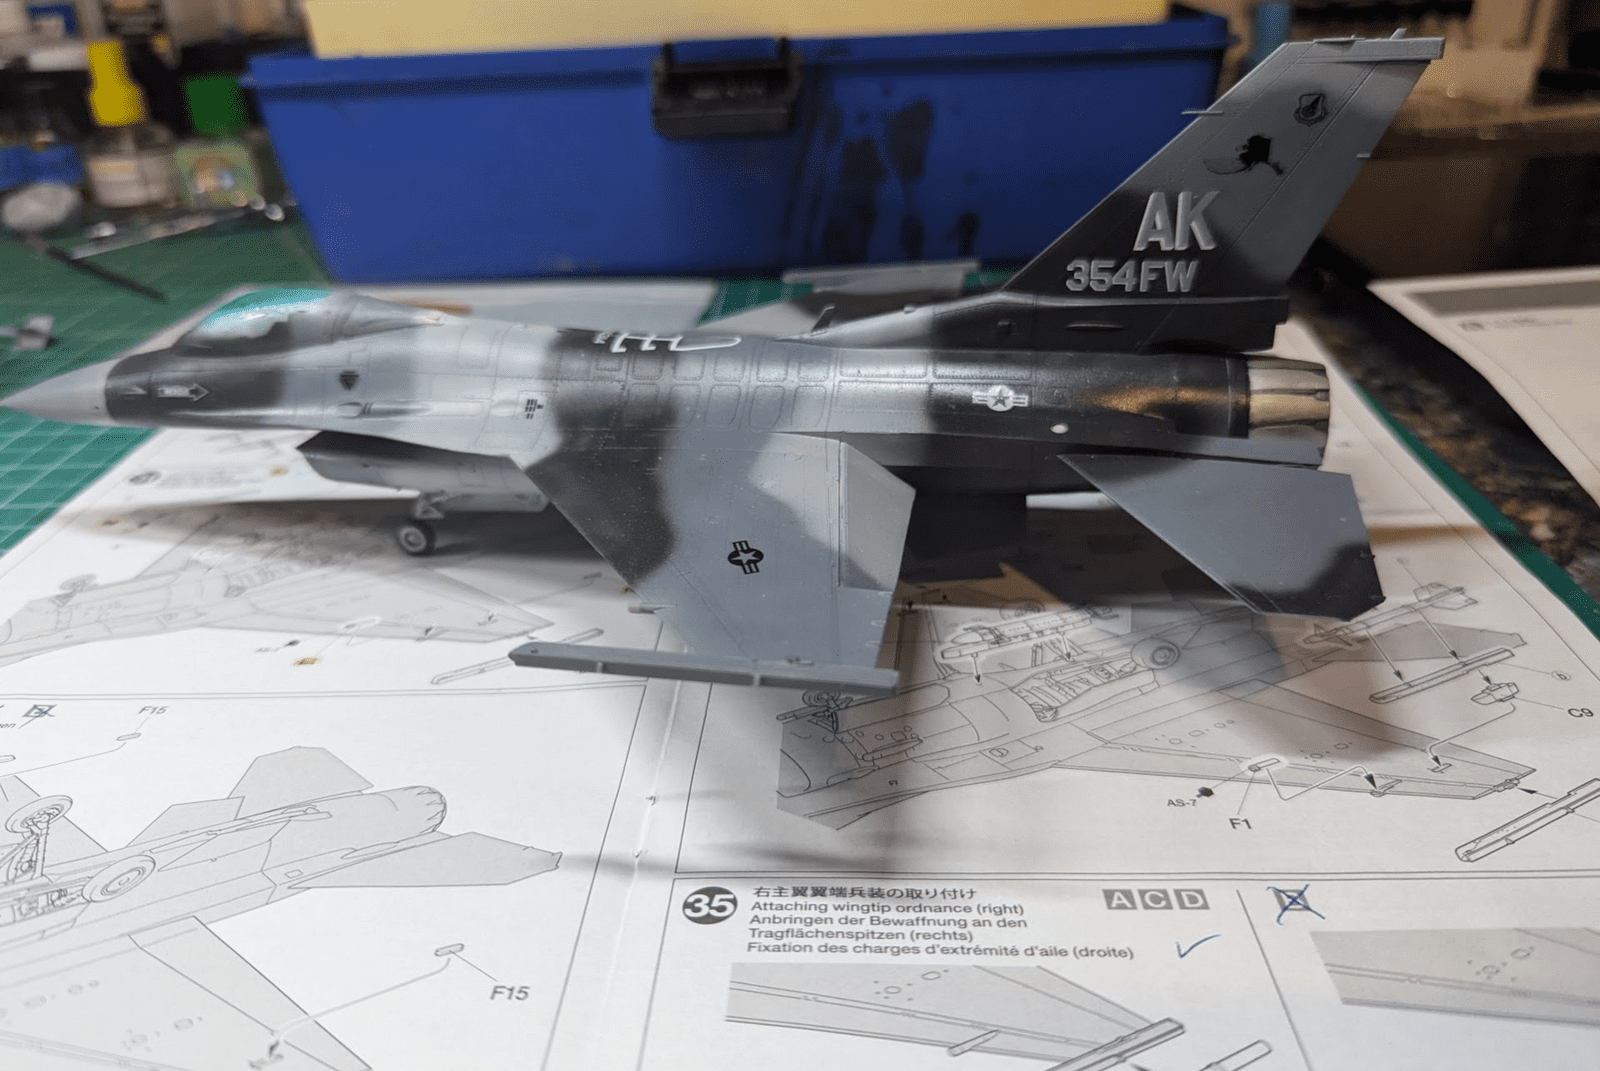
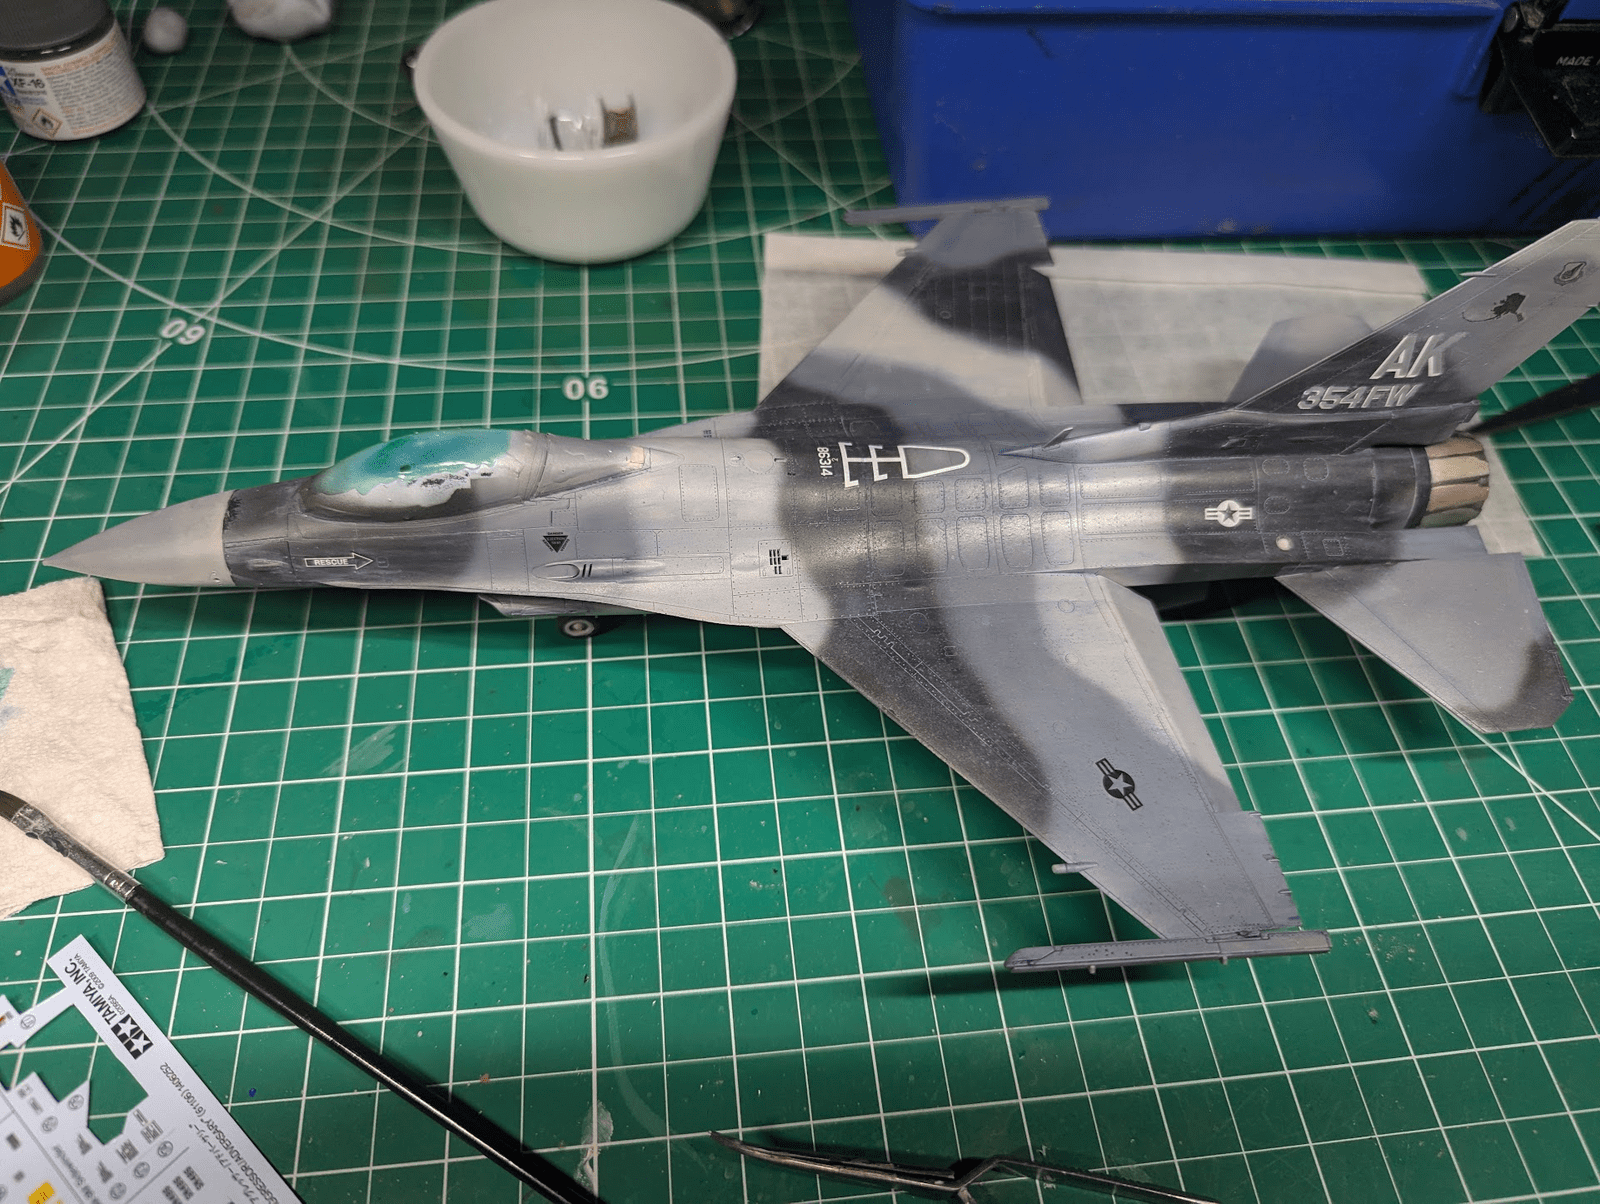
In actuality, it's not a WW2 camo scheme per say but Arctic camo scheme. Arctic scheme is typical for "Aggressors" Vipers.

Arctic camo is more uniform & laid out straight across the fuselage and wrapped to the undersides of the fuselage - typically white, black and grey; WW2 is a little bit different layout for camouflage.
 
I've decided to build my first "modern" aircraft since about 1979. Assuming you consider an airframe designed in the late 1960s to be "modern".

Looking back, I think I've fallen victim to my love of WWII era camoflage, at least when it came to choosing a kit.

The F-15 was my 1st love, I bought a PC in 1988 to play "Microprose F-15 Strike Eagle", I think it was version II (old school for 2.0) but might have been III. Anyway, after being the quintessential fan of "Red Baron" I settled on "Falcon" as my favorite offline combat simulator, owning every edition every published. In the end, for my toy airplane, I had to choose from many favorites, Starfighter, Phantom, Tomcat, Falcon, damn?

I think my decision was made for me when I saw the paint schemes. I'M A VICTIM!

View attachment 120121Which Viper kit did you get? The Hasegawa Aggressor kit?

So it begins...

View attachment 120120
Aggressor/Adversary Vipers are typically F-16C/N Falcons (Block 30). Tamiya has the correct Aggressor/Adversary F-16C/N.

The Aggressors Arctic scheme didn't exist until 1987, not the 60s as one may thought/assume.

Another important note on Vipers; not all F-16s are alike. Some variants have large intake mouths, some small intake mouths, frames, different Block types (Block 15, 20, 50+, etc…) Building an Aggressor Viper with black, white, grey camo scheme on an F-16A Fighting Falcon is incorrect; unless you don't care about accuracy.

This is a must read for all Viper fans who want to learn about different variants of the Fighting Falcons.

https://www.cybermodeler.com/aircraft/f-16/viperversions.shtml
 
As an Amazon Associate we earn from qualifying purchases. Product prices and availability are accurate as of the date/time indicated and are subject to change.
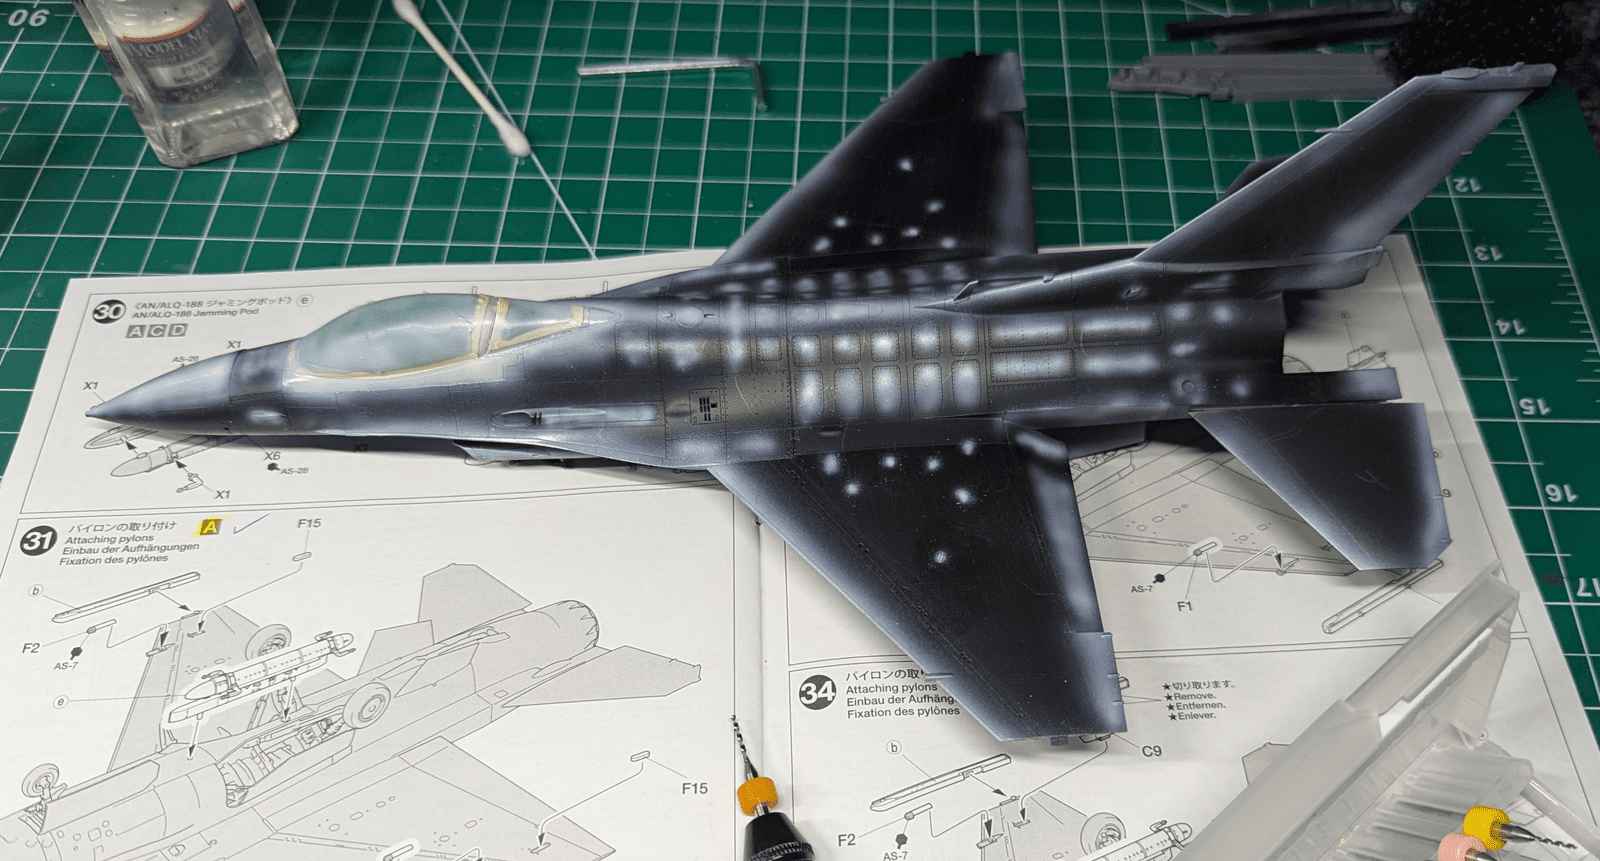
1721599954526.png

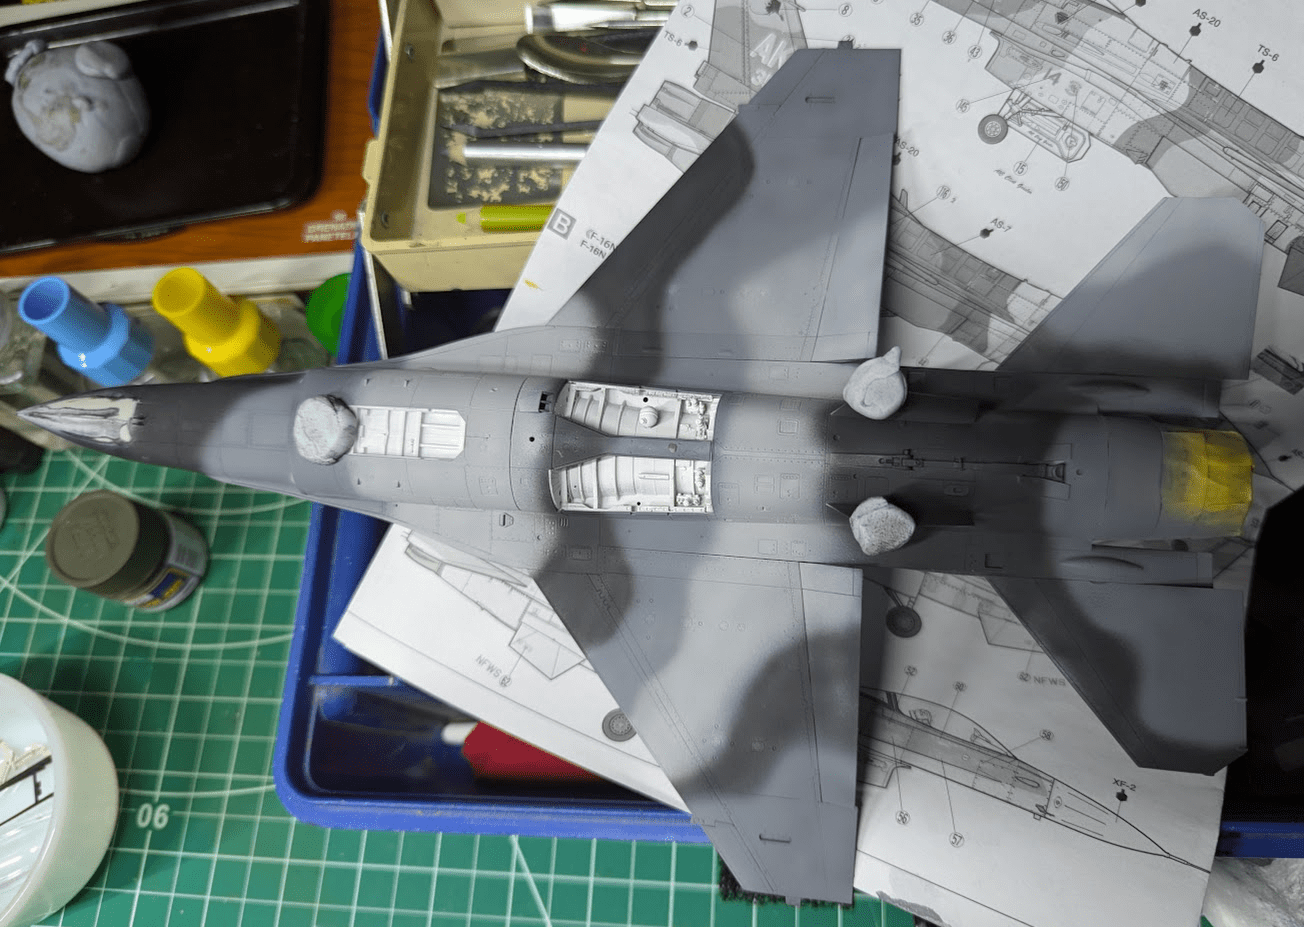
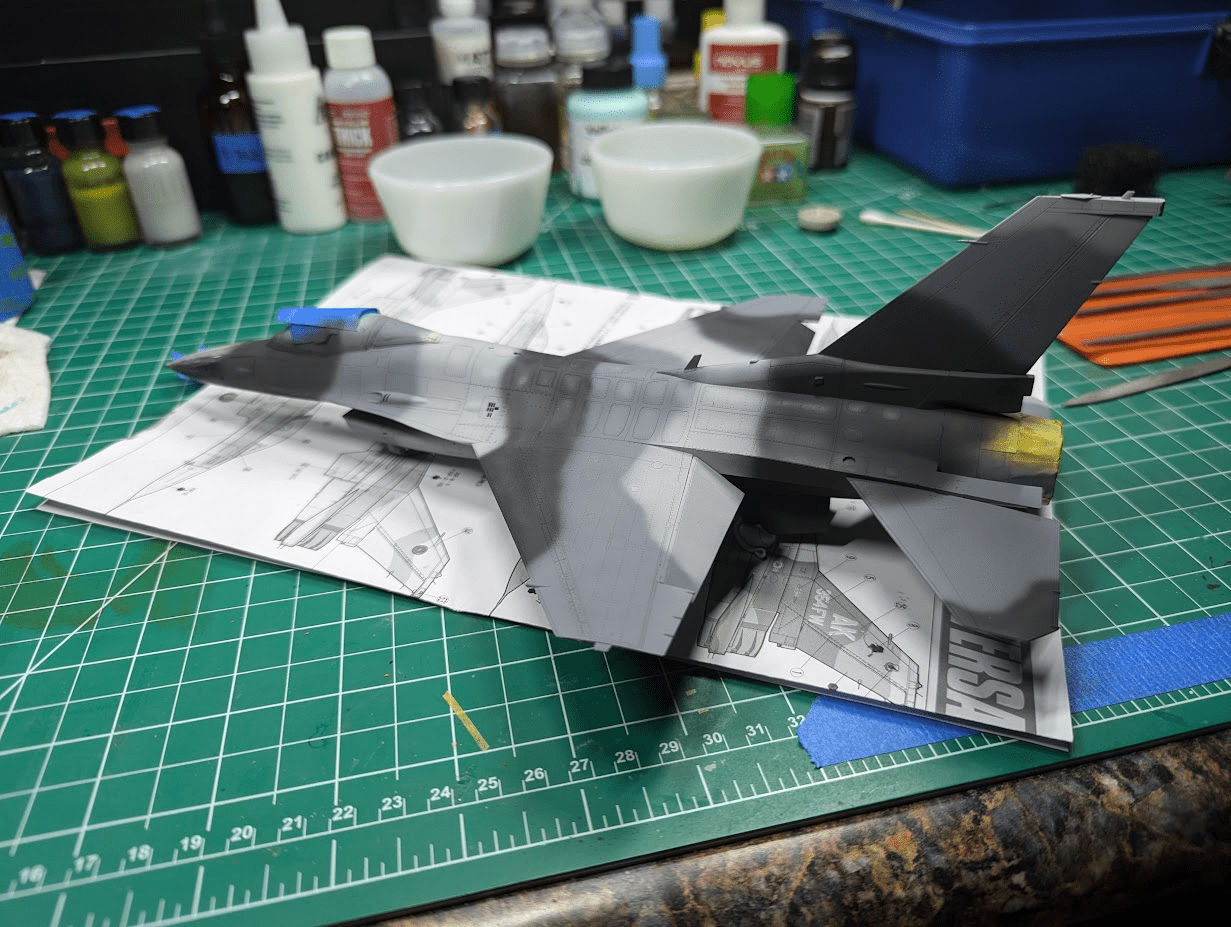
Under-shading (or is that pre-shading?) done.

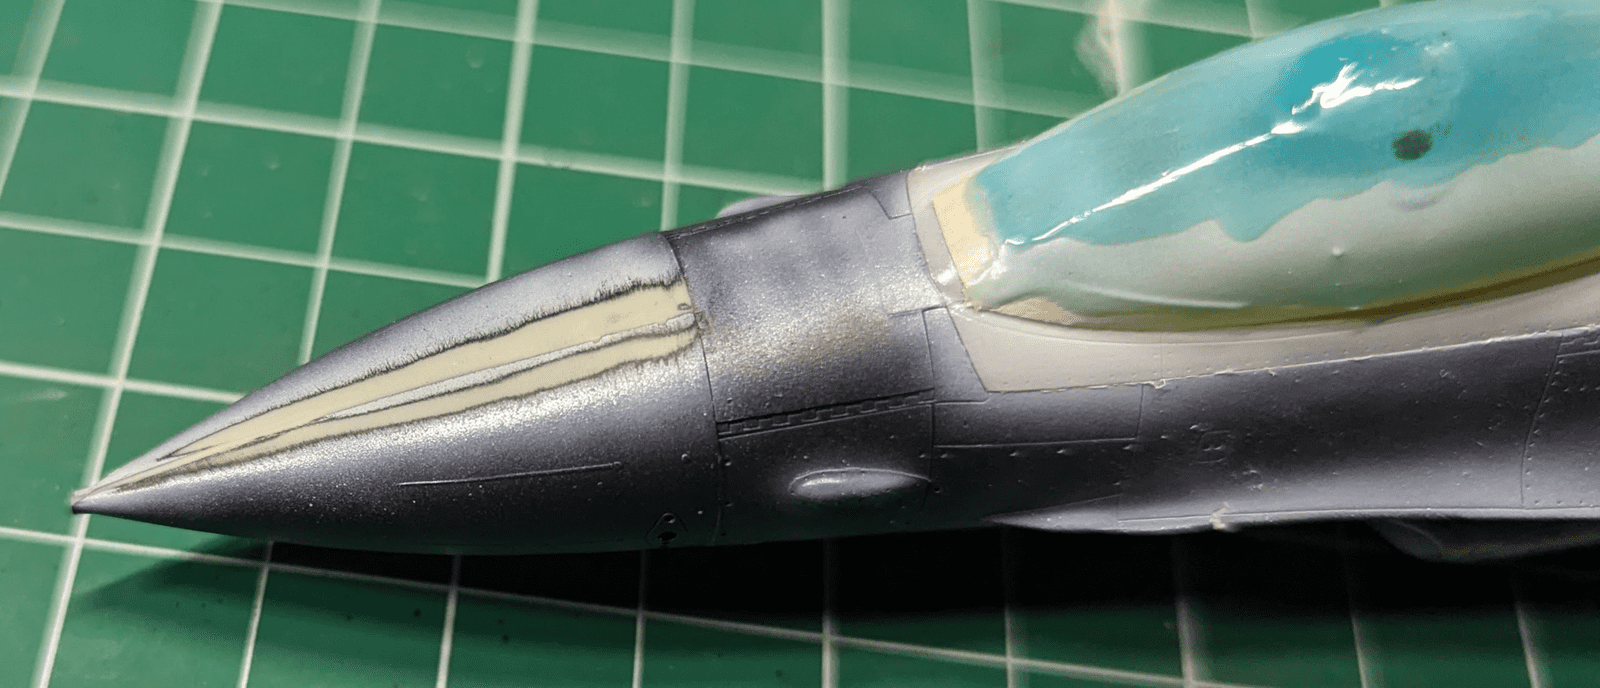
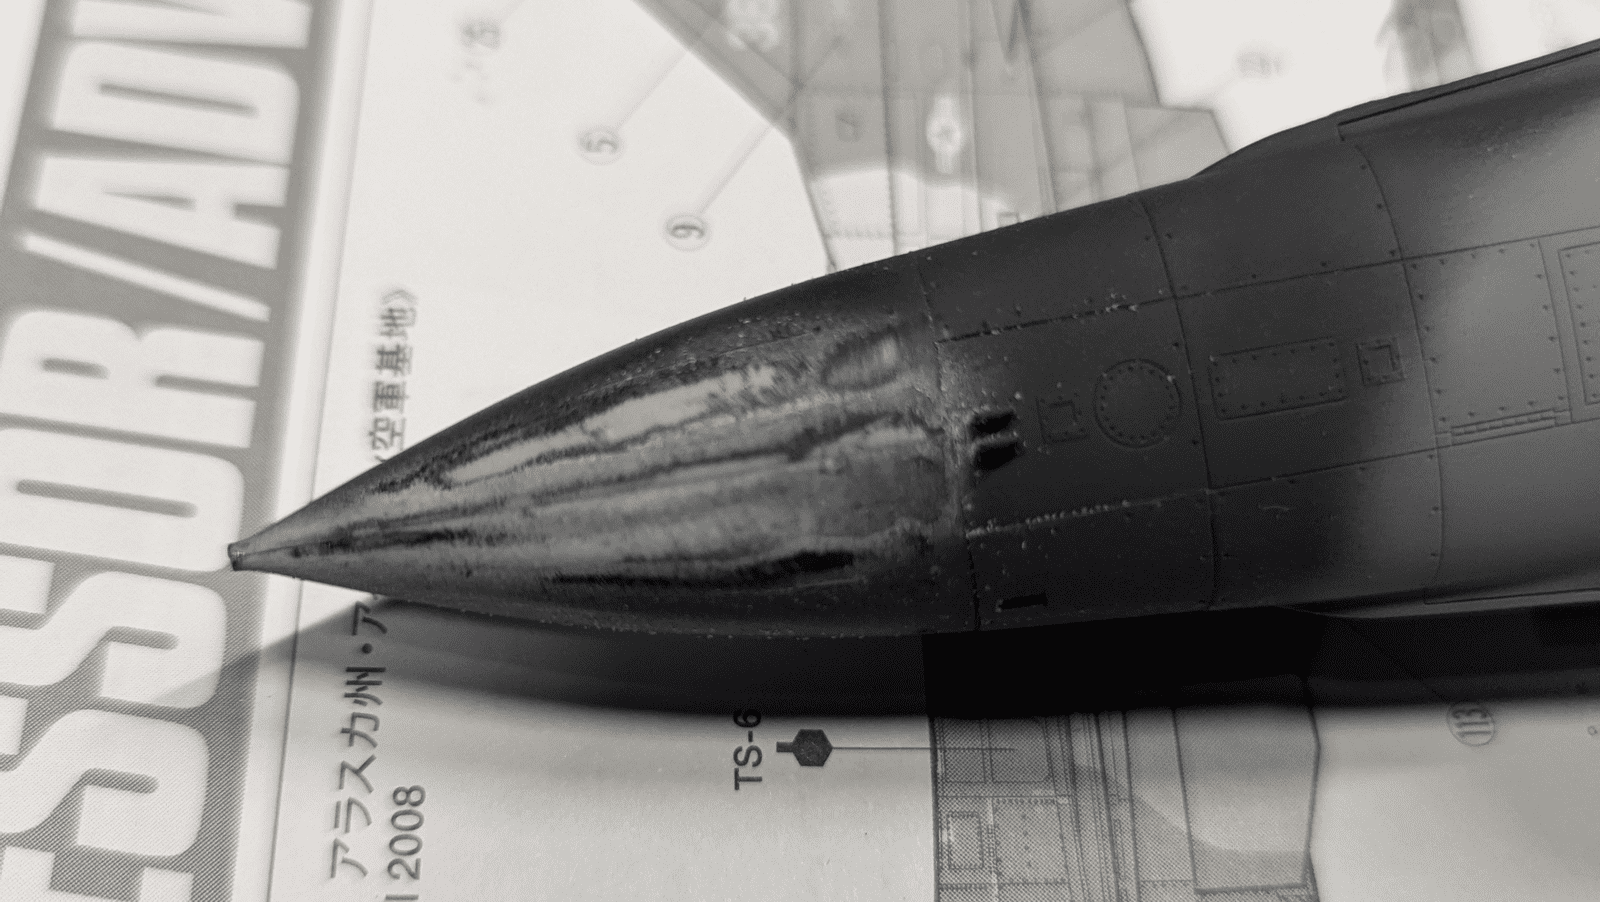
Did not see the flaws in the radar cone, looking at that picture above I still don't. I need to pay more attention when in primer, think I got lazy with Tamiya's overall fit-and-finish.

1721600051592.png

Much sanding.

1721600192857.png

Still needed attention. But trying to take my time for a change.
 
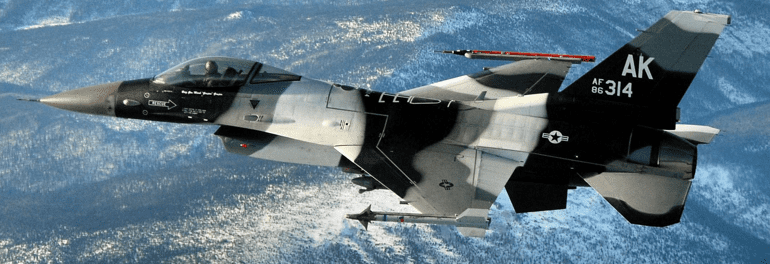
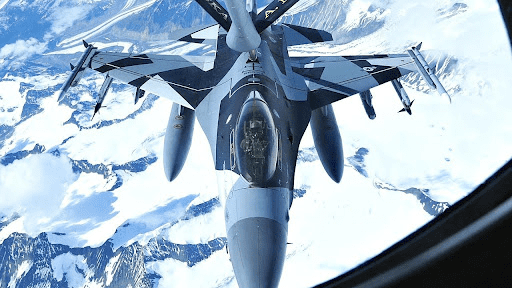
Instructions are clear, the ACMI pod should be painted "Light Ghost Gray", I notice in the first picture of this thread that the two aircraft have a different color of gray on theirs.

So I'm choosing to be wrong and add some color to my kit. Using this photo as my excuse...

1721672361589.png


1721672530568.png


1721672565526.png
 
Instructions are clear, the ACMI pod should be painted "Light Ghost Gray", I notice in the first picture of this thread that the two aircraft have a different color of gray on theirs.

So I'm choosing to be wrong and add some color to my kit. Using this photo as my excuse...

View attachment 120525


View attachment 120527

View attachment 120528
Nice job. The camo matches the photo. And I like that your camo does not have sharp edges. Camo should never have straight lines or sharp edges.
 
And I like that your camo does not have sharp edges.
THANKS! I'm torn to be honest. Most pics I've seen of real Aggressors with this paint job have much sharper edges than mine, but they are not "hard" edges. I'd liken it to the variations seen in WWII RAF paint.

So in scale, I think my fuzziness is too much, might be about right if the model was 1/16 scale. My airbrush can do a 1mm line, but I cannot get the results smooth at that level, and patchy camo with brush marks (air) are not okay to me.

Then again, it is my model, and I like it, right?
 
Last edited:
Instructions are clear, the ACMI pod should be painted "Light Ghost Gray", I notice in the first picture of this thread that the two aircraft have a different color of gray on theirs.

So I'm choosing to be wrong and add some color to my kit. Using this photo as my excuse...

View attachment 120525


View attachment 120527

View attachment 120528
Airbrushed instead of hard lines looks more artistic and realistic I think. Will look more realistic than the real thing when you've finished. JJ.
 
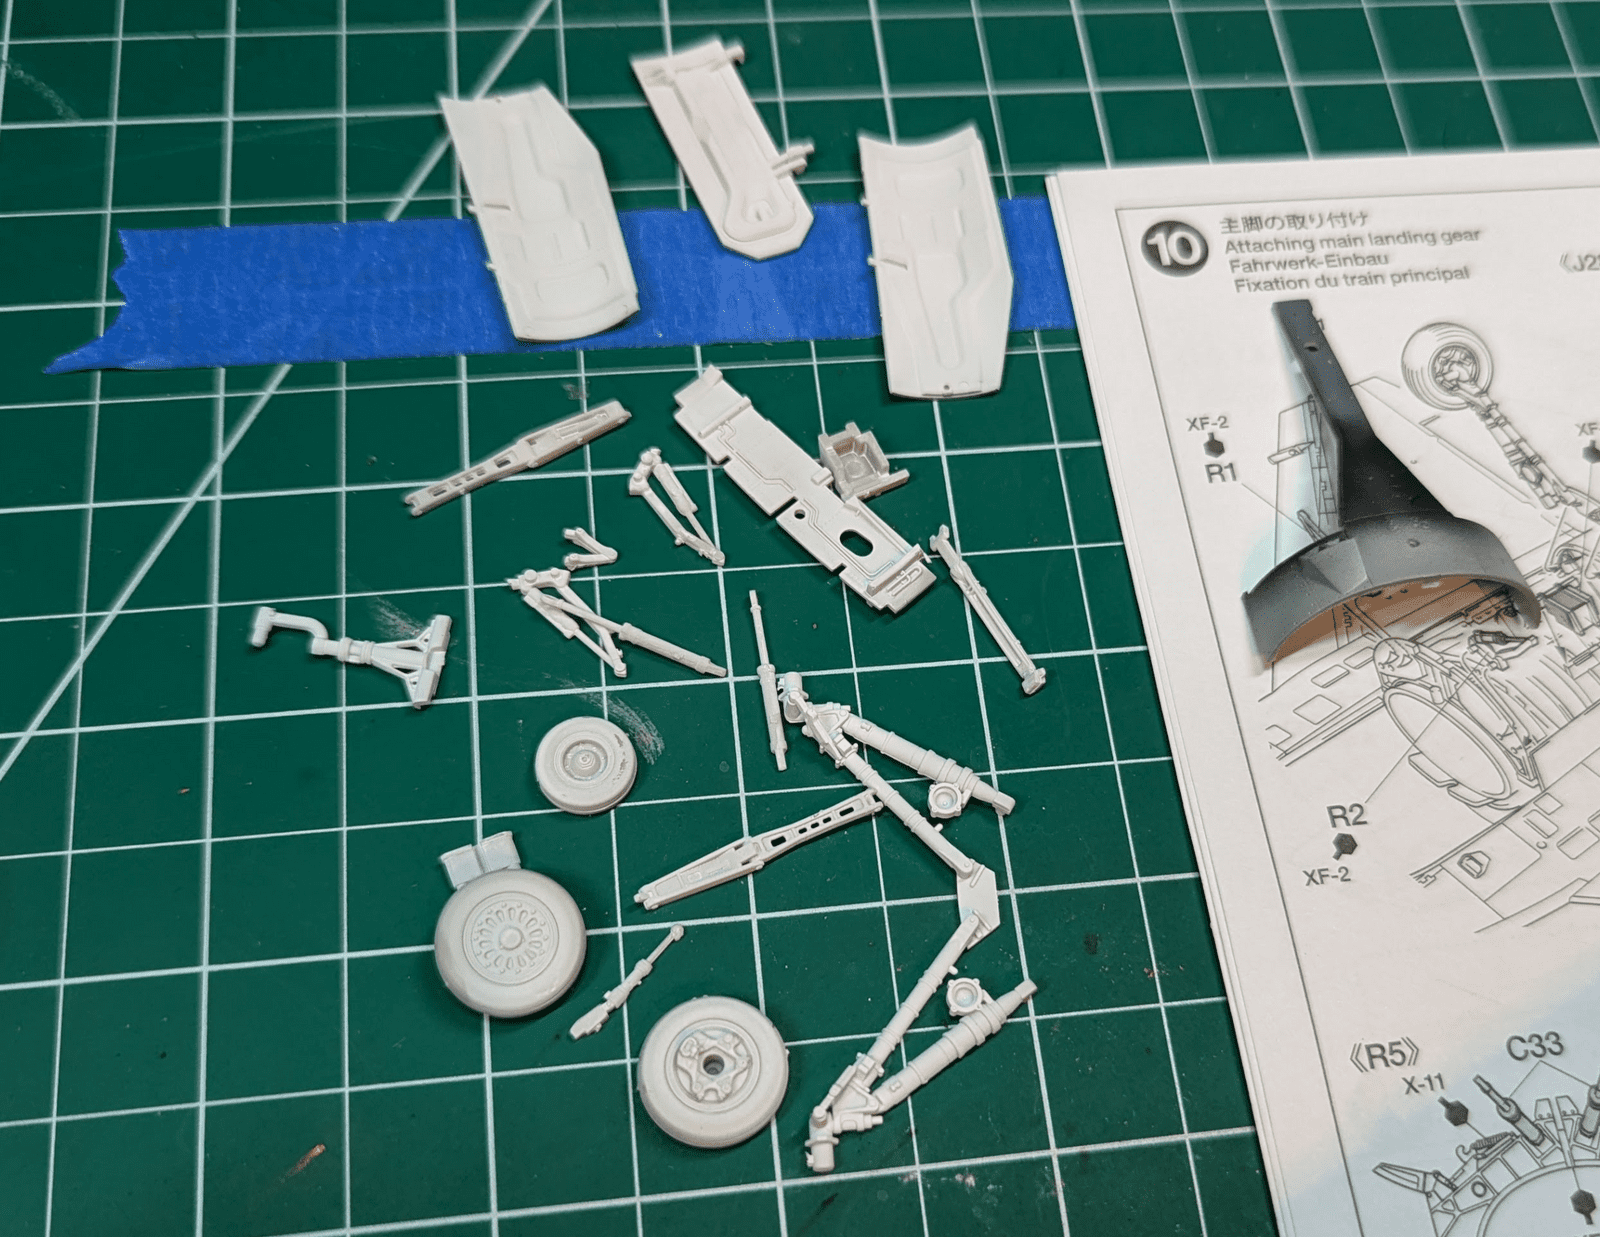
Lots of little bits, I take the blame for not reading ahead far enough, but this 1/48 F-16 kit is far behind the 1/32 Corsair I just re-broke my cherry on.

Here's some added doo-daas (a technical term that is still classified)...
1721780898872.png


...and more...

1721780940148.png


But this will take many more days, I see flaws everywhere, will do what I feel is worth it.
 
I put a bit more time into this kit yesterday and today, not sure if it is normal among this hobby but I keep putting partially complete kits aside to do some work on other partially completed builds.

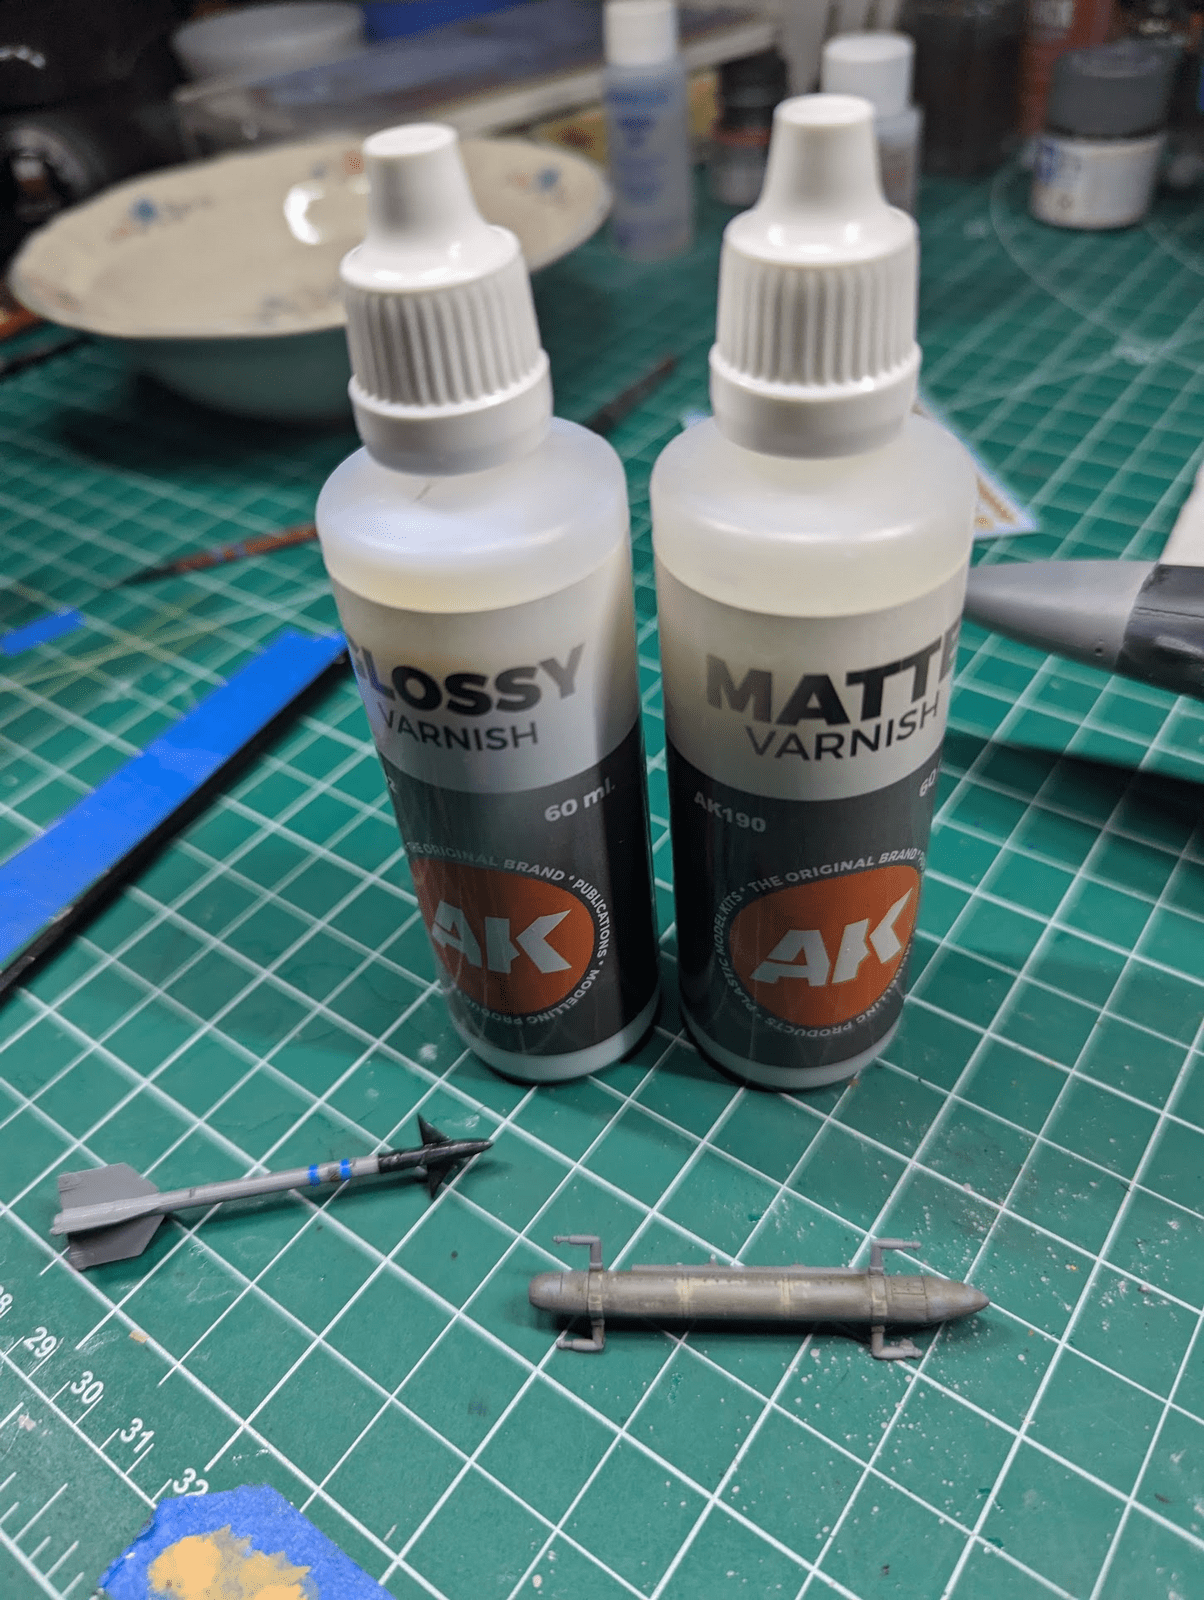
As usual for me, some success and some fails. I've decided for sure I need to find a new product to use for glosscoats before decals and washes. I've been using AK for both gloss and matte, they have a UV property of some kind that is visible under LED lighting if applied heavily, and I'm pleased with their result EXCEPT their durability. To be fair I've not tested the durability of the matte, I use that when the kit is finished, right before peeling masks off canopies. But the gloss, I put that through the ringer, apparently, and I am destroying it. I used it on an F4-U1 that was heavily weathered (as I like in Pacific Theater models) I also used it on the Nashorn which was also heavily weathered. I did not have a problem with it wearing down due to chipping and washing on these kits because I was kind of doing it on purpose. On the Focke Wulf and Spitfire I did very little weathering and did not have the problem either.

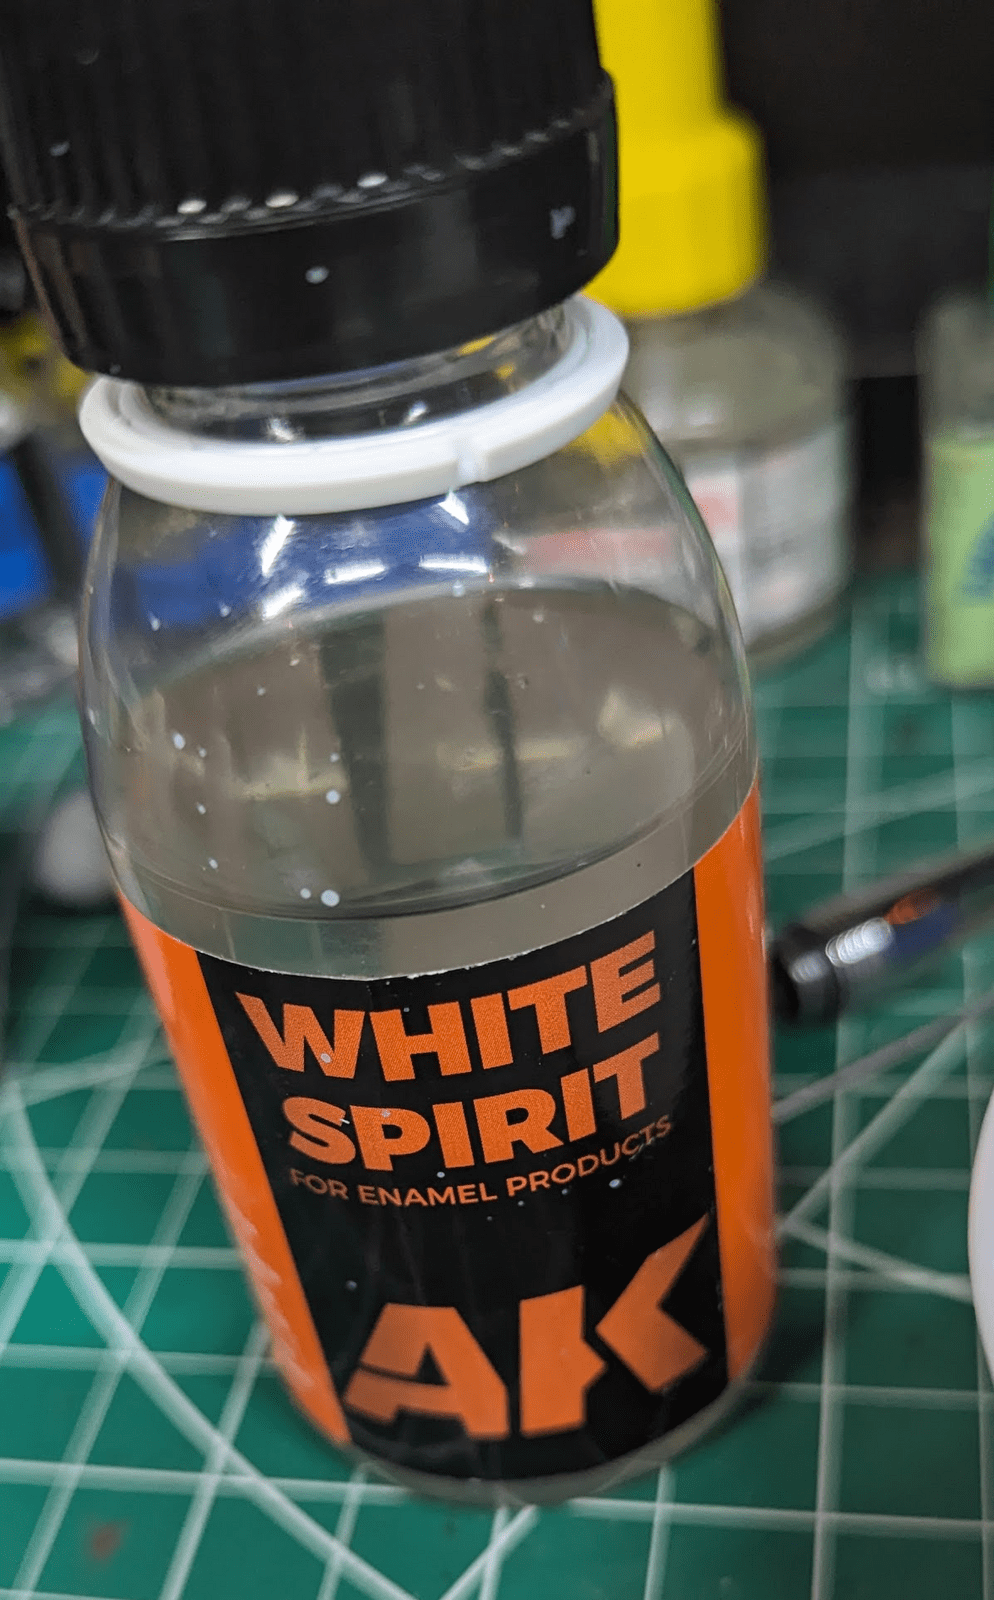
This Falcon/Viper was quite literally the first jet I've built since the 1980s, and while I did want "some" weathering, but I decided to keep it low. However this was also introducing multiple new issues for me with washes since the 3-color paint job required different tints for each color. So that meant more applications of "White Spirits" which I have become convinced is too much for the AK gloss. Maybe I did not apply it thick enough? I did 3 thin coats out of fear of filling in the panel lines or rivets.

1722463217018.png


Here's the kit with the gloss before any washes, I wanted to apply the larger decals before washes, because they need to be toned down a little. The stencils (so many!) can wait until afterwards. I then applied a light gray wash to the darkest paint, a dark bluish gray to the middle gray, and a light bluish gray to the lightest areas.

1722463375911.png

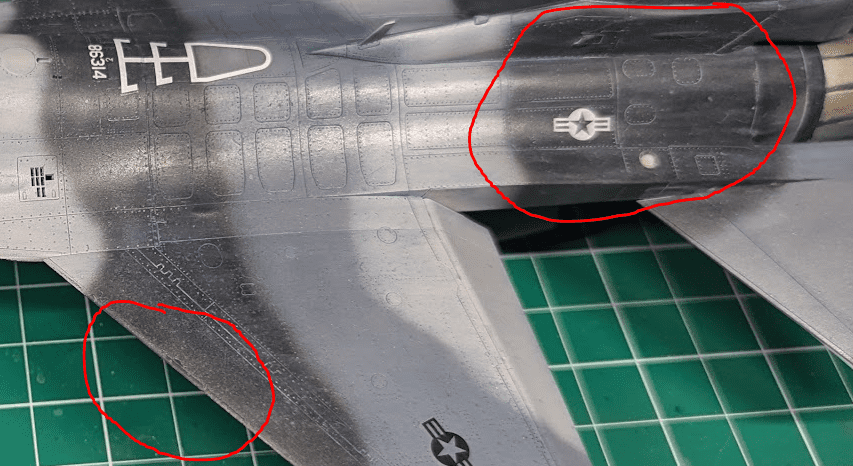
After finishing that it looks "okay" from a distance, but there are issues everywhere. Next two pics are focuses of the one above.

1722463483464.png

You can see that I wore off the clear coat and even the base coat of Tamiya NATO black on the leading edge of the port wing. That is the primer showing through! So I chilled out a bit with removing my wash color which resulted in a lot of steaking as shown by the tail.

1722463591420.png

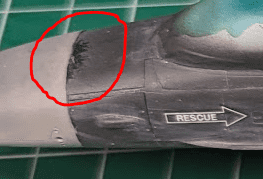
Exact same problem on the nose, trying to remove the whitish haze, I wore things down to bare primer.

So, I need help! With a Tamiya Acrylic top coat, and AK acrylic clearcoat, I thought I was immune to white spirits (turpentine right?) attacking my other layers. BZZZZT! Can anyone recommend something stronger/tougher, or am I just an ape who is overworking this stuff?
 
exactly which mineral spirits are you using ?
how long are the acrylics curing prior to the washes ?
The "white spirit" is from AK.

The Tamiya acrylics were down for at least 10 days, maybe 14. The acrylic glosscoat was maybe 5-8 days?
 
Paintbrush initially.

1722467426278.png


Lay down a layer of thinner, then the color to flow into low spaces, which works great. Followed by a swap (Q-tip) to remove excess, which is when I start removing lower layers if I "scrub".
 
You maybe sprayed the color coats on too dry ? , trying to keep the layers thin .
That will affect adhesion . The min spirits won't dissolve the acrylic but flooding the surface like that with it can delaminate the paint if it wasn't wet enough to develop a bond to the primer or other color coats .

I assume the AK white spirits is refined to " artist grade " with the removal of all the other solvents .
I'm sure it's probably priced like it is , lulz
 
The use of Tamiya Acrylics (almost all "XF") is definitely new to me. I got used to heavy thinner during the 1990s-enamel era. I am 100% applying it thin, to let the pre-shade through.

Does that mean my mistake is expecting a polyurethane scale varnish? I see videos of people flowing high levels of oil-based thinner, I should have added I'm using artist-oil paints, as in meant for canvas.

Here's the product....
1722469101916.png


You can see it was even worse paint-erosion on the jamming-pod, but the sidewinder has a bulletproof enamel metallic black.
 
I'm confused… why are you using washes to weather the heck out of the finish of an Aggressor Viper for a faded look? It looked great prior to your weathering and washes.

Sidewinder tips are black, never metallic black.
 
I'm confused… why are you using washes to weather the heck out of the finish of an Aggressor Viper for a faded look? It looked great prior to your weathering and washes.

Sidewinder tips are black, never metallic black.
The effect is much more than what I was going for, usually do not apply heavy weathering to aircraft other than Pacific War. But I had to stop wiping it off because it was stripping the paint. Can you recommend a stronger clear coat that would not get rubbed off? I thought an acrylic clear was immune to oils.

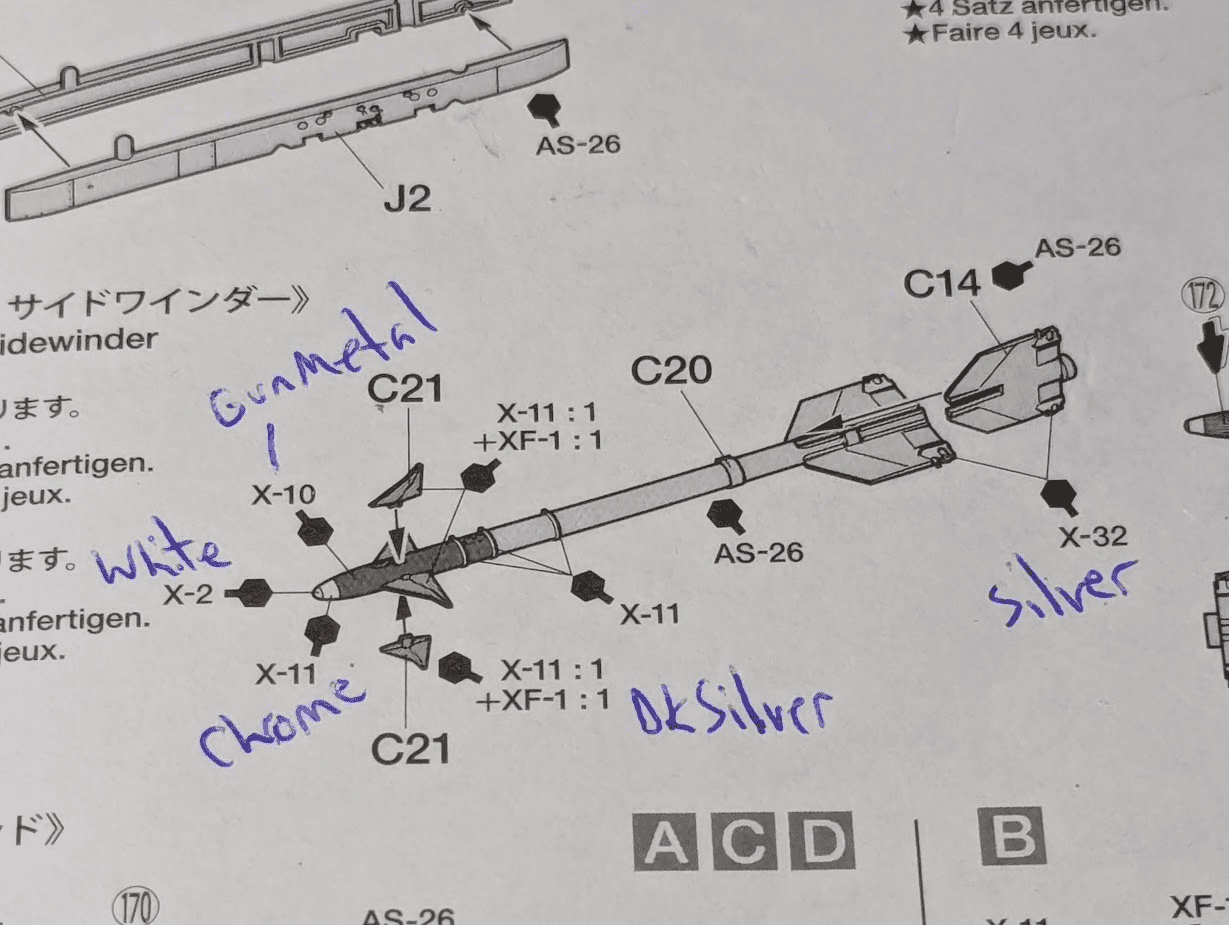
As far as the sidewinder, this is the first I've touched in about 40 years. The Tamiya instructions indicate the front portion is made up of four colors...
  • White
  • Chrome
  • Dark Silver
  • Gunmetal Black
What you see is the gunmetal before I apply the other three colors to the tip.

1722517562763.png
 
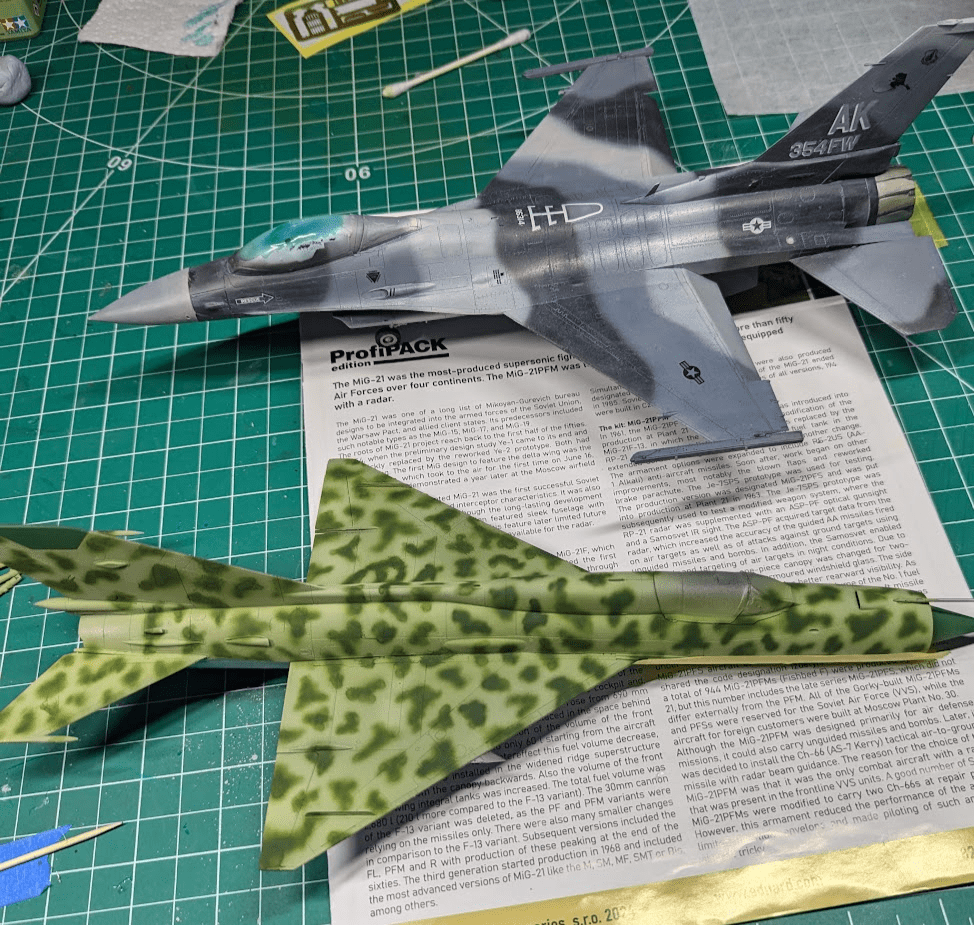
My last two aircraft are jets, this is a bit of a break for me, I'm usually a WWII type. I'm trying to get out of that rut and try "new" subjects, yet the F-16 came out in the early 70s, and my Mig-21 came out in 1961 so the term new is subjective.

While I am pushing myself to build jets, I'm lying to myself in a way, seems that I cannot help but apply the heavy camo paintjobs like WWII warbirds were known for. My Phantom kit is due any day now, I'll stick to the boring grays and solid colors this time!

1722883053218.png


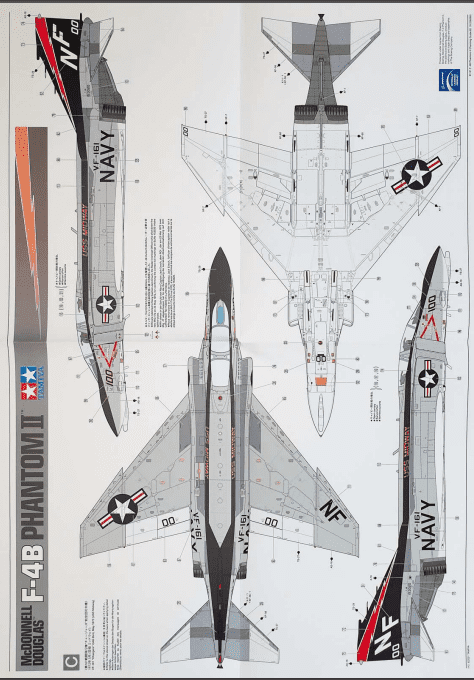
At least this scheme has some color! I prefer the dual-green with brown camo like Gary is building (see above, have to stop painting traditional camo!) and I wanted a shelf-mate to go with the 1968 Mig. All the F4 folks say that means F-4B, and I could not find any aftermarket decal sets for the later camo. Again, I need to stop painting camo and have not built a USN plane in more than 2 decades. The USMC F-4U does not count.

1722883276611.png
 
Last edited:
you're applying the wash with a needle hammer ?
Do you think a lacquer clear would survive a turpentine wash?

I'm assuming I was too thin with the clearcoats, or I thinned it too much. I'm trying to wean myself from the need to use too much thinner, but the XF series of acrylics are so thick they feel like pudding! I did have nozzle drying issues without enough thinner.

On my Mig I laid down a series of coats that in total were more than 2x as thick, maybe 3x. It may be weeks but we'll see if that solves the issue.

But I have an (old) bottle of Testors Gloss Lacquer that I think might be unused, will it survive?
 
Turpentine is more aggressive than mineral spirits . I use it to clean spray can nozzles after use for that reason .
Cured lacquers will survive mineral spirits no problem .
A lot of " lacquers " are actually acrylic resins and not nitrocellulose , but both are safe with mineral spirits .
 
I hate it when you're near finishing the build and you see something that you want to fix and in attempting to do so you make it worse. Very frustrating. I wish I could offer some recommendations to help. Beyond that it looks like a great build.
 
I hate it when you're near finishing the build and you see something that you want to fix and in attempting to do so you make it worse. Very frustrating. I wish I could offer some recommendations to help. Beyond that it looks like a great build.
This was done almost exactly a year ago, it was shortly after "returning" to the hobby and I was trying to use modern techniques (like enamel/oil washes) of the type I had never tried before. The learning curve bit me, and it took several more failures to figure out what I was doing wrong. Bottom line, my clear coats were not applied thick enough. I'm a chronic case of spraying thin coats of thinned paint, I stand by that approach for color coats and post-shading effects. I was concerned with filling in surface detail with clear acrylic, so I ruined a few paint jobs. I did stop using those AK clears, never had good results with them, but I accept the blame, it is not the brand or the product at fault. Since then I am using Tamiya X-22 for my gloss clears, put the stickers and washes on that using mild solvents then clear matte with good old Testors.

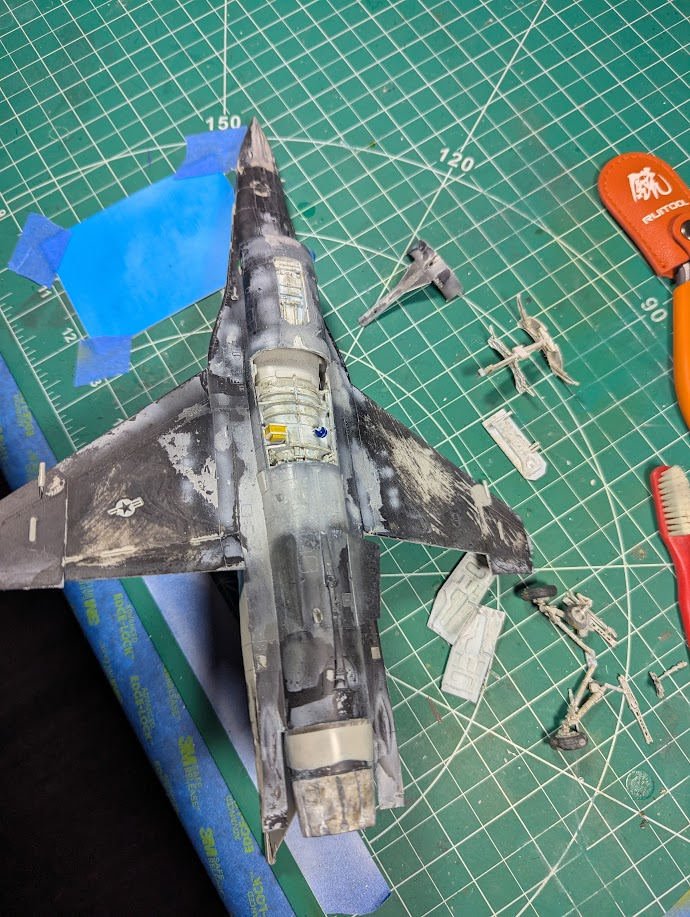
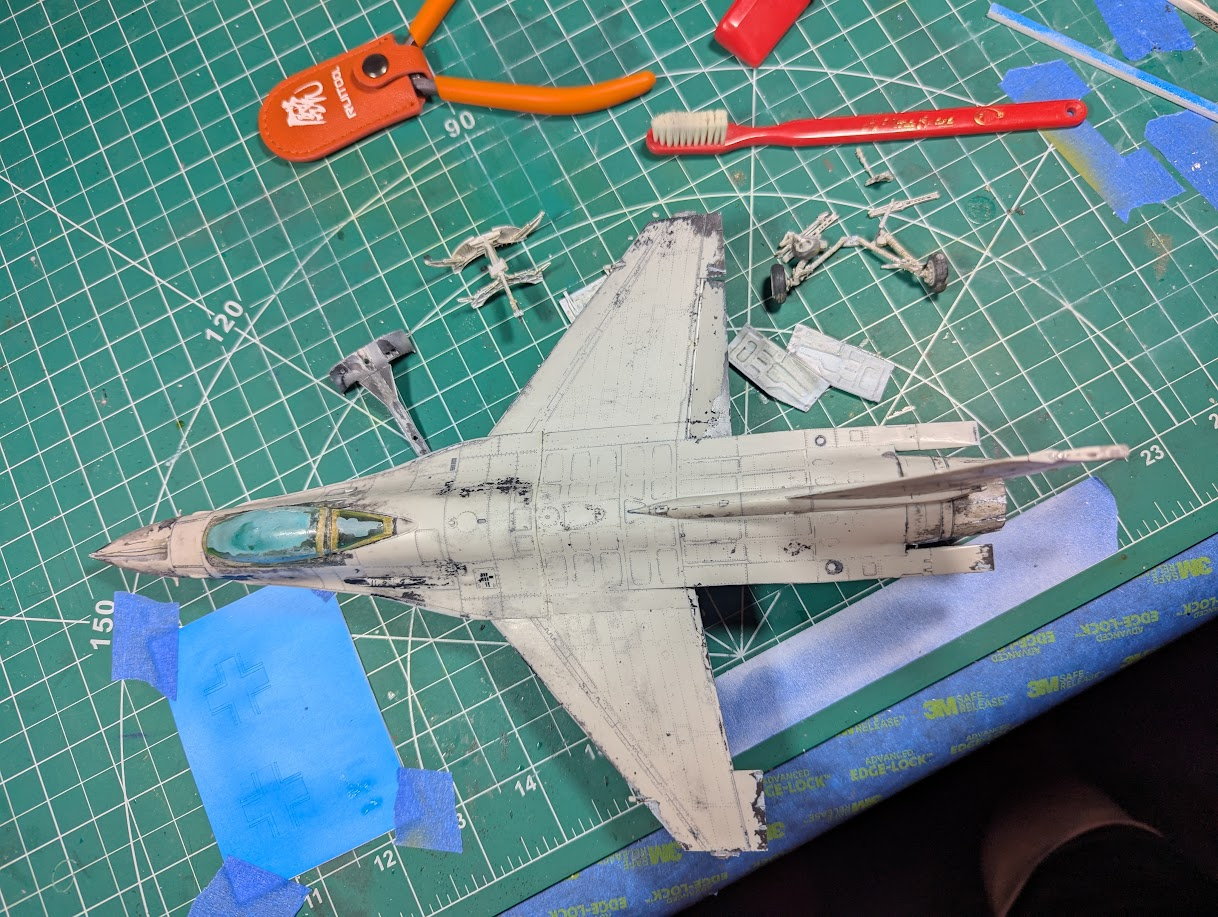
I was going to use this kit as a mule, but could never bring myself to. I had put a detail set in the cockpit and didn't want to waste that. So I used some recommended purple-bottle cleaner to strip the paint. That did not work as well as I hoped so I broke out the easy-off oven cleaner.

1754229154675.png


1754229134832.png


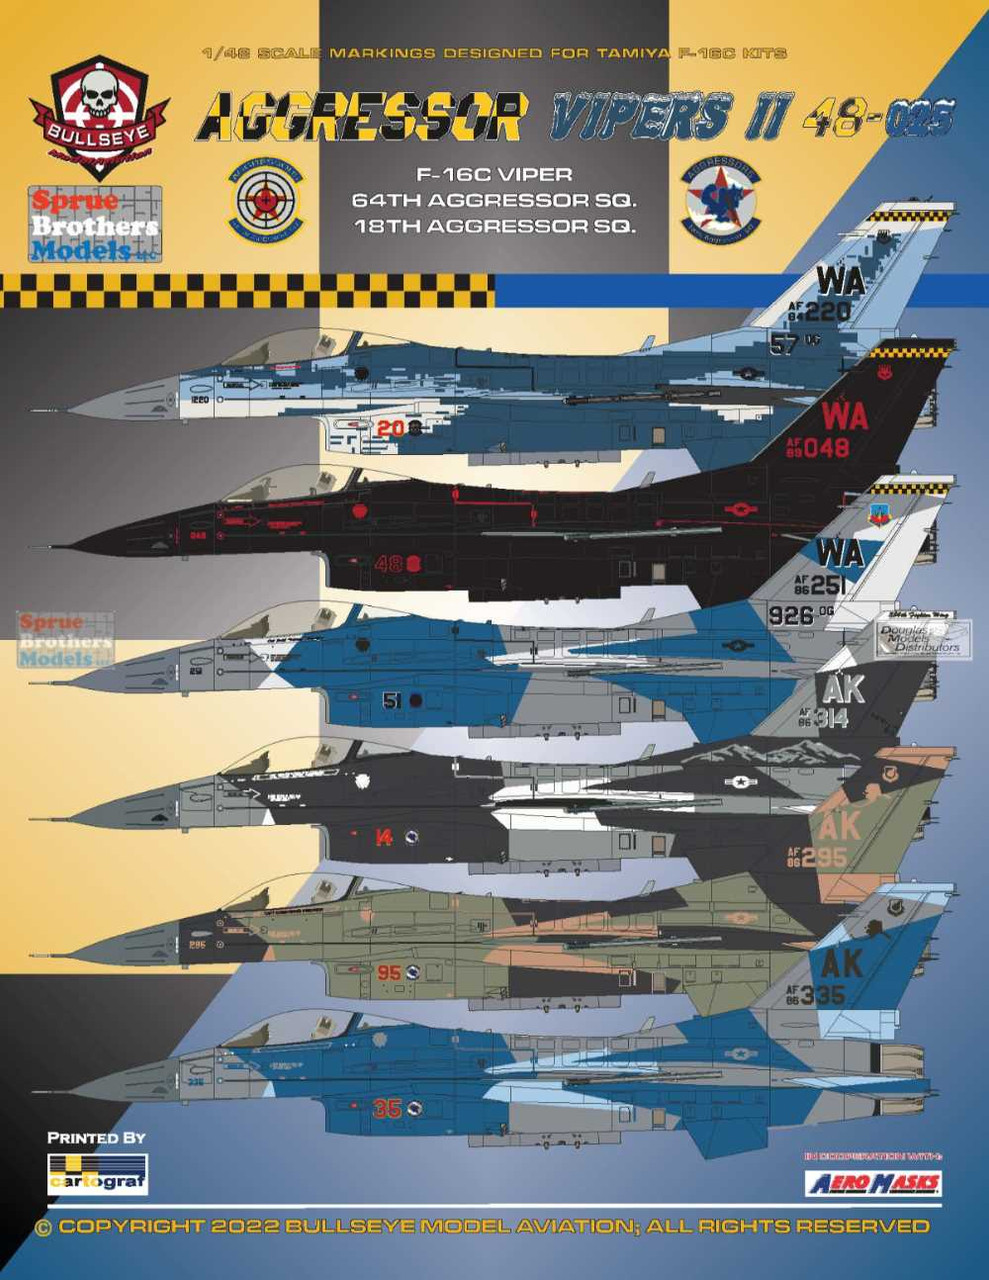
Then I purchased a new set of stickers, I do intend to at least tray and resurrect this kit, someday.

1754229226180.png


I admit I'm a bit scared of the splinter version of the white-gray-black paint.
 

Latest posts

Back
Top