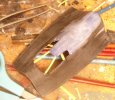
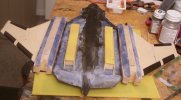
Changewind One-Omega 7 Tau

Quaralane

Well-Known Member
Joined
May 22, 2009
Messages
11,263
And now, for the next project on the boards.
This one is a WIP that I actually started about two years ago.
It's based on ships both from stories I've worked on, and RPs I've been in.
The original ship: Changewind One
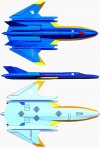
CW-1-00-CW1.jpg

Is refurbished as the transport craft: Omega 7 Tau
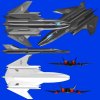
CW-1-00-O7.jpg

As is clear from the schematics, the base model is an SR-71 Blackbird. But there are some obvious tweaks to make it unique
I'm starting with the old Revell 1/72 scale kit, but I'll be building the ship itself at 1/144 scale
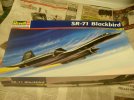
CW-1-01.jpg

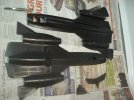
Base kit parts
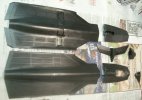
CW-1-02.jpg

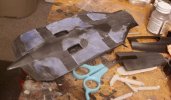
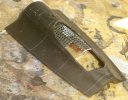
mods after chopping out a section of fuselage, chopping off the engines, and cutting off the nose
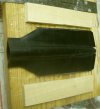
CW-1-03.jpg

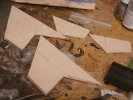
Original roughs for the wing engines.
CW-1-04.jpg

Going to be using the landing gear from the Moebius mk7 Viper, as well as creating the new cockpit deck using the backs of the seats from the mk7 kit as well.
I've also begun reworkign the cockpit opening for my new layout
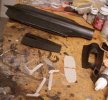
CW-1-05.jpg

Starts on the new engine blanks. These still need a lot of work as yet
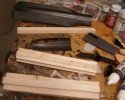
CW-1-06.jpg

The vent detail on the Blackbird has been filled in mostly with Aves Apoxie Sculpt, although I left some sections in the bottom clear to represent the VLS thruster vents.
I've also cut new landing gear wells in the bottom of the ship.
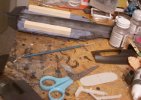
CW-1-07.jpg
CW-1-08.jpg

Youtube link:
Omega 7 Tau-Changewind One-Part 1
 
After some delay, here's an update on the build.
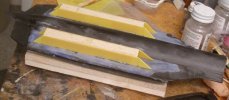
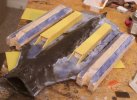
Using the blocks I'd cut previously, I started on the upper hull engine pods.
I glued the blocks to the wing surface, then cut styrene to skin the blocks with.
I started by epoxying the sides to the blocks.
CW-1-09.jpg

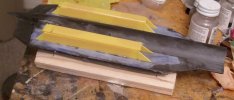
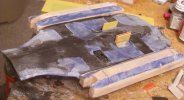
Then, I epoxied styrene across the top to cover it completely
CW-1-10.jpg

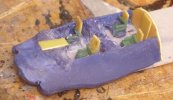
Turning my attention to the cockpit, my original plan was to try and make a mold for it so I could get multiple copies.
To that end, I braced the cockpit deck into the front fuselage and filled the edges with modelling clay to ease the process.
CW-1-11.jpg

Problem was, the clay wanted to stick to the fuselage and wasn't ridgid enough for my purposes.
So, after making the fuselage slick with something I found to be good for the job, I opted instead to do the fill-in work with Aves Apoxie Sculpt.
CW-1-12.jpg

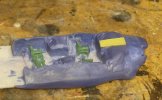
I also started work on the main engine pods by using Aves to produce the bevels along the edges of the balsa cores.
CW-1-13.jpg

Decided against casting the cockpit in favor of just getting it done.
The main and auxiliary consoles were sculpted in with Aves.
A plastic detail piece was added to the front of the main console.
The seats were made with bits of N-scale benches.
CW-1-14.jpg
CW-1-15.jpg

Youtube link:
Omega 7 Tau-Changewind One-Part 2
 
Woah! Missed this one Q, I'll pick it up now though! Interesting project, and looking great so far.
 
Thanks, guys.
The work isn't going fast, but it's progressing. Glad you're liking her
 
I apologize for the slow progress.
But, I'm happy to report that I 'am' making progress.

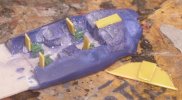
Got the bevels on the engine pods done with Aves Apoxie Sculpt.
Glued a small piece of styrene to the back plate to simulate a cockpit door.
I also started work on the landing gear bays by getting one side and the main door into place
CW-1-16.jpg

To help better detail the cockpit, I used a small grinding bit in my Dremel to add more detail to the consoles and clean them up a bit.
I also added backs to the seats with small strips of sheet styrene
CW-1-17.jpg

Next big step was to get the notches cut into the engine pod blanks. I did this with a grinding bit in my Dremel and a square file.
The cockpit back plates has now been glued into place as well
CW-1-18.jpg
Cockpit is ready for at least a base primer coat
CW-1-19.jpg

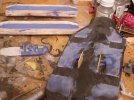
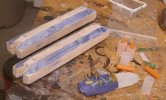
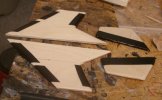
Also got the main wings and 'vertical stabilizers' cut.
They're 1/8" birch plywood for strength
CW-1-20.jpg

Youtube link:
Omega 7 Tau-Changewind One-Part 3
 
Thanks, Solander.
And I still consider myself as having a long way to go.

Okay, I'll readily admit to not getting a lot of work done on this during the last week other than sealing the wood parts with white glue and sadning them.

I made up for that with what I got done today.

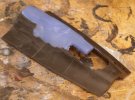
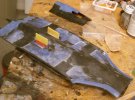
Roughed in the cockpit roof with some pieces of the sanding screen used for sheetrock that I cut to size and glued inside the upper part of the front section.
CW-1-21.jpg

Using that as a base, I went in and covered that with Aves Apoxie Sculpt to flesh out the roof.
CW-1-22.jpg

Using strips of electrical tape rather than carving the lines, I got the "flaps" put into place on the "rudders" and wings
CW-1-23.jpg

I also got some seam filling done on the front of the aft section as well as where the tail section mates to the main body.
I also cut some smaller pieces of sheet styrene to add at least 'some' definition to the insides of the landing gear bay doors.
CW-1-24.jpg

Youtube link:
Omega 7 Tau-Changewind One-Part 4
 
Nicely done Q! Love the use of drywall screen for use as a backing for the roof of the cockpit. Just brilliant. Another great idea you have going on there is the use of the blue Aves. I use the gray stuff and sometimes it's difficult to see it on a gray plastic kit. Not that it's a bad thing just that you like to see where the two mediums meet so when you rub your finger over it you can better gauge where the edges are. Question for you....is that a black primer I'm seeing on that or is the kit itself black? Just wondering.
 
Thanks, Glorfindel. I figured I'd need something to support the Aves, and it was handy
I'll freely admit that the blue Aves was totally by accident. I thought I'd ordered the grey, actually.
But I'll agree with you about it making things easier.
Kit's base plastic is black
 
Coolness Q. Another totally unique creation. :)

Given the number of members on the forum now, and the volume of WiP threads I don't get over here to the Sci-fi section often enough. I just got caught up on your Changewind build, good stuff. Keep it going.
 
Yeah Q!!!
This a kewl concept, and great execution!
So, did you generate the 3-d renders of the ship? If so, what software did you use?
Fellow graphic artist?
Everybody has mentioned AVES is it easy to work with, and does it air dry, and where do you find it?
 
Thanks, guys.

Mike, the model was created in a combination of 3d Studio Max and Anim8or, then rendered in Poser.
I started with an SR-71 mesh I'd found online, then made the mods with primitives

Aves air dries, but takes almost 24 hours for a full cure. I get mine from the Starship Modeler on-line store
 
After much delay caused by lack of motivation, we have a new update.

Using 5-minute epoxy, I attached the engines to the main body.
I still need to fill the seams to clean things up.
CW-1-25.jpg
I also opened up the main entry bay to the ship. I'll add a boarding ramp once I have a better idea how it needs to sit
CW-1-26.jpg

Using small strips of styrene, I created the frames for the cockpit windows.
CW-1-27.jpg

Glued the wings into place on the main body before starting seam work.
CW-1-28.jpg

Youtube link:
Omega 7 Tau-Changewind One-Part 5
 
Thanks, John.
Things are progressing slowly now, but that's mostly from fatigue after work
 
She's looking great.
The wings add so much. It will be very nice to see it completed, and painted.
I totally understand about work taking it outta ya.
I am mostly toast by the time I get home. :/
 
Especially with the heat we've been having lately.
But I am trying to get her done, I promise
 

Latest posts

Back
Top