BSG-47 Battlestar Solaria
- Thread starter Quaralane
- Start date
Quaralane
Well-Known Member
- Joined
- May 22, 2009
- Messages
- 11,263
Thanks for watching, guys.
Only reason it's taking so long is the cure time for the Aves, otherwise I could have probably knocked this part out in a couple of nights.
@SLW45,
No difference between the two, other than the color.
Truth be told, I think I'd ordered the natural, but got shipped the blue by mistake. No biggie, though, as it lets me easily see where I've been
Quaralane
Well-Known Member
- Joined
- May 22, 2009
- Messages
- 11,263
Small update on the build.
Using Aves Epoxie Sculpt, I sculpted the upper parts of the secondary struts for Solaria's fixed-position flight pods.
I'll go in and do the bottom portions once I have the pods assembled.
The ends aren't all the same length, but that won't matter once I insert them into the soon-to-be-filled pod bays
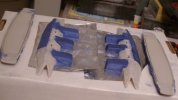
Learning a lesson from the my Galactica build, I went ahead and sprayed the insides of the parts that will hold lights with a coat of flat black
I have also drilled the holes for the wiring on most of the parts.
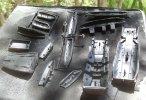
Follwing that being dry, I hit the parts with a coat of flat white to aid in reflecting the light inside the ship
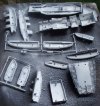
I assembled the lower parts of the flight pods, as well as drilling the holes for the windows in the middle section of the "head."
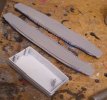
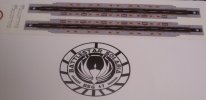
Using a scan of the kit decals, I altered the numbers to reflect the BS-47.
I also printed off a Solaria crest to use on the base
Youtube link:
BSG-47 Battlestar Solaria-Part 4-Plating, Mods, and Bits
Using Aves Epoxie Sculpt, I sculpted the upper parts of the secondary struts for Solaria's fixed-position flight pods.
I'll go in and do the bottom portions once I have the pods assembled.
The ends aren't all the same length, but that won't matter once I insert them into the soon-to-be-filled pod bays

Learning a lesson from the my Galactica build, I went ahead and sprayed the insides of the parts that will hold lights with a coat of flat black
I have also drilled the holes for the wiring on most of the parts.

Follwing that being dry, I hit the parts with a coat of flat white to aid in reflecting the light inside the ship

I assembled the lower parts of the flight pods, as well as drilling the holes for the windows in the middle section of the "head."

Using a scan of the kit decals, I altered the numbers to reflect the BS-47.
I also printed off a Solaria crest to use on the base

Youtube link:
BSG-47 Battlestar Solaria-Part 4-Plating, Mods, and Bits
Quaralane
Well-Known Member
- Joined
- May 22, 2009
- Messages
- 11,263
Here's the current progress on the build.
Got the flight decks decalled, and the photoetch girders bent to the proper shapes.
The girders will be attached with superglue
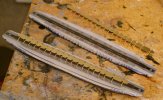
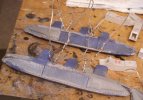
With the flight pods now assembled, I went in and added the bottoms to the auxilliary struts with Aves
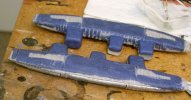
Green LEDs being put into place for the lights in the four engine pods
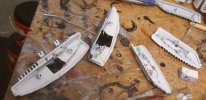
Red LEDs being put into place for the flight pods
Youtube link:
BSG-47 Battlestar Solaria-Part 5-Wiring and More
Got the flight decks decalled, and the photoetch girders bent to the proper shapes.
The girders will be attached with superglue

With the flight pods now assembled, I went in and added the bottoms to the auxilliary struts with Aves

Green LEDs being put into place for the lights in the four engine pods

Red LEDs being put into place for the flight pods

Youtube link:
BSG-47 Battlestar Solaria-Part 5-Wiring and More
JohnSimmons
For Spud: I was once Merseajohn
- Joined
- Jan 4, 2011
- Messages
- 5,645
Wow photo etch, aves, LED's! Your going all out, keep up the great work and vids buddy.
ModelMakerMike
"It's Slobberin' time""
- Joined
- May 28, 2011
- Messages
- 1,838
I must concur!
You're giving the entire treatment.
And it's really looking good. Those landing bays look great so far.
;D
You're giving the entire treatment.
And it's really looking good. Those landing bays look great so far.
;D
Glorfindel
Active Member
- Joined
- May 2, 2011
- Messages
- 1,504
Q's rollin here boys. Going nuclear, or as GWB says newclear.
Grumpy Popeye
New Member
- Joined
- May 14, 2009
- Messages
- 146
Watching your build is serious fun! ;D Keep up the great work Q!
CTspeedshop
I picked the wrong week to stop sniffing glue. : )
- Joined
- Apr 17, 2011
- Messages
- 1,388
Excellent work so far Q! I always enjoy the BSG builds. Good Stuff!!!
Quaralane
Well-Known Member
- Joined
- May 22, 2009
- Messages
- 11,263
--smiles--
Thanks for watching all of this, guys.
Fairly major update time here.
The home stretch is in sight.
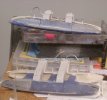
Began the process of filling the flight pod bays by mixing up some two part resin and pouring it into the parts
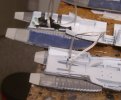
Got the main engines glued into place, and the wires run into the main hull
A look inside the flight pods with the lights on
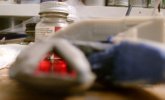
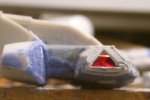
Final wiring connectioons are made
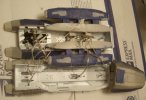
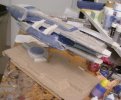
Major construction is now complete, although she's not permanently on the base as yet.
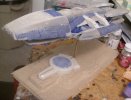
The base consists of a piece of rather interestingly shaped packing material with a brass tube inserted through it.
Wooden spacers have been glued into place along the edges to help make the base sturdier and to raise it up to make room for the power pack to fit underneath it.
The kit base has had the hole plugged with Aves, and the "Galactica" lettering covered as well.
Youtube link:
BSG-47 Battlestar Solaria-Part 6-Lights and Construction
Thanks for watching all of this, guys.
Fairly major update time here.
The home stretch is in sight.
Began the process of filling the flight pod bays by mixing up some two part resin and pouring it into the parts

Got the main engines glued into place, and the wires run into the main hull

A look inside the flight pods with the lights on


Final wiring connectioons are made

Major construction is now complete, although she's not permanently on the base as yet.
The base consists of a piece of rather interestingly shaped packing material with a brass tube inserted through it.
Wooden spacers have been glued into place along the edges to help make the base sturdier and to raise it up to make room for the power pack to fit underneath it.
The kit base has had the hole plugged with Aves, and the "Galactica" lettering covered as well.


Youtube link:
BSG-47 Battlestar Solaria-Part 6-Lights and Construction
Similar threads
- Replies
- 1
- Views
- 2K
