Bronco Buffalo MPCV " BoneCrusher"

Hey man, I'm not going to have any finger nails left if you keep us waiting for another update. Hahaha
 
NEVER FEAR!!! The update is here! It's a pretty big one too.
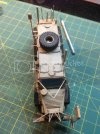
image_zpsa62a5883.jpg
Slapped some paint on the slats and the extra bits.
Cleaned up all the excess wash to make it dirty but believable. Decided to mount the spare wheel....still need to make straps though.
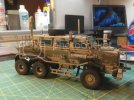
image_zpsa51d087e.jpg
And mounted all the rest of the wheels along with some antennae too
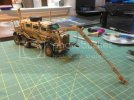
image_zpsf2157743.jpg
Decided on the rear basket and the armature too....washed the small bit to mount and slopped some on the slats too
image_zps577ea449.jpg

Starting to rough out the base tomorrow after work....gonna be a big undertaking.

If you have ideas, please throw them my way!!
 
Wauuuu is an excellent work ..! I find myself putting together the same model but I added LED lights ..! follow your project ..!
 
I spend a few hours in the cave and I miss an update til the next morning! WOW! This looks great! Can't wait to see what it looks like with the slat armor!
 
Detail painting stil needs to be done.....plus adding some more soot from the exhaust along with pigments and straps for the spare tire on the roof.

Currently sketching the plan for the base and what to use as a roadside IED for the vehicle to be investigating....not gonna be an easy undertaking to get the look right. Anyone have ideas on a 1:35th scale light pole and signage you could find in Fallujah ?
 
for the ied you could use some ammo from one of them Tamiya kits or even from a 1/48 /1/32 aircraft add some wires to it and you have something that looks like its going kill
 
Awesome work man. This vehicle is one cool machine. It is one of the few vehicles that I did not get to see personally when I was in Iraq, but it seemed to work really well against various types of blast attacks. From different pictures I have seen on the internet, this model kit looks very good and looks like the real deal. You put some great effort in the details. Keep it up man.
 
Saw this kit completed in a magazine article today at the newsagents , gotta say your build looks much better. Loving this build.
 
really incredible work mate! once you cleaned up the excess wash it surely does look the part!
 
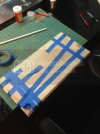
Roughed out the base and glued on the trim. I made the base out of a 1x10 and some moulding from lowes. It was cheaper than getting a router and all. After the moulding dries I'll lay a quick layer of black stain about 1 inch toward the center....just have to figure out how to lay a roadbed about a 1/8 to 1/4 inch thick. Is there something I could use to lay the curved road and use it as a border to hold the plaster? Like a piping or thick tape of sorts?

image_zpsffc387be.jpg
 
Pink Foam would do the trick you can just and shape it how you like.
 
I would highly recommend sealing all six sides of that with some sort of clear coat, a couple coats of it even, before doing any groundwork. Any moisture in the plaster will get wicked up into the wood grain and most likely cause it to warp.
 
Advice noted. I'm spraying at least one coat of urethane sealer over the flat. I stained the borders last night and figured spare sprue will function as a plaster trough.
 
Quick drying polycrylic to the rescue. Sprayed 2 coats before breakfast and its ready to handle already. Now I just need to mix my roadbed amalgam and get that laid out so it can dry for a day or so.
 

Latest posts

Back
Top