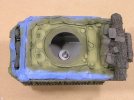
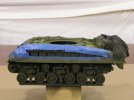
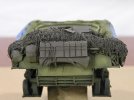
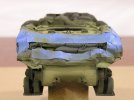
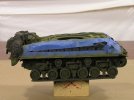
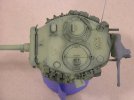
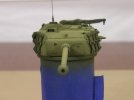
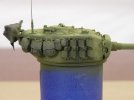
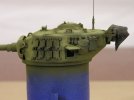
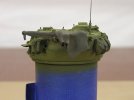
Battlewagon: M4A3E8 ETO

P15e1.jpg

What kind of AirBrush is that ? if you don't mind me asking?

Nice tank by the way... you are putting a lot of work on that !!! all the extra stuff !

Like your paint technique... not many are like that... paint after assembly ? not for everybody !

let me know about that sweet looking A/B I'm pretty sure it's a single action due to the adjuster at the back but... you never know !

my hand get numb and something like this would Ease my pain !
 
Thanks gang for the kind words! It's been a long time coming but I've finally got that paint going!

@Jelly! You kill me bro, you kill me....LOL ;D

It's all about what works for you. But don't feel left out just take a marker and write "PANA-VISE" on your block of wood and you have the same thing, but much cheaper!! ::)

Yep I took small break to gather my strength for the finish. Truth be told I was just plan scared to start painting. :-\ But once I got my nerve up and some words of encouragement from an on-line mentor I just jumped in and got started. So far so good and its even kind of fun, once I relax and enjoy myself. :D

Now to answer some of the questions.

The VISE-- I have been kicking the idea around for a few months. Not to sound like a weirdo or anything but the idea came to me in a dream of all things, while I was building up the stowage for the rear deck. I figured if I had something that could hold the model at different angles to free up my other hand life would be much easier. then I had a dream about my old shop class in high school where I used such a vise. After doing some research on-line the PanaVise was the winner. It seemed to have the best reviews and feedback. But the big selling point for me was that I could order the vise in any configuration I wanted, thus totally tailoring it to my needs...awesome!! The only draw back is the cost. It isn't cheap just under a $100.00 U.S. green backs. I'm sure there are others out there for less so if you are interested in getting something similar shop around. I'll post some pictures on how I use it in the building process during my next model.

Follow the below links
PanaVise
Vise head Model: 203
Base Model: 305 Low-Profile
Base Model: 308 Weighted Base Mount (5lbs/2.3kg) it isn't going anywhere!!

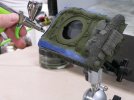
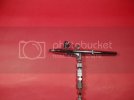
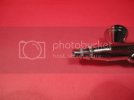
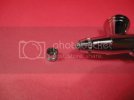
The GUN-- GREX Tritium.TG - Dual Action Pistol Style Airbrush, Top Gravity Let me tell you I can not say enough good things about this bad boy. But let me say ABs are a personnel choice. So I'm not saying this is the end all be all of ABs...but it is for me!! I picked this up at the AMPS National show last April here in Virginia. It just happened to be the first booth I hit and after a test drive without giving it a second thought laid out the green backs for this beauty! For me I always had a problem getting the paint flow just right, always seemed to over do it with the traditional top trigger ABs but once I used this pistol style trigger I was golden. Now like the vise she's no cheap date at just over $200.00 USD so shop around and you might score a lower priced one.

Lastly if anyone was wondering. So far all the paints I have used are Tamiya Acrylic Paints. XF27 Back Green mixed with a little X1 Black for the pre-shade. Then a coat of XF51 Khaki Drab (which came out on the gray side, check the stowage) and then a few light coats of straight XF62 OD. I'll post a more detailed overview once I get a little further along.
 
is it me or do tamia paints look more chalky when sprayed. and thanks for the info on teh vise i dont think i would find it in europe but one would be easy enough to fabricate from a ballhead joint from a mono pod
 
Hey Spud!

On the paint question; it could be pictures as I had to lighten them a bit for posting as they came out on the dark side. But I see what you mean. I'll double check to make sure. Anyways I figure the weathering process will correct some of that I would think...or hope.

Good idea about the ballhead joint. I just wanted to show what I used so that others on the form could adapt any ideas to come up with their own gizmos.

Good luck!
 
Oh Jelly I for got to answer your question about how the AB works.

The Trigger has a built in stop. So when you are pulling the trigger all you get is air until you hit the stop. applying more pressure moves the trigger past the built-in stop. So past the stop is when the start to get paint. More Trigger pull equals more paint. Since I never really got the hang of the top trigger ABs I was able to pick this up real fast. but may take some getting use to for other people.

Hope that make sense. ???
 
I've noticed it my self errins, I'm not complaining about it just an observation :)
 
E ,

Yeah ! Th Shermie is lookin Good ! I like th shading !! Can't wait for th Weathering to start , ..... & Those details ! I think th different shade of Green are really gonna PoP under a good wash !
 
errains said:
Oh Jelly I for got to answer your question about how the AB works.

The Trigger has a built in stop. So when you are pulling the trigger all you get is air until you hit the stop. applying more pressure moves the trigger past the built-in stop. So past the stop is when the start to get paint. More Trigger pull equals more paint. Since I never really got the hang of the top trigger ABs I was able to pick this up real fast. but may take some getting use to for other people.

Hope that make sense. ???

:) Hey, man, thank you very much for the AB firing principle explanation. Eric, after reading it either twice or ten times (clarification: due to my language restraints), now I understand it 100%. :)

Your AB looks the FN-SCAR of the AB´s… wow ! For European prices, 200 US bucks is a joke (I got my Iwata from CANADA): here we´re used to tie dogs to fences with sausages, I won´t even try to find out the price of your AB here… enjoy it… may I know wich nozzle calibre do you play with? May I believe it´s a 0,3mm one? I think this trigger concept would work very fine with the 0,2 mm calibre…

:) Ergonomically (I think this is the correct word in english language) I believe & think that with a trigger in that position it is feasible to get a better control of the movement & pressure applied with the finger than with a top-trigger AB.

I have an excellent Iwata (top trigger AB), and really I love it, man, but I must confess that as I´m not frequently firing with it, I´m not an “experten” (veeeery faaaar from it ) with it´s trigger. But for a low - profile modeller like me, it is Sweet Cream (and I believe that really it is, sincerely :) ).

I can´t believe that you were “scared” of beginning to paint ! ! ! ;D


;D I´ll follow your advise… and from now on, I´ll label my wooden blocks with “Pana Bise - Poor Man´s Freedom Degrees - Limited Edition Kit – Environmentally Friendly ” (I say B, not V, due to copyright stuff).

:) “See you”, Eric!
RG
 
Well now that you have Enlighten us how that Grex AB function... it is identical to a TOP triggered Cousin !

We push down first then slowly move back to add paint to the Airflow... you just Pull on yours... which is even easier!

I will definitely look in getting one ! I have 6 A/B but prefer using only 2 or 3 at the most !
At 279$ it’s a little pricey! but

This puppy might replace a few?
 
spud said:
is it me or do tamia paints look more chalky when sprayed. and thanks for the info on teh vise i dont think i would find it in europe but one would be easy enough to fabricate from a ballhead joint from a mono pod

You're not the only one. I thought that paint looked very flat'n'dry...

errains said:
Oh Jelly I for got to answer your question about how the AB works.

The Trigger has a built in stop. So when you are pulling the trigger all you get is air until you hit the stop. applying more pressure moves the trigger past the built-in stop. So past the stop is when the start to get paint. More Trigger pull equals more paint. Since I never really got the hang of the top trigger ABs I was able to pick this up real fast. but may take some getting use to for other people.

Hope that make sense. ???

So you can't control the airflow independently from the paint?

It sounds a bit weird but then again: I can see the point of it. Sometimes I feel that my top-controlled dual-action airbrush is somewhat prone to "finger-slip".
 
@f2k; I agree the paint is looking a bit flat-ish but I have a fix for coming up...or I hope so anyways. And your correct about the air flow but it doen't seem to be a problem for me and the top control ABs always caused my finger to cramp, not sure why that happen. But this ABs fixs that. :D

@schweinhund227; I'm not sure if the 279 price tag is because of the Canada thing but AMAZON has it list for around 210 if that help any. :-\
 
Hey Eric,

I wouldn’t be too concerned with the flat paint. It should come to life after weathering.

My one and only attempt with Tamiya paints looked this way. I used Migs filter for tri color cammo on it, and it made it look really good! It added some depth to the paint. I was very pleased with the results.

I don’t know if your planning on using any filters, but this is what helped mine out.
 
Eric I use a Iwata trigger gun too. After painting cars since I was a kid a trigger just fits my hand better.

Tony lee :)
 
Hey guys, Tamiya always looks like that. I buff it out with a coffee filter to smooth it out a bit. 8)
 
Errains you work is fantastic, congratulation mate. The paint is nice, I waiting for the weathering.

With respect to airbrushes I send a link to these bugs, the prices are cheap and are copy Iwata. Plus there parts and accessories for airbrushes

http://stores.ebay.com/Manda-Worldwide?_rdc=1

One of my airbrush is a Harder Steenbeck Focus with a 0.2 Nose is a fantastic baby.

To get a finest line in airbrushes, is take out the nozzle lead and you manage fine lines.

DSC00697.jpg
DSC00698.jpg
DSC00700.jpg
DSC00706.jpg
DSC00708.jpg
DSC00709.jpg

DSC00725.jpg
 
Eric,

as I have already stated in my email response, this looks really great. Especially the flat finish. ;) Although I was privy to some more 'advanced' photos, maybe you should post them here as well?

I tried one of those Grex brushes at AMPS east a year or two ago, they're pretty neat. I had a blast using it at their demo and it did fit the hand really well. Unfortunately I am so used to the more 'normal' style of airbrushes that I didn't want to start relearning.

In the end, airbrushes are a personal choice and only the brush that works for you is the one you need to worry about. The tool doesn't build the house, the carpenter does. An expensive hammer in the hands of an inexperienced worker isn't going to produce the same results as an experienced person using a brick.

I can get super fine lines with my $60 Badger 100.


[attachment deleted by admin]
 
A Little Update

Just wanted to keep you all apprized of the paint progress. As you can see the I gotz the base color laid on it looks ok-ish and all. I just finished doing up the base colors for Jerry cans and sandbags tonight and will be moving on to the base colors for stowage on the rear deck and turret. Once thats done I'll pull the masking and post new pixs of that...soon I hope. Until then Enjoy!

P16a.jpg

P16b.jpg

P16c.jpg

P16d.jpg

P16e.jpg

P16f.jpg

P16g.jpg

P16h.jpg

P16i.jpg

P16j.jpg
 

Latest posts

Back
Top