A Tale of Three Shermans

errains

New Member
Joined
Apr 10, 2011
Messages
288
Banner01.jpg


So begins a sorted little tale of three model builders who have taken upon themselves to each build an M4A3 Dry Stowage Sherman. Each of these poor misguided souls will journey through this quest by different means and methods. One will use only parts from the spare parts bin and begin with a Tamiya M4 upper & lower hull. Another will use Tasca parts but not from a kit, oh no all these parts where order directly from Tasca sepertaly and then combined into finial product. The Last soul will travel the resin road and build his Sherman from the Formation resin hull. Many perils await these three intrepid souls and we invite you to follow along and lay witness to their ultimate triumph…or at least we hope so.

~~~~~~~~~~~~~~~~~~~~~

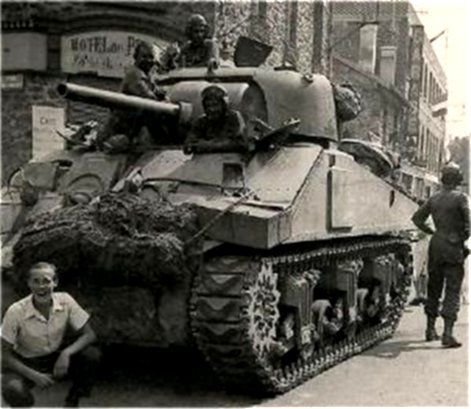
Here is my Sherman that will be part of this sorted little Tale of three Shermans. Majority of the M4A3 Dry Stowage Shermans were manufactured by Ford and used primarily as trainer Shermans state side. However the with the depletion of the Sherman inventory during the Battle of the Bulge a limited number of these training M4A3s where shipped over to the ETO after a period of remanufacture. It is my intention to build this example to represent one of these replacement Shermans as it might have appeared near the end of the war while conducting operations within Germany. The photo below is look I’ll be striving for.

M4IAT-001a.jpg


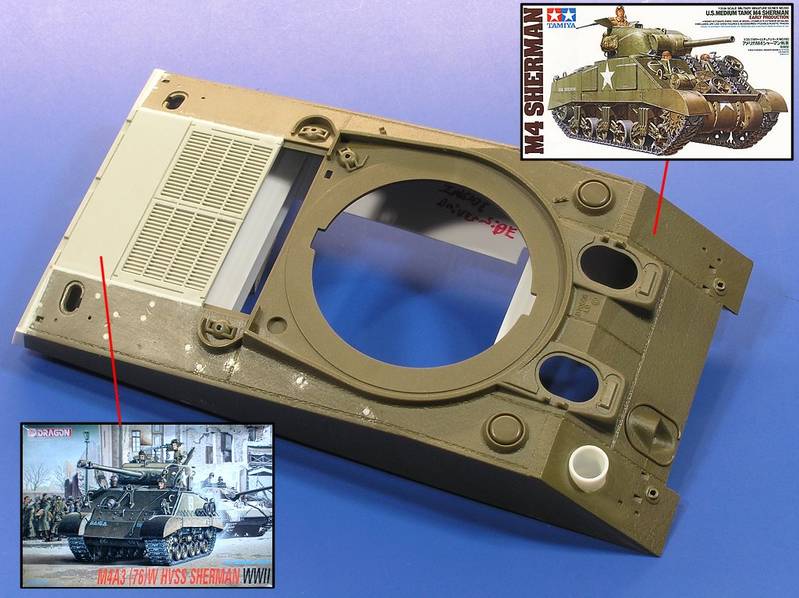
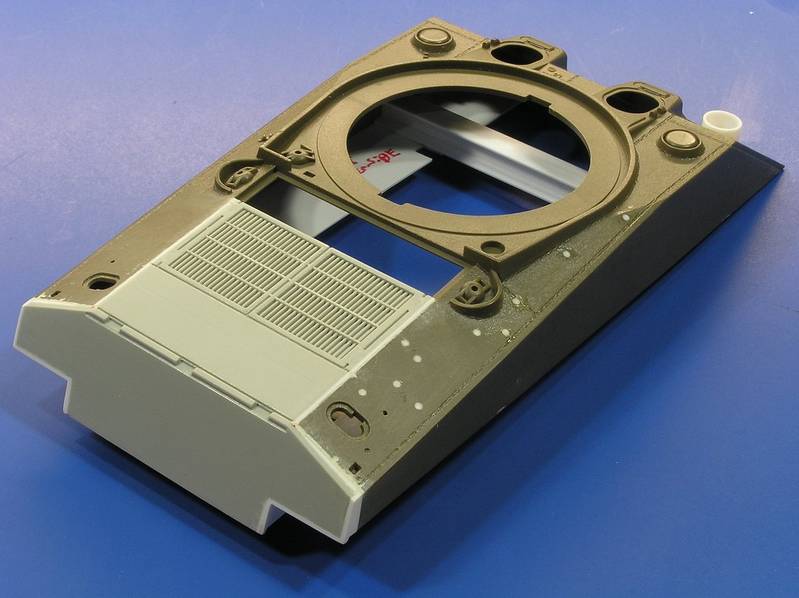
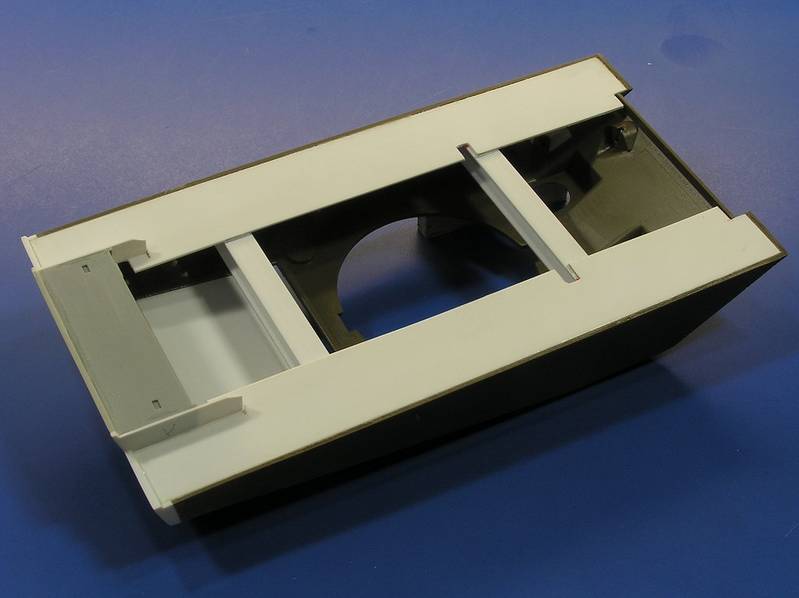
My approach to this build is to use only items from my spare parts box therefore no one single kit will act as the primary donor. Thus far the upper and lower hull is from the Tamiya M4 and the engine deck and rear plate are from an old Dragon M4A3E8(76)W kit. I began work by fitting the engine deck and rear plate that I cut from the Dragon M4A3 upper hull. I kept this as one part so that the correct angle of the rear plate would be maintained. I then fitted and glued this to the Tamiya upper hull, filling the gaps as need with styrene and putty. I then moved on to filling the open sponsons with sheet styrene. Once that was completed I added the mounting area for the exhaust deflector.

M4A3DS-003.jpg

M4A3DS-004.jpg

M4A3DS-005.jpg


Thank you for joining us on our little Journey
 
Hey Eric,

Glad to see this one here! I'll be following along buddy. Gotta love them shermans!
 
Greetings Fair Gentlemen...and I use the term losely ;D

THX for stopping by and partaking in this sorted little tale and taking time to leave your words of support.
For sure I do love me some Shermans, I can't seen to get enough of them. Hopefully the other fellow travelers will post there progress here soon and introduce themselves. The main idea here is to have fun and share the different methods. It maybe slow going but in the end it should be a good time.

THX Big-E for providing the opening video! 8) Nice Choice

Thanks again to everyone for taking time here for a peek :D
 
Re: "A Tale of Three Shermans" Remanfactured M4A3

Greetings,
Frank Blanton here. I am guy #2 on this ahem.. "journey" to model the Ford built M4A3 Dry Stowage 75mm Sherman. These tanks were the 57 degree sloped front hull with narrow drivers hatches/hoods. Also the rear decks were somewhat different than a 47 degree sloped front hull 75/76mm M4A3. My model is being constructed from parts sourced directly from Tasca "by the sprue" I began with an M4A2 Upper and lower hull and added the A3 Engine deck which was then modified by removing the "U" shaped splash guard. Added two more filler caps and a new guard was emplaced using Evergreen styrene strips. A bit of .010 solder wire was used to replicate the wire conduit for the hull mounted sirene and Archer fine transfers were used to create the hull casting no. from the Surface details line. Also new weld beads were used from the Archer range for the prominent weld beads on the front hull. Moving to the rear lower hull I used More Evergreen styrene this time a 1/4 piece of tubing was cut to form the "rounded lower hull plate that all the Ford Manf. A3's had. Ford made many of their own parts and Sherman expert Joe Demarco is our advisor. Ok. Go Joe! Noe for some images....
frontM4A3Tasca.jpg
RearTascaM4A3.jpg
LowerrearM4A3Tasca.jpg
UpperTascahullM4A3.jpg
 
Very nice Frank!! Not surprised to see you part of this Triumvirate!! Making some excellent progress too!!! ;)
 
Thank you. Waiting for Guy # 3 to post his images. He is finishing up a project now and should be with us soon. He will do a Formations Resin M4A3 Dry Stowage 75mm.
 
Re: A Tale of Three Shermans, New images

Some new images from my workbench. I have painted and weathered the lower hull and bogie trucks. I have also painted and weathered the tracks. These are the T-51 rubber block tracks from Tasca. I am going for a dusty coat as I may end up putting this on an M-26 Dragon Wagon scene with civilians at a public military equipment display. This would be similar to the one done in Wash. D.C. in 1944. By the way, I have constructed a track painting jig from 1 1/2 inch thick styro-foam board. I am able to secure the track to the board using sewing pins filched from my wife's sewing supplies. The groves cut into the foam allow me to place the track in a flat position. The guide teeth go into the trenches.
BogiesonM4A3FordBuilt.jpg
T-51tracks.jpg
Tracksonpaintingjig.jpg
 

Latest posts

Back
Top