Great job on the Dry Stowage A# Eric. Looks like you are coming along. I am impressed with your cabinet! Very cool! My A3 Build has ground to a halt for the moment. I had an AMPS Kit review to finish and post as well as some yard work as the weather has been very nice!
Tasca Dry Stowage build update:
Having spoken with THE Sherman Guru Joe Demarco I have been informed that my siren is in the wrong spot sitting there on the glacis. It should be mounted on the left front fender as all M4A3 Dry Stowage [Ford Motor Co.] Shermans had them mounted that way. Also I will mount the gun travel lock this weekend.
Guy #1 posting some images of the completed Ford Manf. M4A3 Dry Stowage build. Paint and Body work next. Finished the build Christmas Eve.
Added to the model were the siren and tools from Formations. Adlers Nest antenna fitting. Schumo-kits metal periscope guards and some home made bits. I did add some late features to the turret namely the .50 cal. stowage pintle and the angle iron rack on the rear of the turret. Also the pistol port was welded up and I added the roof mounted .50 cal. pintle. The tow cable was made from strands of thin copper wire.
One shot of the painted turret. I am planning on this being a training tank used stateside thus the white band around the turret. I will post more pics over the weekend.
This thread is awesome! I'd love to see more mini SIGs or group builds like this. From a reader perspective it's fantastic.
And the builds...., just amazing. Great work to all 3.
I echo Lobo's curiosity too..., where the heck did you get that cabinet?
Guy 1 posting some new images of my Ford M4A3 Dry Stowage 75mm Sherman build.
These images are just after the painting of the national insignia and post shade painting process. I used stencils and Tamiya tape for the stars and band on the turret. Post shading with Tamiya Smoke and a dark Olive Drab color. The model has been sprayed with Vallejo Clear Flat Varnish Acrylic as I like to use Humbrol Enamel thinner and Humbrol paints for washes and filters as well as weathering. Pigments will be used with Distilled water at the end. The goal is to do a very light weathering to depict a fairly new Stateside training tank. I will pick out the taillights later and add MV Lenses for the headlamps as well.
Here is a little update for my contribution to the “Tale of Three Shermans†….as you see Sherman No.1 is moving right along!!. ;D
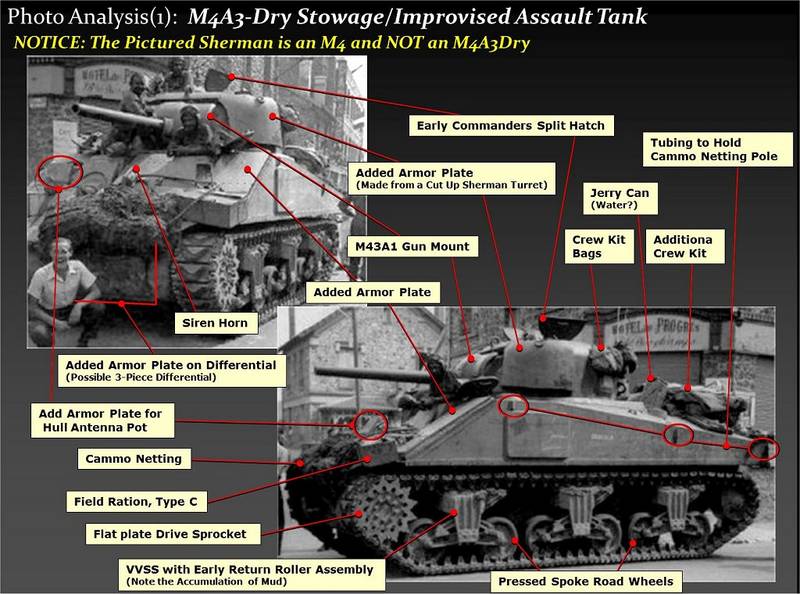
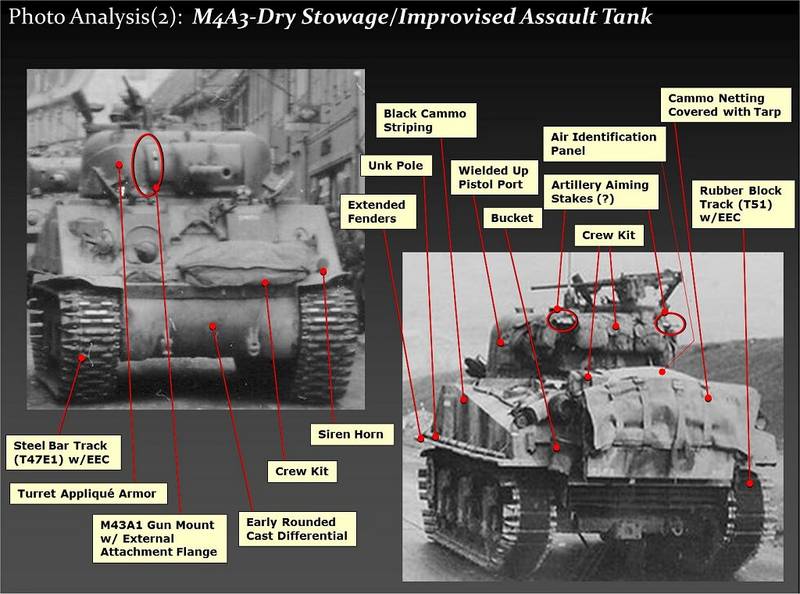
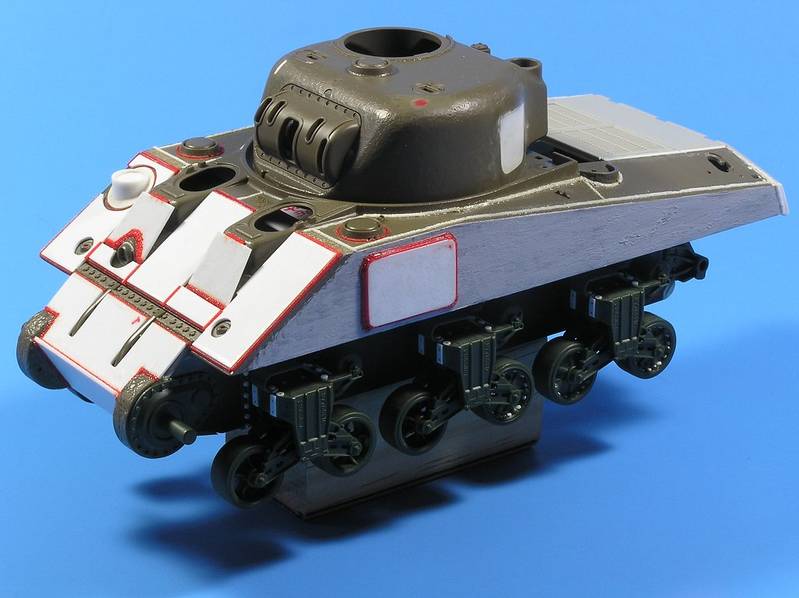
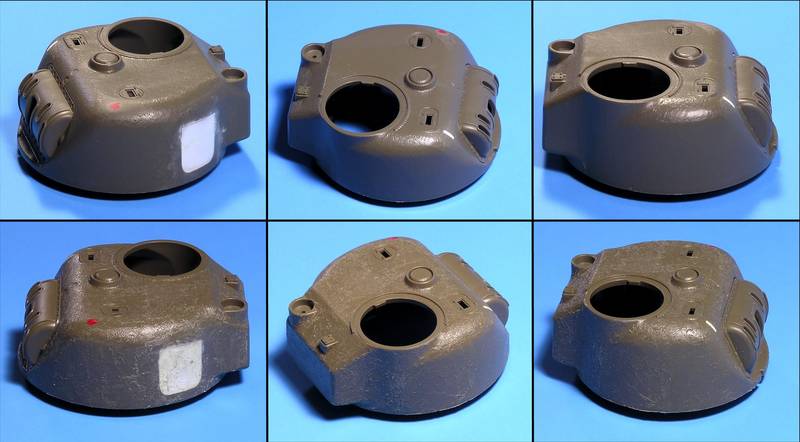
With the holidays the progress has been a little slow. The first set of photos is an analysis process I like to do with my primary photo reference and kind of gives an idea where I’m headed with this model subject. Much of the work on my Sherman has been in the form of adding welds and that is a somewhat time consuming process. I added the up armor plate to the front along with the welds for them. Lastly gave the some texture to hull sides and turret. For the hull sides I used Mr. Surfacer 500. For the turret I used a technique developed by fellow SMA member Big-John. I included some before and after shots.
Thanks For stopping by and as always comments are most welcome
Thank you for all the kind remarks fellow modelers. Our guy #3 has lost internet service and will return hopefully sometime in the future with photos. In the mean time Eric and I will plug along. I will do some detail painting and light weathering. I will mix some weathering fluids up using Humbrol paints and Humbrol enamel thinner.
")