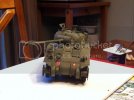
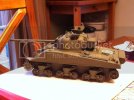
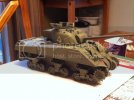
8th NB Hussar's old ride.....WW2 Sherman Firefly VC

Well, here they are as promised.

Any feed back would be appreciated!


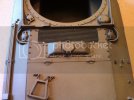
Before....
IMG_0215.jpg


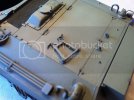
A light coat of black wash
IMG_0219.jpg


Another view
IMG_0217.jpg


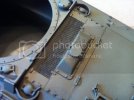
Trying to go light with it...
IMG_0216.jpg


I'm constantly trying to remember "less is more" but I want to really slosh it to the nooks and crannies.

Again, any feedback/ tips are always welcomed!

Regards
 
Hey buddy! Very nice work so far...sorry for missing most of this!

Less is more!!! Keep applying layers. It will build up to where you will like it! If you try and "slosh" you may not get what you want. Shouldn't take too many.

;)
 
In regards to the carbon residue at the end of the barrel.


My advice is not to do it.

I used to spray a bit of flat black at the end of the barrel to recreate this.

However I do not do this anymore. From what I have read (and there are alot of good threads on various sites about this) this is not at all realistic. The smokless powder used would not create large deposits of sooty residue at the ends of the barrel. You might get some discoloration from the heat, cleaning of the barrel and some chipping but thats about it.

Its one of those things like rust and chipping thats way over done IMO.

Hope this helps.
 
Good point. I was only going to use it on the inside portion of the muzzle brake sparingly though.

Then of course for the exhaust as well.


A little bit of progress.

Got down to priming the rubber tracks tonight and forgot the most important step for this type of track....

Wash it before painting. As soon as the primer hit, it beaded up as if it were a freshly waxed car.

Sigh....

Thanks for the tips!
 
Alright, both sides are now primed using Vallejo primer on the rubber band tracks.

One question - how long should I let the paint harden before pressing on with rust / steel paint?

Last thing I want to have happen is the paint to flake off or not be completely cured and it bleeds through or worse.

Thoughts?
 
My thoughts are that you probably need to handle them as little as possible and be prepared to touch them up.

Cured or not the paint could still start to pull away after too much flexing. :p
 
I would wait 24hrs to cure, but Ken is right...on the rubber band tracks it might still flake off if flexed too much, however Vallejo being a polymer resin base, it will flex some no problem.
 
Just got done throwing on the 8CH decals using Decal Fix and Decal Medium from Vallejo. Man, they look so good! Well, except for one. The rear deck star is slightly off due to my wife startling me last night. ::)

Oh well.

Did about three hours of weathering today, dry brushing mostly. I was being real careful not to overdo it. Did a touch of carbon black on the muzzle end to soot it up a bit. I'll be going back to wear it out by dry brushing it a bit. Even on modern tanks, parts get stained with carbon when they are cleaned religiously.

Just got done throwing on some Matt to give everything good adhesion. I'll let it dry overnight before doing anything else to it.

It's coming together quite nicely.

I have to try and find out where the Homelite aux generator exhaust was located. Apparently the thing used to make quite the racket and belched out soot like it was an old immersion heater.

Regards
 
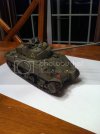
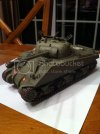
Well, here are some shots as promised:

IMG_0264.jpg

IMG_0265.jpg

IMG_0263.jpg


Still have some more to do. Being interrupted by someone from "Windows international security" constantly for the past hour is grinding my nerves....


Again, as always, tips and tricks are welcomed.

TANKS for looking!
 
This is looking good. I have a Firefly IC I want to do as a Canadaian version sometime.
 
Bit of an update. I've been picking away at it for the past few nights, just small things really.

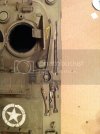
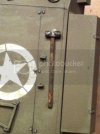
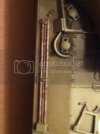
Now have the pioneer tools, sledge and gun stave's chipped and worn somewhat. It was my first time doing it. Funny thing is the track tensioner wrench isn't mounted according to the directions in the kit.

Any idea of where this thing goes? I'm pretty sure it was on every tank.

IMG_0267.jpg


For the wood, I did an initial coat of old wood from Vallejo and followed it with transparent wood. It left it looking like a hard cherry wood. I then painted it OD green and chipped away at it using the hairspray technique. Then I got out the old wood again and did a dry brush to make it look as if the finished wood was worn from use.
IMG_0268.jpg

IMG_0269.jpg


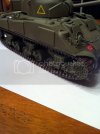
Got the track finally done with a good coat of rubber, dark rust, light rust and sponged on some steel. After that I did a dry brush of steel as well.

IMG_0276.jpg

IMG_0275.jpg

IMG_0274.jpg


As always, tips and tricks are welcome. Any thoughts on how I can improve the overall appearance as well.

TANKS for looking!
 
Weathering on the tools looks great!!! looking sharp and clean on the tank, will wait for the weathering. ;D
 
TANKS!

Just realized today that my old Paasche H is basically bit the dust and the tips are done.

After this project, I'll have to buy another one as this one is over 20 years old and I'm down to one tip that's still somewhat workable. Not good when the next project is going to be one for extreme detail.

Evil Bay is able to fill the bill on replacements, but I think it's time to get an updated model.

Regards
 
I would have to agree Beo, very nicely done!! (for a tip) Look into trying some "chipping", either with a brush or a sponge. Adding even a little around areas that get some wear can really bring things out along with maybe some graphite on some edges and bolts. You don't need to go nuts, just some wear. All in all this is a really clean looking build! 8) I like it a lot. I am thinking of picking one of these up myself at some point after seeing this! Thanks for sharing!! ;)
 
TRM said:
I would have to agree Beo, very nicely done!! (for a tip) Look into trying some "chipping", either with a brush or a sponge. Adding even a little around areas that get some wear can really bring things out along with maybe some graphite on some edges and bolts. You don't need to go nuts, just some wear. All in all this is a really clean looking build! 8) I like it a lot. I am thinking of picking one of these up myself at some point after seeing this! Thanks for sharing!! ;)

Thanks much! The chipping I was going for was to replicate tool strikes on the vehicle and on the tools, as if the crew were using them in haste and putting them away in a hurry.

On sponge chipping, I've been researching what the primer colour was on Shermans and have some up with a whole lot of squat and diddly.

I know on German tanks it was a dark red and on Commie vehicles it was a green.

I'd like to layer something like that with the primer then a bit of steel to make it look as if it were worn through by normal wear and tear.

Any ideas?
 
Well, I will have to say from what I have found, Most US vehicles would either have a Red Oxide Primer or Black primer bases to them (I have no problems if someone comes in here and adds or makes corrections. 8) ) The Red primers seem to be a standard practice and in a pinch and depending on where they were manufactured they could be in varying shades.

I would go for the Red!! Here is a great started link... http://modelerssocialclub.proboards.com/index.cgi?board=painting&action=display&thread=43 Iain from AK gives a great explanation and mix

While your at it, check this out... http://modelerssocialclub.proboards.com/index.cgi?board=painting&action=display&thread=99 Again, Iain explains a chipping technique with some outstanding results!!!

Nice thought on showing some of the raw steel as well, here and there. I think if you study many photos this will help you see where a lot of the scuffing, rubs, chips, gouges and other minor damage occurs from normal wear and tear.

Good luck!! Mostly.....have fun!! ;)
 
I can get you replacement parts for your Paasche, or if you want to replace it with the same model, or get you into a new Harder & Steenbeck AB!!!
 
TRM said:
Well, I will have to say from what I have found, Most US vehicles would either have a Red Oxide Primer or Black primer bases to them (I have no problems if someone comes in here and adds or makes corrections. 8) ) The Red primers seem to be a standard practice and in a pinch and depending on where they were manufactured they could be in varying shades.

I would go for the Red!! Here is a great started link... http://modelerssocialclub.proboards.com/index.cgi?board=painting&action=display&thread=43 Iain from AK gives a great explanation and mix

While your at it, check this out... http://modelerssocialclub.proboards.com/index.cgi?board=painting&action=display&thread=99 Again, Iain explains a chipping technique with some outstanding results!!!

Nice thought on showing some of the raw steel as well, here and there. I think if you study many photos this will help you see where a lot of the scuffing, rubs, chips, gouges and other minor damage occurs from normal wear and tear.

Good luck!! Mostly.....have fun!! ;)

Thanks for the link. I'm thinking the most wear and tear will be where the movement of the crew would be most concentrated, in front of the vehicle on the glacis on either side near the lift eyes/ headlights are and next to the hatches. Another spot would be on the turret in front of the hatches.

Elm City Hobbies said:
I can get you replacement parts for your Paasche, or if you want to replace it with the same model, or get you into a new Harder & Steenbeck AB!!!

Looking to replace it Scott. Need to get into the 21st century.

Regards
 

Latest posts

Back
Top