1:72 Armored Core "Hakuheisen" type

tetsujin

Active Member
Joined
Jun 26, 2009
Messages
101
20090729_Hakuheisen_overview.jpg
Hakuheisen 2009-07-29 Update

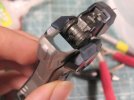
I made a big push trying to finish this for Otakon - that didn't work out but as a result of all the recent attention I'm now very close to the painting stage on this thing. This update covers a lot of different stuff I've been doing - the leg thruster lights and the wiring to support them figures prominently, however.

Incidentally, this robot does not operate in space...
 
Shark said:
That's what 'm talking about!

Yeah, I guess it's a bit hard for people to visualize this thing from parts images if they aren't familiar with it... The stage I'm at with this thing, however, doesn't really lend itself well to reassembling the model on a whim to take photos. :) Quite the opposite, in fact: for the most part I'm working on taking it apart. That photo was taken almost two years ago...
 
Shark said:
I love AC. I just recently found out about the models. Now I'm on the hunt.

Yeah, they're great stuff. One of the reasons I got into the game was 'cause I enjoyed modeling - so a game where you build and paint robots (and then make them go out and break stuff) was just too perfect. But back then I couldn't afford the resin kits, which were the only AC kits available at the time... But the plastic kits make things much easier... I have big plans for 'em.
 
Oh cool! I do have two Armored Core Kits lying around here as well. I'd love to see more pics of your build! :D
 
The koto Armor Core kits are really nice, really when it come to Sci-fi coolness factor, you can't go wrong with a japanese robot.
Tetsujin, your build looks great, are you planning to use some of the optional weapon kits? I think the AC kits are modular...
 
JMac said:
The koto Armor Core kits are really nice, really when it come to Sci-fi coolness factor, you can't go wrong with a japanese robot.
Tetsujin, your build looks great, are you planning to use some of the optional weapon kits? I think the AC kits are modular...

Well, the rifle is the GAST assault rifle from weapon set 7, but otherwise this is gonna be a stock build. One of the reasons I started with this kit is because it's the Armored Core 3 version of a classic AC design that goes all the way back to the original Armored Core. I briefly considered replacing the missile launcher with a radar unit, too, but I decided to stick with the missile launcher as a nod to AC tradition. I'm even tempted to give the thing its original machine gun back in place of the GAST, putting it fully back to its stock configuration as it appeared in AC 3...

When the AC kits first came out I wanted to wait for more kits to be released before I started building them - it felt weird building an AC kit "stock", since customizing ACs is such a major part of the game... But at this point there are a few that I want to build more-or-less stock: this one, the Uranus, and the Selena. I just really like 'em as-is.

For other builds I'll be doing a lot more part swapping and even some scratch building. I have one in the works that's got the QUEEN head (from the Gaea kit), the C84 core, Crest A71 arms (from the Dual Face kit), and Crest LH99 legs (scratchbuild, in progress)... Another using the Uranus core, head and legs from Vixen, and arms from the C84 kit. I have all the AC3-era AC kits and I'm trying to make the most interesting stuff with 'em that I can.
 
I've finally started painting some parts their final colors... I've painted the white parts and the cannon. I'm using the hairspray technique to chip the paint - first time doing it so of course I screwed up... but not too bad. Good times.

2009-10-4 update
20091004_Hakuheisen_chipping_4.jpg
 
Update time again...

One day left to work on this thing before Granite Con. Parts are all painted but there's still various steps left to do like paint-chipping, washes, clear coats, weathering, etc. For now I'm not going to do the full internal wiring through the knees and hips - I haven't got time for that. For Granitecon I'll probably just wire up the head LEDs to a battery stored in the belly.

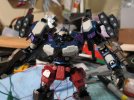
The shot below is a test of the head LEDs now that I've painted the forehead camera part and all - I've also put the rest of the model back together to try to get a feel for how my color choices have played out. Well, except for the legs, I haven't gotten those finished yet... Thus, the model's borrowing Nine Ball legs.

20091017_Hakuheisen_preview_1.jpg
2009-10-17 update
 
Very colourful Armored Core kit. Looks like a great build so far! Good luck on Granite Con.
 
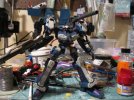
Granitecon could have gone better, but at least I had the Hakuheisen ready to show... Now there's a few things I have to straighten out - some of them due to the last-minute rush to hit the deadline, others just a result of poor planning earlier in the project...

20091019_Hakuheisen_preview.jpg
 
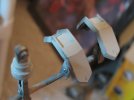
Well, some things always go wrong with my projects. XD This is especially true when I'm trying to hit a deadline... It's OK, though. It sucks that the leg panels broke but the damage to the left one is so minor that I don't feel a need to address it, beyond just gluing the part down to prevent it being damaged further... As for the right leg, I've already spot-primed the damaged area - the repair seam still needs more work, unfortunately, but it'll be good as new when I'm done with it.

The combination of a last-minute push to hit a deadline (and the corresponding lack of sleep) and a failure to place tends to be pretty discouraging for me - makes me question my own work. But I don't think the last-minute rush hurt this project too badly - it's great that all this work on the project is now done and very little of it needs to be undone and fixed... It really just needs a little work and a little weathering and I think it'll turn out great.

What's really a shame, though, is that gap that appeared on the right leg. I didn't glue that part down because I'd planned to have the part be removable so I could service the wiring that way... But as a result it became difficult to make the part stay put where it should be, so the right leg, at the show, had that 1mm gap between the blue and white parts. I didn't even notice that gap until after judging - if not for that gap I think my entry would have at least merited third place over the runabout. But the second place winner was this lovely Maschinen Krieger diorama... and first place was a Fine Molds Millennium Falcon - which had a few seam gaps in it but was otherwise really cool. Personally I think the second place winner should have gone first but I think both were damn good models - that makes me feel less bad about losing, too. :)
 
Well yeah, rushing things is not a good idea generally. I only entered something in to a contest (It was actually Scotts SMA Easter Contest) once and luckily didn't have to rush anything there. Sometimes I sit infront of my model and just think. For minutes or hours, because I am afraid I could do something wrong. On the other hand: Everything can be fixed! :D

Post some more photos, once you fixed everything.
 
Well, fortunately by the time I hit "deadline crunch mode" on this project, I was pretty far along, and I didn't try to push all the way to the project's true finish in that time. (In particular, I didn't try any filters or pigments or other weathering effects at the last minute. I did do a wash on the last night that didn't turn out super-great, but the resulting problems there aren't that bad...)

It was sort of a shame to waste $12 on watch batteries that didn't really power the LEDs very effectively, just 'cause I couldn't get the display base ready on time... Maybe in the future I should make a habit of keeping some plain display bases with battery packs installed on hand for just such an emergency. :)
 

Latest posts

Back
Top