1/48 F-4E city of homestead

ModelMakerMike said:
Neo, that B-25 is rockin' it!
is it 1/48?
You are a mad man for details!
;D

Hi Mike thanks really mean allot to me. The kit is the 1/48 revell B-25J i never go smaller than 1/48. I just wish i had the skills to had lights to the dio. Oh well next time

[quote author=Chiefpettyofficer]Amazing paint job!!!! Woah! You did it!! [/quote]
Thanks.

We really need a blushing emoticon on the forums

Cheers

Neo
 
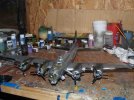
Well i did not get much modeling done this week end but i did manage to install my light setup in my office so i can actually see what im working on. It took 3 hours and many beers to intall (its a flex track so we tried many designs) but it was worth it

p1030141o.jpg


Cheers

Neo
 
Neo that work area is way to Clean. I couldn't work like that be too afraid i'd mess something up here is my work area kinda.
workbench.jpg

James
 
Fantastic work on the painting. Hand painting is becoming a lost art, glad to see people out there are still doing it..., and doing it well!
 
Myke said:
Fantastic work on the painting. Hand painting is becoming a lost art, glad to see people out there are still doing it..., and doing it well!

Thanks Myke really appreciate it.

@Bomber Boy
The misses requires clean environnement.. but im used to it as in my appartement i use to work on the corner of my computer desk that was in the living room.

Plus i cheated and use Kitchen and bathroom paint on the walls that is washable/scrubable 8)


I promises ill get off my lazy behind and update soon
 
Awesome Office/Model shop Set up !!! Some can build in Clean environment like yours... and surprises others... if you can maintain it? Then there is no worries ! Love the Desk !

I confess ! Its hard at times for me to keep up my work area looking like that.... but I find it helps Keep me going.... do you find the Lights... Hot ? I have a similar set up and I find that I can feel a lot of Heat on my Head ! fine in the Long Winter nights here... but it gives me a headache ! so I keep them shinning away and have a Fluorecent to work with ! similar to the one you have on your desk...

Your "Sharpie lines" Handled being painted over...! Never heard of that technique before… seems to be working for ya ! How expensive are those PEN compared to the Normal Sharpie ?

Take care Buddy ! LuV the Bird by the way !
 
Ok about time i give you guys something to look at

Paint is done with a coat a=of future applied.

Started on my weapons(fist time using my aribrush for a real project) gotto do a little sanding then the final coat of white
p1030168x.jpg


p1030171e.jpg


ive installed the stabs and started on the decals.Man o man are therse decals CRAP they take for ever to slide of and its the firts time that a perfectly installed decal
wrinkles with micro sol :-\
I really dont feel like buying new decals so i hope they will come out ok.
p1030170a.jpg

Also under the "ZD" the future went really milky white!! i hope it will go away on the next coat!

Cheers

Neo
 
Everything is looking good there. That sucks about your decal troubles. That problem you are having about the future going all milky is the reason I don't use future anymore under decals. Had the same problem once, and if it's a dark color that the decal is going to sit on..., it stands out really bad. I still use future, but use a lacquer or solvent based gloss coat before applying decals.
 
Yeah i use to apply Humbrol enamels clears only but future is soo easy to get a smooth job.

Looking at it this morning the milky white is almost all gone. I normally get the reaction around the decals not under so that when i apply another coat of future it disappears!

Before i continue on the decals i will apply a coat of future over the ones applied and go from there


Cheers

Neo
 
OK here a small update

been having fun with the decals(use sarcastic tone here) this side is almost done (stencils not in pic) but i like where its going
p1030174l.jpg

Cheers

Neo
 
Great work one those Decs Neo!!! This is really shaping up!!! ;D
 
Thanks TRM


Now im trying to keep this build fresh ...

p1030187.jpg


:p

ok just kidding!! i masked and cling wrap it so i can shoot some red on the antenas and the joint on the top of the tail (i hate those wing/tail tips decals )


95% of the decals are on also done

and the AIM-4D's are ready for decals and clear coat (these are my first part i EVER airbrush came out pretty good)
p1030197h.jpg


More soon

Cheers

Neo
 
Thanks guys

Today's challenge:

Well look like this one really wants to fight

After removing the cling wrap and the tape some of the decals broke.... looks like my 2 future coats didnt qui jight enouph on this side :deadhorse1:
p1030202z.jpg


I tried to fix it by re setting the part on the tape and got 70% of it back onto the plane.(the "D" is fixed)

Ive got a couple of options.
1- take another "Z" from the decal sheet and apply over this one
2- that the top bar of the "Z" for the decal sheet and apply over this one
3 Try to remove the top bar from the one on the tail and replace it with the one from the decals sheet(the problem is that i reapplied future so it would not get worst)

Let me know what you think

Neo
 
Are there other markings on the sheet you can salvage this from?
If not, you may need to paint it
 
Quaralane said:
Are there other markings on the sheet you can salvage this from?
If not, you may need to paint it

Yep there are hence the 3 options
 

Latest posts

Back
Top