1/35 SS PANZERGRENADIER VIGNETTE

- Big John, thanks for much mate ;D

- Quaralane thanks for your support buddy

- Spud, its not too hard to master, my best advice would be to just ake your time and enjoy it ;)

- chris, cheers buddy


ill have more updates to share with yee very soon


shane
 
:) Very, very nice results, Shane.

Again, flesh tonalities seem to me very well blended.

Don´t you have glossy troubles with oil washes, Shane?? ??? I had some and (again) had to correct them with matt barnish...
The results are great, Shane, awaiting for more pics... ;)
RG
PD; Oh, I followed also advice about the washes, ah? But I have to train more and more with that technique over figurines ;)
 
Jelly ,if you put your oil paint out on a piece of card and let it 'breathe' for about half an hour ,the card draws out a lot of the oil which helps give a mat finish to the paint ;)

Chris.
 
- Chris right on the many there ;)


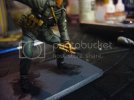
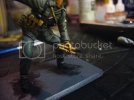
i know things have been quite of late, but not to worry the project hasnt been shelfed, and good news i have some progress to show yee ;D

the figure is for the most part done, only have to gave the stick grenade handles another brown tone coat to pick out a little detail and a few other touch ups here and there

P1090945.jpg

P1090945.jpg

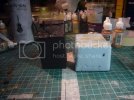
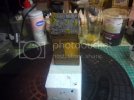
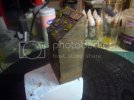
with the bulk of the work on figure out of the way i can now there my full focus on the base, the main backdroop of the base in a small building section i scracth built a while ago and a small base made of blue foam

P1090885.jpg

im looking forward to painting weathering the wood effects and getting stuck into the ground work


till then


shane
 
Nice one Shane , I like the little out building that should paint up real good ,plenty of weathering fun to be had there ;D.

Chris.
 
Looks great Shane. I enjoyed watching your progress using acrylics.

Very nice idea with the base. Looking forward to seeing more!
 
Howdie Gents ;D

have some progress to share with yee at last :)

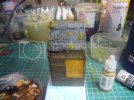
been working away on the wood effects of the "shack" over the last week or two doing a bit here and there, woodgrain is always a tricky thing to get right so i experiemented a lot with varous methods to get the best finish. I was going for a kinda worn, aged look without going to the extent of having rot on the timber....wouldnt even know where to begin for that kind of weathering effect :-X


P1100025.jpg

i added a lot of different brown shades to each plank to get then to stand out and add a little contrast, then to weather the wood i added a few washes of black and dark brown

P1100029.jpg

i added a little astroturf from woodland scenics to give it that "abandoned" look, it was very bright so i had to tone the turf down with a wash of flat earth and say ill give it another wash before the end of the project to tone it down further

P1090971-2.jpg

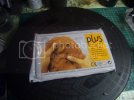
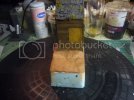
for the basic ground work i used a modelling clay i picked up in a local art shop...hopefully it wont crack on me :p

P1100030.jpg

P1100032.jpg

hopefully tomorrow the clay will be ready


shane
 
Howdie Gents


have a small bit of progress to report ;D

painted in the clay......which thankfully didnt crack.......in vallejo earth brown and also gave the sides of the base a heavy coat of flat black

P1100041.jpg


almost there now gents ;D


more soon


shane
 
Hi!
Great work! I like how you weathered the wood and the look of the shingles. Do you plan on adding some strukture to the earthen surface (rock, sand, dirt)or leave it that way?
 
Elastirion said:
Hi!
Great work! I like how you weathered the wood and the look of the shingles. Do you plan on adding some strukture to the earthen surface (rock, sand, dirt)or leave it that way?

what i normally do, is make a mix of static grass, a little ballast (depending) and pigment and get into a paiste like consistency and plaster it onto the base, ive using that method for a little while on smaller dio bases and got a good result.....i plan to do the same for this project just hope i enough pigment.....i have to a serious restock on paint and tools when i have the cash too lol

but i think whats left in the container should be enough to cover this base......hopefully :p


thanks for dropping by :)


shane
 
Howdie Gents


last update ! ;D


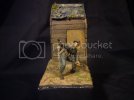
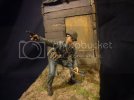
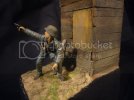
spent the evening a couple of nights ago doing the finishing touches to this project, the figure was attacthed to the base, and everything was photographed using my fancy new lights (which have sat in the attic for 18yrs almost...only a little younger then i lol :p) and heres the finished project


FINISHED PROJECT:

P1100064.jpg


P1100066.jpg


P1100080.jpg


thank you all for all your great support lads ;D


shane
 
Nice one Shane ,another great little viginette and the base turned out excellent buddy . Using the backdrop and lights is a good move ,you can appreciate the model better without other distractions .

Love it ;)

Chris.
 
I love it! The ground work looks nice! good job on every thing. Like Chris said, the backdrop really helps with the final results.
 

Latest posts

Back
Top