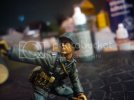
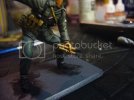
1/35 SS PANZERGRENADIER VIGNETTE

longlance67

cry havoc and let slip the dogs of war -shakespear
Joined
Sep 21, 2011
Messages
656
Howdie,


thought id try something a little new, and give a Vignette a go using a scratch built backdrop and a resin figure from warriors which have been lying around for a few months now, also thought it would be a good idea to show a few of the methods i use when figure painting and maybe some might find usefull as for many figure painting is tricky thing.....dont mean to babble ;)


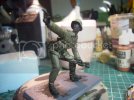
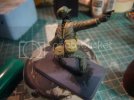
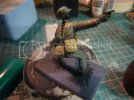
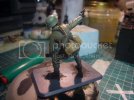
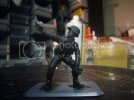
Righty-oh, the figure is of a late war SS grenadier firing a flare pistol, before i undercoated the figure for painting i added some personal equipment from the spares box (all kit are dragon parts in this one) to bulk out his combat order a little :)
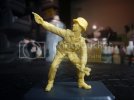
P1090841.jpg

i used normal superglue from the pound shop for all my resin and etch work.... saves a few euros ;)
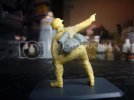
P1090842.jpg

once the glue is set......and boy it didnt take long :p......its time undercoat, him i use vallejo paints for the most part....its good stuff ;D
P1090849.jpg

with the undercoat being allowed to set for the night, ill get back to him tomorrow evening


so stay tuned ;D


cheers


shane
 
Nice to see you doing another viginette Shane ,the figure looks good . You know I'll be watching this one ;D

Chris.
 
Thanks you chris and John :)

i thought it was about time to get back into diorama building, and thought to try something new first before i get cracking on some bigger projects later in the year ;)


im really exicted about this one ;D


shane
 
:) Howdy, Shane, that figure detail seems really OK. You´ve had a good idea adding him the Dragon stuff, really...

Hey, am I nuts or that guy has a Secon Class Iron Cross band in the front of the fatigue?? If so, that´s a nice touch, and will add a some nice color contrast with the fatigue color...

Don´t forget to hollow the barrel of the flare pistol !
Cheers, Shane
RG
 
will the black primer be a bit harsh on the face when it comes to skin tones? and looking forward to this shane, just done drop it in that carpet of yours other wise we will never see it done :D
 
- Jelly

i think the ribbon is eastren front service ribbon its red with white bounting.....i think thats the ostfront ribbon or maybe your right its the iron cross ribbon ???

- Spud, the black primer has always worked very well for me in the past, the flesh areas will be coated in dark flesh when the time comes ;)


advancing forward,

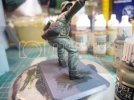
the uniform colours went go on which are Vallejo (for all paints) 70920 German uniform for the jacket and 70830 German Fieldgrey for the trousers

P1090856.jpg

once the basecoats have set, i began to add shadowing to the entire model for this i used a wash of black heavy thinned with tap water and was given a few hours to dry. Then i began to add highlights, the trousers were highlighted with German uniform applied to risen areas and blended with each coat. For highlighting the jacket i drybrushed a tiny amount of 70821 German Camo. Beige

P1090881.jpg

P1090862.jpg

next blocking in the equipment and y-straps


till then


shane
 
Nice start Shane ;) funny that you start with the uniform !

Chris.
 
ya i know LOL, most start the with the flesh areas....ah well you me know :p
 
Howdie gents,

have a little progress to show yee :)
Been working on the equipment this evening......and a cold evening at that ! :(

i coated the mp 44 ammo pouch, bread bag and the demolition pouch Geramn camo Beige as a base coat
P1090872.jpg

P1090888.jpg

once allowed time to set, i gave the pouches a wash of black in prep for the highlight process

P1090881.jpg

http://s1192.photobucket.com/albums/aa334/longlance67/?action=view&current=P1090889.jpg

in the next installment ill be layering the equipment and painting in the y-straps and belt


see yee soon


shane
 
Howdie Gents,


been busy with college work of late but not ta worry still managing to squeeze those pericous moments on the bench ;)

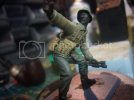
the kit has been painted in, the bread bag, ammo pouch and demo charge case got a coat of camo beige as a base and the gas mask case got a base of fieldgrey

P1090888.jpg

once the basecoats had set everthing was given a wash of black to pick out the detail and add a little depth too

P1090881.jpg

with wash dry i set about adding a few drybrushed layers of first camo beige followed by tan yellow and finally followed by a very light wash of flat earth to all the beige coated parts.....the gase mask case has yet to be chipped which i will do later in the paint season

P1090889.jpg


more updates to follow,


all comments and feedback are most welcome


cheers


shane
 
looking good now shane, Hurry up and get to that face!! 8)
 
spud said:
looking good now shane, Hurry up and get to that face!! 8)

The face i hear you ? ;) well you be luck thats exackly whats coming up just for you my man 8)


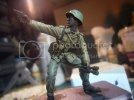
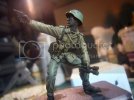
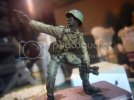
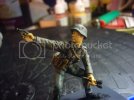
for painting faces or flesh areas i use three main paints, vallejo dark flesh as a basecoat, vallejo sunny fleshtone as a highlight and burnt sinnea as a shadow agent

so first thing on is several light coats of dark flesh built up to get a nice even coat

P1090914-2.jpg

allowed to dry for a few hours i then applied a heavy coat of burnt sinnea thinned with water

P1090917.jpg

P1090923.jpg

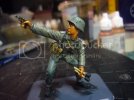
once the wash had time to dry i began adding highlights of sunny fleshtone wth a fine brush to the jaw line, nose, forehead, fingers and any other area that would catch light

P1090958-1.jpg

P1090945.jpg


thats all for now


thanks


shane
 
Wow Shane that looks really good and a simple way of doing it, well it sounds simple :)
 
Coming on very nice Shane ,great work buddy ;)

Chris.
 

Latest posts

Back
Top