Tamiya Vought F4U-1D Corsair 1/48
- Thread starter GaryG64
- Start date
Pantherman
Well-Known Member
- Joined
- Feb 10, 2022
- Messages
- 4,007
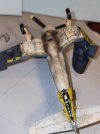
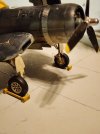
That looks great. PanthermanAttempt number two for exhaust stains. The first attempt was on the P-38.
GaryG64
Well-Known Member
- Joined
- Sep 8, 2022
- Messages
- 2,546
Thank youThat looks great. Pantherman
GaryG64
Well-Known Member
- Joined
- Sep 8, 2022
- Messages
- 2,546
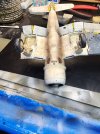
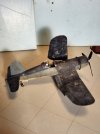
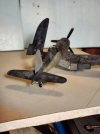
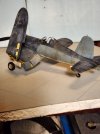
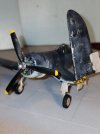
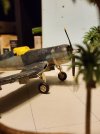
I believe the corsair is finished. Waiting for Mr. Setter and Softer to arrive to apply the decals.
I have micro set and micronsol and Mark Fit. The reviews ive seen showbthat Mr. Products look to have better results.
Tomorrow I'll spray a varnish coat to prepare for the decals then work on the diorama.
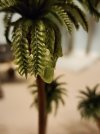
I have several palm trees to try to improve their looks
I have micro set and micronsol and Mark Fit. The reviews ive seen showbthat Mr. Products look to have better results.
Tomorrow I'll spray a varnish coat to prepare for the decals then work on the diorama.
I have several palm trees to try to improve their looks
Attachments
-
 20230221_201542.jpg543.4 KB · Views: 7
 -
 20230221_201601.jpg487.5 KB · Views: 6
 -
 20230221_201815.jpg227.6 KB · Views: 6
 -
 20230221_201834.jpg203.4 KB · Views: 8
 -
 20230221_201848.jpg227 KB · Views: 8
 -
 20230221_201859.jpg293.8 KB · Views: 8
 -
 20230221_201913.jpg135.8 KB · Views: 9
 -
 20230221_201958.jpg160.9 KB · Views: 8
 -
 20230221_202011.jpg171.4 KB · Views: 7
 -
 20230221_202029.jpg180.4 KB · Views: 8
blakeh1
Well-Known Member
- Joined
- Oct 26, 2011
- Messages
- 1,147
Thanks, Blake. Now it's time to watch videos on how to weather decals.
probably just a really thin "mist" coat of a lighter color or even the base color or the dirt color should do the trick to make them look faded
GaryG64
Well-Known Member
- Joined
- Sep 8, 2022
- Messages
- 2,546
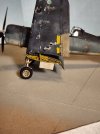
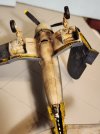
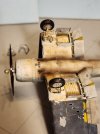
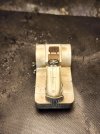
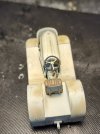
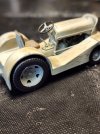
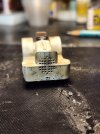
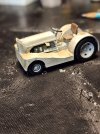
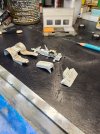
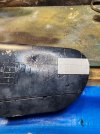
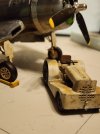
Moto-Tug completed. Tomorrow I'll start the decals.
Attachments
GaryG64
Well-Known Member
- Joined
- Sep 8, 2022
- Messages
- 2,546
Thanks Steve.Wow, I like it!
GaryG64
Well-Known Member
- Joined
- Sep 8, 2022
- Messages
- 2,546
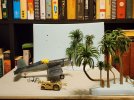
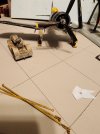
A rough idea. I just finished bending the trees. Next I'll be painting them more or a realistic color and pattern. Some of the leaves are horrible like a big blob. Those will have to go.
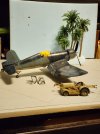
Most likely I'll use Sculptamold for a piece of land and coat with a sand. Then poke holes for the palms to fit in and use some clump grasses and shrub plants. The P-38 should fit snuggly in a corner and the Corsair in the other.
Most likely I'll use Sculptamold for a piece of land and coat with a sand. Then poke holes for the palms to fit in and use some clump grasses and shrub plants. The P-38 should fit snuggly in a corner and the Corsair in the other.
Attachments


GaryG64
Well-Known Member
- Joined
- Sep 8, 2022
- Messages
- 2,546
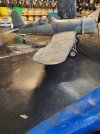
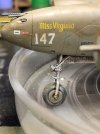
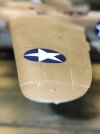
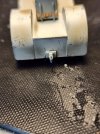
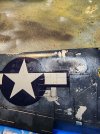
I ran into a problem. My clear-coat varnish bubbled up after preping the surface to put a decal down.
I used Vallejo polyurethane gloss varnish straight as it stated it can be used from the bottle. I let it dry for 24 hrs. Then I placed a coat of Mr. Mark Setter down the varnish started to wrinkle up along with the coat of paint too. I hoped it would settle that area back down onto the wing. It did but not that great. (Pictured with the white ban on the wingtip).
I have a thought of lightly sanding that area and spot painting it. Or should I just leave it or choose an alternate option?
Open for advice.
Other that that it seems to be coming together fairly well.
Attachments
GaryG64
Well-Known Member
- Joined
- Sep 8, 2022
- Messages
- 2,546
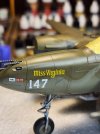
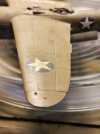
After I rescribed the panel lines that were covered by the decal I reapplied the Mr. Mark Softer which really enhanced the lines once they setteled into the crevices.I ran into a problem. My clear-coat varnish bubbled up after preping the surface to put a decal down.
I used Vallejo polyurethane gloss varnish straight as it stated it can be used from the bottle. I let it dry for 24 hrs. Then I placed a coat of Mr. Mark Setter down the varnish started to wrinkle up along with the coat of paint too. I hoped it would settle that area back down onto the wing. It did but not that great. (Pictured with the white ban on the wingtip).
I have a thought of lightly sanding that area and spot painting it. Or should I just leave it or choose an alternate option?
Open for advice.
Other that that it seems to be coming together fairly well.
I think after I apply a flat coat at the end they should look more like painted ensignias and hopefully mask the lumps and wrinkles from the varnish mishap.
Similar threads
- Replies
- 15
- Views
- 941