The One I Have Been Waiting for

without seeing what exactly you're talking about , I'm assuming there is a loose connection between the conductor and one or more of the connectors on the problem wire ( E ) -- inspect those connections for a loose fit .
LEDs consume tiny amounts of current ,, around 20 milliamps each , up to 30 milliamp , so the wiring should handle it . What gauge is the wiring ?
I dunno the gauge, but these are 12 v leds and connectors. So the wires must be up to snuff.

I checked the problem wire's connector and it didn't SEEM like there were loose connections. I am thinking maybe the little prongs that hold the strip could be bad somehow.

Regardless, I strung the six strips together as one line and tested it. There was a negligible amount of voltage drop, heck it could have even been from me not putting the plug for the wire all the way into its connector on the PCB board. So I will be fine.

I have to be as I already decided to go with the idea after the test and have the dorsal wired and glued up.
 
So, dorsal is wired up...20210927_093531.jpg

The saucer has been stewing with its putty. Dunno if I'm gonna work on that before or after work.20210927_093519.jpg

And the pylons are ready. After painting them I noticed the green gray is just a touch dark and greener than the proper hull color(but only VERY slightly). My solution? Drybrush light aircraft grey over them. It lightens them up just a touch, and while not a perfect match is really close to the proper hull color. So the entire ship will get this drybrushing after base coat.20210927_094836.jpg20210927_094844.jpg
 

Attachments

  • 20210927_093500.jpg
    20210927_093500.jpg
    168.7 KB · Views: 0
Had to work till 1 AM last nigh, so all I got done was to weather the pylons. I will put the final flat clear on when I do the saucer and dorsal. Otherwise they are ready.20210928_090728.jpg20210928_090735.jpg

Taking a break from sanding the saucer rim. Its work.:p 
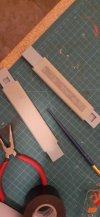
Might have to tear out the small round windows(I used just MKK on them), and redo em. The dust has clogged them up bad, and made the masks come off two so far. The rectangular windows seem fine. I will definitely have to reputty the edge after the sanding is done, cos in spots its still pretty not good.

The dorsal might be ready to paint, as the seam looks like I may not need to putty it.
 
The saucer has been exterior lightblocked, primed and basecoated. In the process of doing the drybrushing as I did on the pylons to slightly lighten and grey the hull. Side effect is its making a surface texture I rather like.20210930_103933.jpg

The dorsal is also being lightblocked outside. Despite 2 coats of black and one of white inside the hull lights up like a Christmas tree.
 
Why isn't your light block working ?
what kinda paint is it ?
Alkyd resin would work much better than acrylic .
 
I
You’re working on your grail model and you don’t know what type of paint you are using? Really?
Am using mostly Tamiya, and Vallejo paints. I used whatever black and white paint I had on hand for the lightblocking as I can't afford to go buy 100 expensive cans of model paint for that. It turns out that lightblocking both interior and exterior works, so I don't see the big deal.
 
A
I
Am using mostly Tamiya, and Vallejo paints. I used whatever black and white paint I had on hand for the lightblocking as I can't afford to go buy 100 expensive cans of model paint for that. It turns out that lightblocking both interior and exterior works, so I don't see the big deal.
I suppose if it works that’s what matters most. Personally, I never liked Rustoleum. I prefer Krylon gloss black craft paint for light blocking myself. It seems to cover better than Rustoleum and leaves a nice level finish. I usually apply a couple of coats though followed by a coat of Krylon gloss white. As I recall on my own build I didn’t need to spray the outside with black but I did apply a coat of Tamiya primer before spraying the final coat.
No light leaks.
 
A

I suppose if it works that’s what matters most. Personally, I never liked Rustoleum. I prefer Krylon gloss black craft paint for light blocking myself. It seems to cover better than Rustoleum and leaves a nice level finish. I usually apply a couple of coats though followed by a coat of Krylon gloss white. As I recall on my own build I didn’t need to spray the outside with black but I did apply a coat of Tamiya primer before spraying the final coat.
No light leaks.
Well, I bet its because I am using this new light kit. I dunno what the original was like but the LED strips in this are BRIGHT. Brighter than I think needed IMO.

My problem is that I WANT to go get everything that I need, but my financial situation requires me to pick and choose for what I absolutely gotta have. But I have been able to fix any screwups so far, so fingers crossed I still can if any more crop up.
 
The saucer has had its aircraft grey drybrushing, and got a sealcoat on. Tomorrow at some point I'll gloss and Sunday decals and weathering.20211001_120244.jpg20211001_120251.jpg

Had to clean up some smutzes from the MKK on the dorsal and patch the seam in spots. Sorted and now primed.20211001_120236.jpg

And this morning when running errands I picked up a couple wood panels from the dollar store intended for crafts. I glued them together and they will form the basis of the display base, with the PL dome epoxied to it.20211001_120306.jpg
 
Just cut out a hole in the top of the boards for the cable, and using my micro chisel and hacksaw made a slot in the sidewall to feed them out of. I will clean up the slot with files for a smooth finish.20211001_122237.jpg20211001_122234.jpg
 
Last night after work I took some time to sand down the base with 220, 320 and 500 grit sandpaper, then slapped black on it. After that dried, sanded with 1000 grit then repainted. At some point today will resand and repaint, then clearcoat with poly. I want this to be shiny, but I worry sprays may inhibit the wood breathing and expanding/contracting.20211002_012821.jpg
 
Always best to use oil based stains and paints on wood to avoid raising the grain and the timber absorbing water on the working side and causing differential expansion .
You're past the grain raising on that color side , but you should coat the underside with the same amount of coating to prevent unequal absorption of ambient moisture .
It's not going to be a big deal with anything that lives it's life in a conditioned space though .

If you had put a bunch of water-base on one side without those framing members attached , the working face would expand and cause the board to cup , arching the color side upward .
You can use just clearcoat on the underside if you want . Make it the same amount of resin as the top either way so it experiences equal absorption/release of environmental humidity .
Again , something like this isn't going to be subjected to environmental extremes .
Well, then maybe I will just spray that hot clearcoat that briefly messed up the deflector on it, maybe three coats on both top and undersides, sanding the top lightly between coats.
 
Whelp, after multiple coats of black acrylic, and twelve coats of the clear gloss, sanding with 1000 grit each coat, I have this for the base:20211002_232210.jpg

Not too shabby for a couple craft boards that cost a buck fifty each and some cheap paints. Gonna gloss the PL dome to match.
 

Latest posts

Back
Top