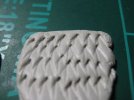
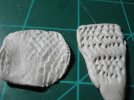
The adversaries face off....

John! Hold off on what I just said!

Uploading a small video! With a solution you might like?


Here is the small Video I have made.... Very CRUDE ! I am sorry !!! the Old pc is barely keeping up !

I hope it will Fire up your mind !!! on the possibilities...??? this trick can offer you !


monster skin duplication.wmv
 
great progress !! .. man... I still can't get over how great the trees look ,, thank you for sharing this technique ! and also the technique of detailing the seams.
 
Patrick: It is much harder to do than I origionally thought. Part of my problem is that the different putties I am trying to use: Aves, bondo, and squadron white. Have trouble taking the detail when they are in a thin film. I can replicate the pattern on a thick flat sheet of aves:
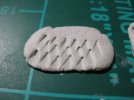
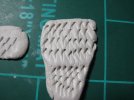
20110515_5.jpg
20110515_6.jpg
20110515_7.jpg

And one last photo of my sculpt next to a texture stamp that I made:20110515_34.jpg

As you can see my textures are way larger than those on the model


With the flat sheet, the Aves has room to squish underneath my sculpting tool. But it can't do that on the piece. In addition, the texture on the model is no where as deep as I have done on the flat sheet of aves.

I have also been experimenting with curing time, for example Aves will take a texture better after it has been sitting for a few hours, rather than when it is first mixed up. In part I need to get the variables straight. Once I do, I think I will get it figured out, or maybe try a different putty.

Norm: Thank you for the video! It has given me ideas and brought up a few questions. I have never worked with resin before. (I have made one resin model.) From my limited experience, resin is brittle. These parts are very curved. Would I be able to flex it around a curved surface? Or would my "mold" have to be curved like the part?

You have given me an idea, how about taking that molding compound that I used for the feet, making a negative like you did in your video and then using aves for the thin "skin" it cures slowly and if I let it sit for a few hours it might take the texture and still be soft enough to attach to the model.

I also thought of a different type of texture stamp other than what I was using. One that is more like a stamp than a flat sheet to wrap around. I am also thinking of cutting up a thick sheet of styrene to make up a new texture tool. Part of my problem is the sculpting tool I am using isn't quite the same as this texture.

And Norm, criticism is always welcome!!! It doesn't hurt it helps!
 
Ok... to answer your question John !!! Yes, I worked with Resin in the past !!! LOL

I know how Brittle some resins are !!! but you can Cheat !!!

if your FILM (resin Film) is thin enough, and that is up to you... I can't go there and do it for ya !

You can dip it in Hot water.... for a few seconds... or minutes depending how HOT your water is...
and... it will become Malleable ! to some degree !

not soft enough...? back in the water it goes...

I learned that from a Czech supplier ! his stuff was too Small for the model I bought it from and he told me
to dip it in hot water ! tack it in place and it will solidify again.... but with the new SHAPE !!

Which worked great for me !!! and I am pretty sure it could help you to !!!! Well I sure hope so !

remember to put some Mold release on the clay or some Talcom power !!! to help the resin lift off the Clay... last thing I want is you to waste your time...

but to tell you the truth ! I will be using this on my Predator.... no matter what !!! so I can recover some of those Nice details I erased while sanding that Stupid HARD like Rock Resin from China !!!

good luck !

Norm

out !
 
LOL Norm, I know you have worked with Resin. I have followed some of your speeder bike builds.

I will go try to track down some resin tomorrow. But for now I am going to give it a try with Aves first. I have that on hand, and I don't need to buy any more. If that doesn't work, then resin it is.

Thank you for the advice!

Now for the next video: Nagoya castle

Nagoya castle Out of Box review

Ignore the slight mess up on the title ::)
 
Way to go John! Good luck on getting the castle(s) together! Keep it going! ;D
 
Ah, the castle is here! So cool! I've always loved models of big buildings - castles, museum and architecture miniatures and recreations, yet have never built one myself. Looking forward new updates on this.
 
Thank you everyone!!!

XXXNITRO: Nice video! Too bad it is so short

Biskup: I have seen those, they are a larger scale than mine, and I was going to use some of what I learned watching them, but after studying my reference videos and taking the scale of this castle into account, I am going with a close to out of box build. At this small of a scale, most details will be lost or are very hard to add.

I would rather concentrate on the grounds around the castle instead of making it accurate. I am going to add a few details to it however......

I might add a few lights though, and I will add windows to the castle. I am also working on how to make the walls around the castle and the moat.

But until then, here are a couple of videos to tie you over. The first one is my work on the mouths of King Gidrah and Godzilla:

Godzilla and Gidrah: Mouths

And the second one is from the making of Godzilla 2000. It is mainly about exploding things:

The Making of Godzilla 2000
 
Your trees definately look much better than the ready made trees. Of course you could always slip a few of the trees you bought in with your trees for variety. Keep up the good work!
 
LOL !!! Nice face at the END of your Video !!!

Maybe we should put in more Bloopers.. LOL

Anyway ! the inside of your mouths ... monsters Mouth's look great ! once assemble even more...
You could do a little Future in there... to GLOSS it up a bit ??? what do you think ? even with a little hint of red to dye it or Not !!

I am doing an experiment right now with the SKIN effect I proposed to you... will be sharing this later on another small video ! to show you the pros and cons !

Take care till then !!!
 
Noname and Quaralane, thank you!

Norm: I made molds today of the skin on Gidrah. I just didn't have time to try them out. I spent too much time working on the castle today. (Base coats of paint on most everything.)

That Oyamaru stuff is great for just this sort of application. I have five different impressions on one piece. I will mix up some Aves tomorrow and give it a try.

I didn't think of coating the insides with future, might do that tomorrow. Just to see how it looks. I have nothing to lose on that one. But one thing to think about. Are mouths shinny? or dull in color. I will have to think before I future.
 
ahhh .. ya gotta love those Japanese modeling shows.

nice work Grendals.

I notice that many modelers paint mouths of reptiles in pink colours.
I've seen photo's of Crocodiles (in Australia) and the mouths are more pale tan/cream colours than pink/red.
oh well ... might be modeling license, as it does help breakup the colours of the reptile hide/skin by having pink mouths ...
 
John ! Good news ! I smeared some resin on a Clay Skin imprint last night! and as far as I can tell, it worked !!! Took a very long time to Set... as previously stated.... The Jar I mixed the resin in had set and the Skin mould was still in transition.... like I had mentioned ! the thinner the Resin... the slower the Exothermic reaction will be !!! which is good for us ! Gives us lots of time to smear it around making sure it is thin and the details are covered ! and get those pesky little bubbles out !!!

I pulled the skin test out of the Mould just after it had set ! and since I had not listen to myself.... by not putting enough Mould release on the Clay.... some clay adhered to the Resin but that is easily cleaned off with some Rubbing Alcohol and a Scott Towel or soft toothbrush! but before I could do that... I had to let it sit and harden !

I am happy the Proof of concept worked !!! The Oyamaru Compound you have might yield even better results... and won't leave residue on the Resin you pour in !!! but remember..... your Oyamaru won't flatten out !!! it will remain in that curve shape you take the imprint on !!! so it may be a little harder for you to control the wet resin... well that's what I think !

Anyway !!! my Skin TEST has harden by now ! and its cleaned up ... when I get time after work ! I will cut it to shape and do a small Video on how it reacts to HOT water and conforms to the Statue I have...

You will be able to JUDGE by yourself if this can or won't be of any use to you ! I know I will use it on mine... since a few areas are now deprived of details...

HOW was the Castle building experience BTW? looked to me very similar to a Scale Train Building...
very detailed but to the point ! at that scale ! you can't ask for Too much ? right !

Anyway... good progress on your part ! keep it up ! Nice work on the Mouths !!! I love the Mouth Roofs... or ridges !! you did an excellent job on that !!!

Norm.

OUT !
 
The insides of the mouths could have a slight sheen on them due to moisture in the mouths.
Mostly along the roof and around the gums.
Tongue moisture can vary a lot, though


Write your reply...

Latest posts

Back
Top